Intel 深度影像摄影机应用- 在NVIDIA Jetson Nano上使用RealSense D435-辨识人脸与距离
关注文章
 戴夫来自 DesignSpark
你觉得这篇文章怎么样? 帮助我们为您提供更好的内容。
戴夫来自 DesignSpark
Thank you! Your feedback has been received.
戴夫来自 DesignSpark
There was a problem submitting your feedback, please try again later.
戴夫来自 DesignSpark
你觉得这篇文章怎么样?
|
作者 |
郭俊廷 |
|
难度 |
中等 |
|
材料表 |
1. NVIDIA Jestson Nano Developer Kit 2. 64GB SD卡 3. Intel RealSense D435 4. 电源供应器 5. 无线网卡(可以用网络线代替) |

相关文章请参考
Intel 深度影像摄影机应用- 在NVIDIA Jetson Nano上使用RealSense D435
[第一次用Jetson Nano 就上手]OpenCV基础应用
OpenCV网站教学资源: OpenCV Tutorials
需要把RealSense D435相关的套件软件安装完成,在执行本篇文章的所有功能,相关安装与设定请参考先前的]文章。上一篇文章-连结
本篇文章使用MobaXterm远程联机操作范例,您也可以直接使用屏幕键盘鼠标编辑相关内容
执行以下指令移动到RealSense的python/example文件夹
cd ~/librealsense/wrappers/python/examples
执行以下指令测试OpenCV是否成功安装,如安装成功会显示OpenCV版本
python -c "import cv2; print(cv2.__version__)"没有安装OpenCV时可以执行以下指令安装OpenCV
sudo apt-get install python3-opencv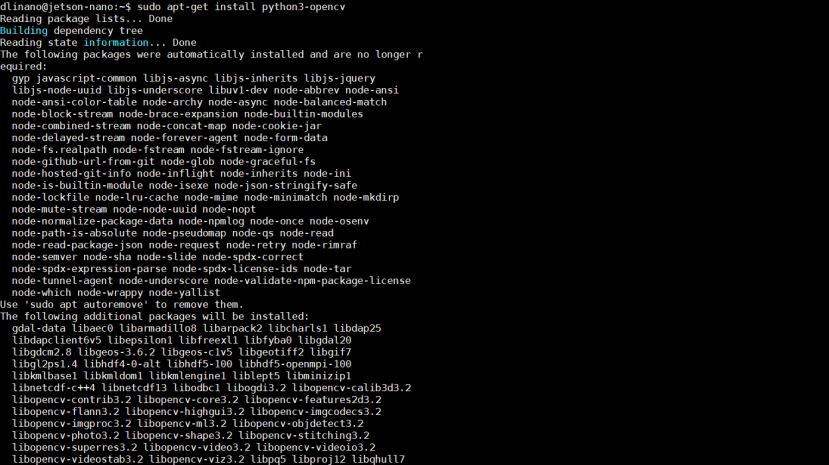
STEP1解析范例程序
执行以下指令可以看到RGB影像与深度影像
python3 opencv_viewer_example.py

本范例按下CTRL+C中断程序并关闭摄影机画面
根据下方增加的程序修改成在画面上按Esc或q键关闭摄影机画面
以下解析官方范例程序
这个程序代码使用常见的OpenCV及NumPy套件,并且处理与显示彩色影像信息及深度影像信息。是可以快速入门且方便的程序代码。
首先来看看程序代码的内容及解析。
第一段为汇入函式库,包含PyRealSense2、NumPy、以及OpenCV。
import pyrealsense2 as rs
import numpy as np
import cv2
第二段中设定彩色影像串流以及深度影像串流,分辨率设定为640×480。两个影像数据格式不同:z16为16bit线性深度值,深度比例乘上该像素储存的值可以得到以公尺为单位的测量深度值;bgr8很直观为8bit的蓝绿红三颜色信道信息,与OpenCV格式互通。对其他格式有兴趣可以参考此文件。
pipeline = rs.pipeline()
config = rs.config()
config.enable_stream(rs.stream.depth, 640, 480, rs.format.z16, 30)
config.enable_stream(rs.stream.color, 640, 480, rs.format.bgr8, 30)
接下来就是开始影像串流
pipeline.start(config)主要段落当中,使用了try/finally。我们之前的文章,大多数都是介绍try/except。except为try区块中有发生例外则执行的区块,而finally则是无论try区块有无发生例外,finally区块一定会被执行。常常制作影像相关专题的用户可能会有过以下类似的经验,如果没有正确关闭资源,就会导致程序结束后,镜头模块资源被占用,而无法顺利执行下一个要使用镜头模块资源的程序。所以finally区块可以放入「无论什么状况都需要关闭资源的程序代码」。在这个范例中,finally放入了关闭影像串流的程序代码。
try:
    while True:
        ……
finally:
    # 停止影像串流
    pipeline.stop()
在while True循环中的第一段落为,等待同一帧的彩色跟深度影像才继续执行后续图像处理,两者缺一不可。
frames = pipeline.wait_for_frames()
depth_frame = frames.get_depth_frame()
color_frame = frames.get_color_frame()
if not depth_frame or not color_frame:
    continue
循环中第二段落将两种影像信息都转换成NumPy数组。
depth_image = np.asanyarray(depth_frame.get_data())
color_image = np.asanyarray(color_frame.get_data())
循环中第三段将深度影像信息上假彩色 (影像必须事先转换成每像素8bit)。假彩色很有趣,可以套用OpenCV不同的假彩色设定。除了cv2.COLORMAP_JET这个最常见的设定之外,也可以试试 cv2.COLORMAP_SUMMER、cv2.COLORMAP_OCEAN等不一样的假彩色设定。
depth_colormap = cv2.applyColorMap(cv2.convertScaleAbs(depth_image, alpha=0.03), cv2.COLORMAP_JET)第四段中,使用hstack将彩色影像及深度影像两张影像水平方向结合在一起,你也可以改成用vstack将两张图垂直结合在一起。能结合在一起的前提是影像要结合的边像素数目要对上。
images = np.hstack((color_image, depth_colormap))第五段为显示影像。
cv2.namedWindow('RealSense', cv2.WINDOW_AUTOSIZE)
cv2.imshow('RealSense', images)
第六段为设定按 esc 键或是 q 键就关闭显示影像的窗口,也就是我们要增加的程序代码,可以使用nano编辑相关程序或是使用屏幕键盘鼠标直接到目录底下开启该程序编辑
        key = cv2.waitKey(1)

        if key & 0xFF == ord('q') or key == 27:
            cv2.destroyAllWindows()
            break
输入以下指令编辑opencv_viewer_example.py档案
nano ~/librealsense/wrappers/python/examples/opencv_viewer_example.py
完整程序代码如下:(红色的为修改及增加的程序代码,也可以全选复制贴上)
## License: Apache 2.0. See LICENSE file in root directory.
## Copyright(c) 2015-2017 Intel Corporation. All Rights Reserved.

###############################################
##      Open CV and Numpy integration        ##
###############################################

import pyrealsense2 as rs
import numpy as np
import cv2

pipeline = rs.pipeline()
config = rs.config()
config.enable_stream(rs.stream.depth, 640, 480, rs.format.z16, 30)
config.enable_stream(rs.stream.color, 640, 480, rs.format.bgr8, 30)

pipeline.start(config)

try:
    while True:
        frames = pipeline.wait_for_frames()
        depth_frame = frames.get_depth_frame()
        color_frame = frames.get_color_frame()
        if not depth_frame or not color_frame:
            continue

        depth_image = np.asanyarray(depth_frame.get_data())
        color_image = np.asanyarray(color_frame.get_data())

        depth_colormap = cv2.applyColorMap(cv2.convertScaleAbs(depth_image, alpha=0.03), cv2.COLORMAP_JET)

        images = np.hstack((color_image, depth_colormap))

        cv2.namedWindow('RealSense', cv2.WINDOW_AUTOSIZE)
        cv2.imshow('RealSense', images)

        key = cv2.waitKey(1)
        if key & 0xFF == ord('q') or key == 27:
            cv2.destroyAllWindows()
            break

finally:
    pipeline.stop()
执行成果如下:
左边为彩色影像信息、右边为深度影像信息。

这时按 Esc 键或是 q 键就可以关闭显示影像的窗口
STEP2取得单点深度信息
知道如何取得影像及如何影像串流之后,下一步就是练习取得像素单点的深度信息。
我们要在上述范例中加入一小段程序代码来显示取得的单点深度信息。
首先,让彩色影像跟深度影像对齐很重要!没有对齐取得彩色信息跟深度信息就会搭不上,下列为两组影像对齐的程序代码:
align_to = rs.stream.color
align = rs.align(align_to)
...
aligned_frames = align.process(frames)
depth_frame = aligned_frames.get_depth_frame()
color_frame = aligned_frames.get_color_frame()
使用下列程序代码取得影像中像素(x, y)的深度信息:
depth_frame.get_distance(x, y)为了方便示范,接下来的范例中会试图取得影像正中央的像素,也就是点(320,240)的深度信息。并将深度信息做成字符串。 深度值太长,所以使用np.round,取前几个数值即可。
text_depth = "depth value of point (320,240) is "+str(np.round(depth_frame.get_distance(320, 240),4))+"meter(s)"如果你不是很确定你取得的影像大小,可以使用下列的程序来进行确认。
print("shape of color image:{0}".format(color_image.shape))接下来使用OpenCV的circle函式在彩色影像上用黄色标记我们要取值的点
color_image = cv2.circle(color_image,(320,240),1,(0,255,255),-1)并在彩色影像上加上刚刚深度信息的文字,范例中用红色显示。
color_image=cv2.putText(color_image, text_depth, (10,20), cv2.FONT_HERSHEY_PLAIN, 1, (0,0,255), 1, cv2.LINE_AA)输入以下指令新增并编辑贴上以下程序代码
nano opencv_singlepoint_viewer_example.py完整程序代码如下:
import pyrealsense2 as rs
import numpy as np
import cv2

pipeline = rs.pipeline()
config = rs.config()
config.enable_stream(rs.stream.depth, 640, 480, rs.format.z16, 30)
config.enable_stream(rs.stream.color, 640, 480, rs.format.bgr8, 30)

pipeline.start(config)

align_to = rs.stream.color
align = rs.align(align_to)

try:
    while True:
        frames = pipeline.wait_for_frames()
        aligned_frames = align.process(frames)
        depth_frame = aligned_frames.get_depth_frame()
        color_frame = aligned_frames.get_color_frame()

        if not depth_frame or not color_frame:
            continue

        depth_image = np.asanyarray(depth_frame.get_data())
        color_image = np.asanyarray(color_frame.get_data())

        depth_colormap = cv2.applyColorMap(cv2.convertScaleAbs(depth_image, alpha=0.03), cv2.COLORMAP_WINTER)

#################加入这段程序#####################

        #print("shape of color image:{0}".format(color_image.shape))
        #print("shape of depth image:{0}".format(depth_colormap.shape))
        #print("depth value in m:{0}".format(depth_frame.get_distance(320, 240)))


        text_depth = "depth value of point (320,240) is "+str(np.round(depth_frame.get_distance(320, 240),4))+"meter(s)"
        color_image = cv2.circle(color_image,(320,240),1,(0,255,255),-1)
        color_image=cv2.putText(color_image, text_depth, (10,20),  cv2.FONT_HERSHEY_PLAIN, 1, (0,0,255), 1, cv2.LINE_AA)

##################################################

        images = np.hstack((color_image, depth_colormap))

        cv2.namedWindow('RealSense', cv2.WINDOW_AUTOSIZE)
        cv2.imshow('RealSense', images)


        key = cv2.waitKey(1)
        if key & 0xFF == ord('q') or key == 27:
            cv2.destroyAllWindows()
            break


finally:
    pipeline.stop()
执行成果如下:

可以看到深度距离讯息在彩色画面左上角,且画面正中间有黄色标记的点。这个范例程序可以做很多距离相关的延伸应用,例如放在百米冲刺终点线前,侦测哪位选手最快通过终点、安装在空拍机上做田间或果园巡视、或是搭配大型屏幕做成展场与参观者互动的游戏设备都很有趣。
STEP3人脸辨识并取得脸部距离
想要做人脸辨识的话,把上一范例中插入的程序代码改成以下内容,就可以侦测人脸,并在人脸的方框左上方显示人脸距离!
加入的第一行为取得人脸数据集,根据教学经验,虽然设定相对路径比较简洁优雅,但设定绝对路径比相对路径的成功率高,不需要确认目前文件夹位置,任意移动档案时也不会出问题。有兴趣的人可以玩看看haarcascades文件夹下的其他数据集。
face_cascade = cv2.CascadeClassifier('/home/your_user_name/opencv/data/haarcascades/haarcascade_frontalface_default.xml')下一步将影像灰阶化后比较方便侦测
gray = cv2.cvtColor(color_image, cv2.COLOR_BGR2GRAY)接着设定人脸侦测的参数
faces = face_cascade.detectMultiScale(gray, scaleFactor=1.2, minNeighbors=5, minSize=(50,50))每一张人脸都画方框后标记深度距离。在这段范例程序中,我们设定侦测人脸方框正中央代表人脸与镜头的距离。显示深度的字符串位置如果直接设(x, y)会跟方框重迭在一起,所以将y修改为y-5,让文字高于方框。有任何颜色、粗细、字型、字体等喜好都可以自行做调整。
for (x, y, w, h) in faces:
    cv2.rectangle(color_image, (x, y), (x+w, y+h), (255, 0, 0), 2)
    text_depth = "depth is "+str(np.round(depth_frame.get_distance(int(x+(1/2)*w), int(y+(1/2)*h)),3))+"m"
    color_image = cv2.putText (color_image, text_depth,(x, y-5), cv2.FONT_HERSHEY_PLAIN,1,(0,0,255),1,cv2.LINE_AA)
完整程序代码如下:
import pyrealsense2 as rs
import numpy as np
import cv2

pipeline = rs.pipeline()
config = rs.config()
config.enable_stream(rs.stream.depth, 640, 480, rs.format.z16, 30)
config.enable_stream(rs.stream.color, 640, 480, rs.format.bgr8, 30)

pipeline.start(config)

align_to = rs.stream.color
align = rs.align(align_to)

try:
    while True:
        frames = pipeline.wait_for_frames()
        aligned_frames = align.process(frames)
        depth_frame = aligned_frames.get_depth_frame()
        color_frame = aligned_frames.get_color_frame()
        if not depth_frame or not color_frame:
            continue

        depth_image = np.asanyarray(depth_frame.get_data())
        color_image = np.asanyarray(color_frame.get_data())

        depth_colormap = cv2.applyColorMap(cv2.convertScaleAbs(depth_image, alpha=0.03), cv2.COLORMAP_JET)

        ################加入这段程序##################
        face_cascade = cv2.CascadeClassifier('/home/dlinano/opencv/data/haarcascades/haarcascade_frontalface_default.xml')

        gray = cv2.cvtColor(color_image, cv2.COLOR_BGR2GRAY)

        faces = face_cascade.detectMultiScale(gray, scaleFactor=1.2, minNeighbors=5, minSize=(50,50))

        for (x, y, w, h) in faces:
            cv2.rectangle(color_image, (x, y-5), (x+w, y+h), (255, 0, 0), 2)
            text_depth = "depth is "+str(np.round(depth_frame.get_distance(int(x+(1/2)*w), int(y+(1/2)*h)),3))+"m"
            color_image=cv2.putText(color_image,text_depth,(x,y-5),cv2.FONT_HERSHEY_PLAIN,1,(0,0,255),1,cv2.LINE_AA)
        ###############################################

        images = np.hstack((color_image, depth_colormap))

        cv2.namedWindow('RealSense', cv2.WINDOW_AUTOSIZE)
        cv2.imshow('RealSense', images)


        key = cv2.waitKey(1)

        if key & 0xFF == ord('q') or key == 27:
            cv2.destroyAllWindows()
            break


finally:
    pipeline.stop()
首先我们要先下载OpenCV人脸数据集
输入以下指令回到家目录并且下载OpenCV数据集
cd ~
git clone https://github.com/opencv/opencv.git
下载完之后移动回范例文件夹并执行以下指令新增并编辑贴上刚刚的程序代码
cd ~/librealsense/wrappers/python/examples
nano opencv_facedistance_viewer_example.py
执行人脸辨识及距离侦测的程序
python3 opencv_facedistance_viewer_example.py执行成果如下:
戴口罩也可以侦测得到人脸,并且可以侦测到该脸离镜头的距离,可是只有某些特定角度时比较容易侦测的到,五官的轮廓度会影响到侦测的效果,不戴口罩的侦测效果较佳。
一人版本:

多人版本:


由于这篇的教学是入门教学,仅取人脸侦测方框的中间点深度值代表整脸。想要进一步练习的人,可以试着将整个方框的所有像素深度值去极值后取平均,会有更精确的效果。或是去除背景及侦测失败的像素后再取平均值也是好方法。
以上是Intel 深度影像摄影机应用-在NVIDIA Jetson Nano上使用RealSense D435-单点深度信息和人脸辨识及距离侦测的范例应用改写,大家有没有执行成功呢?是不是很有趣呢? 如果你也有做出其他有趣的范例欢迎跟我们分享。