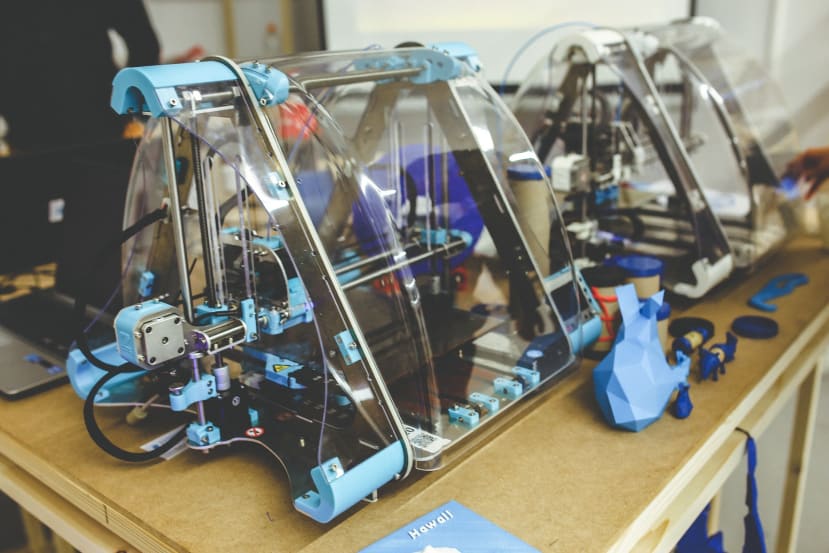
How to Calibrate Your New 3D Printer
Follow article
 Dave from DesignSpark
How do you feel about this article? Help us to provide better content for you.
Dave from DesignSpark
Thank you! Your feedback has been received.
Dave from DesignSpark
There was a problem submitting your feedback, please try again later.
Dave from DesignSpark
What do you think of this article?
Proper 3D printer calibration is essential for helping the machine perform as expected and to help your company achieve the maximum return on investment. Besides going through the following tips, always follow manufacturer recommendations for your printer’s setup.
Set the Nozzle Height
Start by ensuring the print bed is at the proper distance from the nozzle. Check the owner’s manual for your printer, since most manufacturers include recommended measurements in it.
Also, you can use a piece of paper to check that the distance will help the printer perform as expected. Slide the paper underneath the nozzle to see if it reaches that point without force. Repeat the process three times to make sure you get the same results with each attempt. If not, spend time making further adjustments.
Ensure You Have a Square Frame and Level Bed
A square frame and level print bed are two essentials that help print jobs have the expected results. Otherwise, the print head could melt into the print bed, causing crooked messy outcomes.
Use a level, T-square, and related tools to scrutinize the printer’s squareness, then make any necessary changes. As far as the print bed goes, some models have features that let users adjust its levelness. If that’s not the case with your new purchase, reach out to the manufacturer to get further guidance.
Apply Calipers to Check the Extruder
Callipers can help determine if a 3D printer’s extruder needs calibrating. One way to do that is to apply a calliper when checking the filament tolerance. Often, it’ll be plus or minus 0.05 millimetres from the expected width. If it’s greater than that, your printer nozzle could become clogged.
It’s good practice to take these measurements when working with a new filament as a quality control measure. Since 3D printing requires a high level of accuracy, check that the chosen calliper provides readings in fractions of millimetres.
First, verify your calliper’s accuracy by measuring items with known widths. Many manufacturers guarantee accuracy within 0.02 millimetres. Then, load the filament into the printer, or preheat the extruder if necessary. Connect the 3D printer to your computer and launch your slicer software. Go to the slicer section for tethered printing.
Testing the extruder requires sending 100 millimetres of filament through the hot end. Before doing that, though, use a permanent marker and callipers to mark the filament at 120 millimetres before the extruder’s entrance. Use the slicer software to instruct the printer to put 100 millimetres through the filament, which will happen over approximately a minute.
Finally, use the calliper to measure from the extruder to the point you designated with the marker. If the extruder is calibrated correctly, the distance should come out to 20 millimetres. However, if it’s more than that, you have an over-extrusion problem that necessitates decreasing the steps/millimetre setting. Do the opposite if the distance is less than 20 millimetres because that indicates under-extrusion.
Run Calibration Cube Tests
A calibration cube is a geometric shape that helps fine-tune a printer’s settings. You can use a calibration cube to tune the printer’s steps or millimetre settings. They instruct the printer’s motors on how much to turn so they move by one millimetre. Make sure to calibrate the printer’s extruder before working with the calibration cube, however.
Otherwise, it’ll be impossible to separate mechanical problems from those caused by a poorly calibrated extruder. If you’ve already used your 3D printer and noticed print gaps or bulges in the layers, those are signs that the extruder needs tweaking before you take any further actions with the calibration cube.
You’ll perform specific calibration cube tests depending on the 3D printing project. For example, a dimension accuracy test checks the results of a small part, but a full-bed dimensional accuracy test examines the whole print bed. Then, an overhang test concerns how well the printer can cool down the extruded material, resulting in a cleaner bottom surface.
Running tests with a calibration cube adds to your setup time, but it’s worthwhile. Their outcomes will help you understand where to start making printer adjustments if required.
Check the Current and Connections
As mentioned above, 3D printers have stepper motors that incrementally rotate specific amounts to move the extruder or axes at certain distances. The moment of inertia (MOI) determines whether the axis motors can maintain maximum torque when running at your chosen speed. A greater mass MOI requires more torque to achieve a particular angular acceleration.
A common 3D printer problem happens when the motor vibrates but does not turn. Calculating the moment of inertia when trying to fix this problem is a helpful early step. That’s because the inertia required for the printer motor to turn must be similar to its own inertia.
You can calculate the moment of inertia for simple objects by finding the point mass. Do so by multiplying the squared distance between the rotational axis and the mass, by the mass at the given point. Then, when calculating the MOI for more complex objects, the mass MOI is the summation of all the piece’s point masses.
Checking the current and connections are good steps to take to resolve the matter, particularly because motor vibrations typically happen when there is not enough current available to move the extruder to the correct amount. Motor vibration issues are the most likely to occur after people have improperly installed new 3D printer motors. Thus, you won’t likely experience it with a new 3D printer, but it could happen after a component upgrade.
Adjust the Fan Speed
Activating a print head’s fans allows you to manipulate how the material cools and reduce certain undesirable outcomes, such as oozing. For example, a higher fan speed provides more efficient cooling, but it can also increase material shrinkage.
Changing the fan speed can also be an important troubleshooting step for commonly experienced 3D printing problems. For example, if you notice that the first print layer does not stick to the bed, the fan speed may be too high. Try keeping the fan speed low or off for the first few layers.
You can change the fan’s speed through your slicer software’s settings. It’s also advisable to take this step when dealing with warping. Keeping the fan speed low or off while getting through the first few layers is a frequently chosen option, particularly since the material remains hotter for longer after the first several layers are on the bed.
3D Printer Calibration Is Worth Your Time
When users are especially eager to start using a new 3D printer, they may assume it’s already properly calibrated. However, that’s often not the case. Although going through these steps requires a time investment, it’ll pay off in the results you get.