How do I place tracks on my PCB with different features?
Follow article
 Dave from DesignSpark
How do you feel about this article? Help us to provide better content for you.
Dave from DesignSpark
Thank you! Your feedback has been received.
Dave from DesignSpark
There was a problem submitting your feedback, please try again later.
Dave from DesignSpark
What do you think of this article?
We have a lot of tutorials, hints, tips and guides to help you get up to speed quickly with DesignSpark PCB. You can find them all here.
Below we have look at that age-old conundrum, ‘How do I place tracks on my PCB with different features?’ Read on and find out!
You have just completed your schematic; how do you place the copper tracks on the PCB?
1. Here we have a simple example of a two-component schematic. Nets connect the pins of each connector in a simple one to one arrangement.

2. We now wish to produce a PCB.
From the menu bar select Tools --> Translate To PCB…

3. Use the PCB wizard to generate the required PCB size and layer requirements.
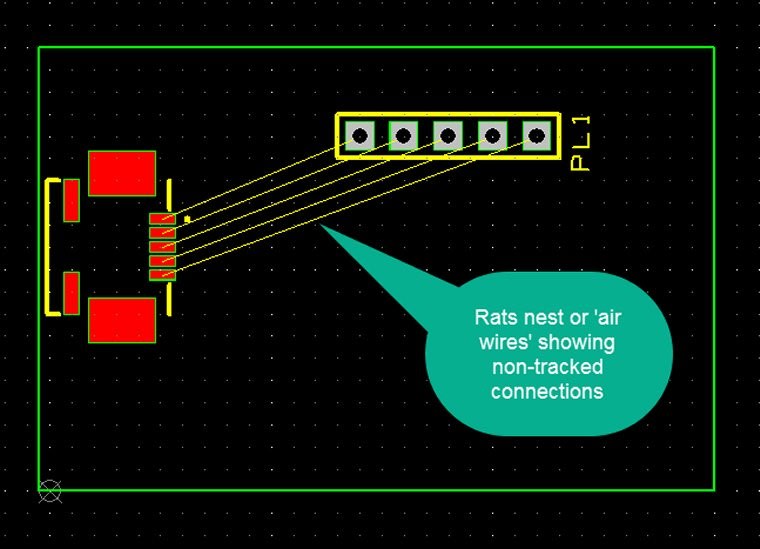
Drag the components to their required positions and you will see as in the example the components connected by their ‘air wires’, commonly called a ‘rats nest’. These are not the copper tracks! It is now your task to route these in copper.
4. From the toolbar select the “Add Track” icon. The pointer is now in a mode ready to place the copper.
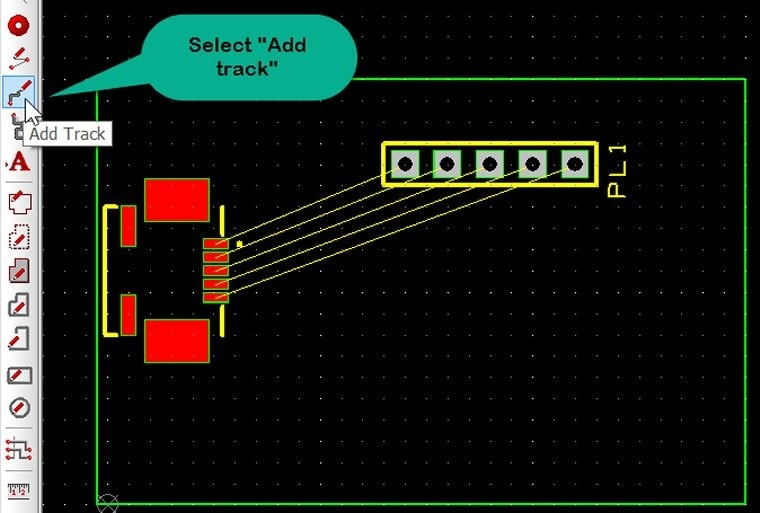
5. Click on the air wire to route, the track appears from the pad and you may route the copper as you wish to complete the track.Tips:
1. Do not click the pad as this will place copper but not remove the air wire.
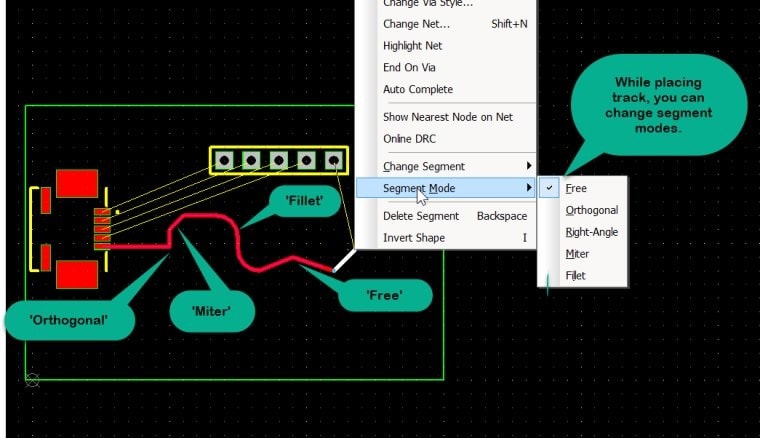
2. You may right click and see options such as changing the track width as you progress.

6. The default is Orthogonal placed tracks. You can select other options from the ‘right-click’ menu such as ‘miter’ which is a very common routing style. The options are illustrated below.
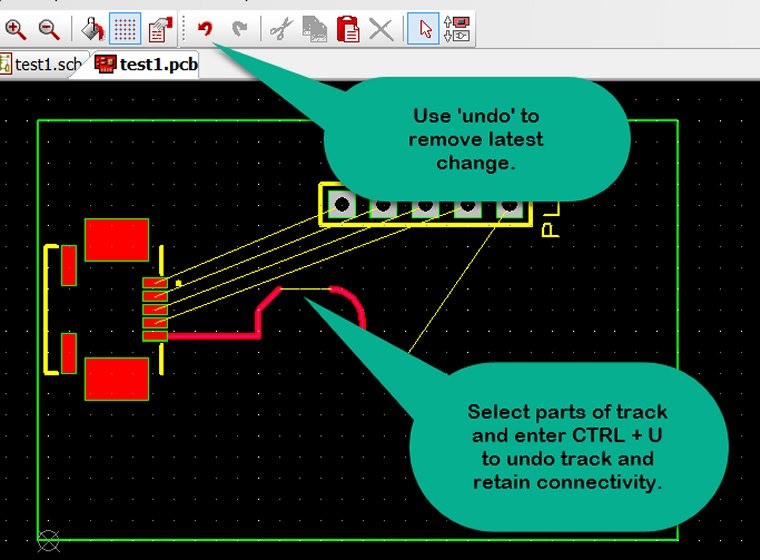
7. Should you wish to edit any part of the segment, (press ESC to exit the ‘Add Track’ mode) click on the required part (and CTRL + left click to select additional parts of the track) to highlight and press the shortcut key combination CTRL + U to ‘undo’ the routing but retaining the air wire connectivity.
Remember the ‘undo’ icon will progressively undo track placement from your latest step which may be a useful fast editing method.
Tips:
1. DO NOT use the delete key as you will remove the air wire connectivity. Should you accidentally do this use ‘undo’ to recover the air wire.
2. When re-tracking the air wire part of the segment, use ‘Add Track’ as before and click on the air wire or attach the route to this.
Remember there is much more additional detail in ‘Help’ from the menu bar or by Shift + F1