How can I create my own library?
Follow tutorial
 Dave from DesignSpark
How do you feel about this tutorial? Help us to provide better content for you.
Dave from DesignSpark
Thank you! Your feedback has been received.
Dave from DesignSpark
There was a problem submitting your feedback, please try again later.
Dave from DesignSpark
What do you think of this tutorial?
This tutorial requires:
DesignSpark PCB V11.0.0Libraries are saved in normal Windows folders, but they need to be configured in the library manager before use. To create a new library, choose a descriptive name and follow these steps.
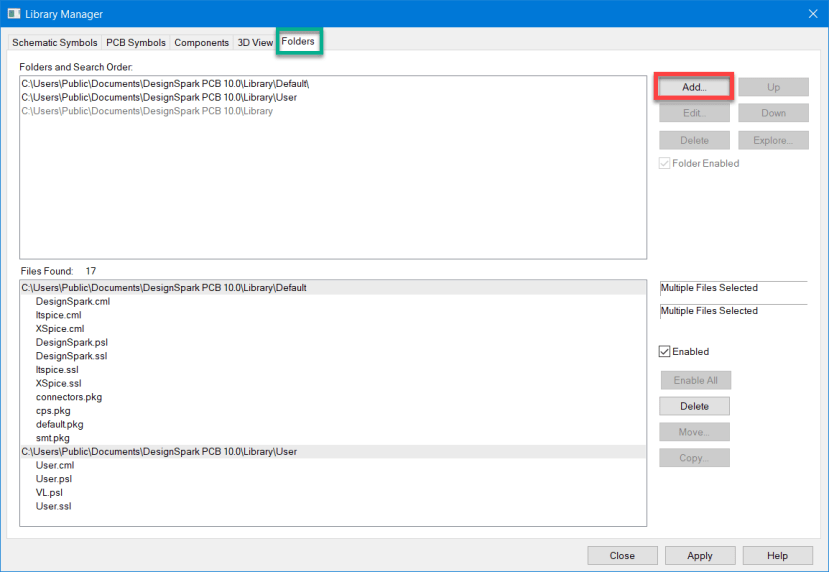
Launch the Library Manager and select the 'Folders' tab. This will display the current libraries. Now click the "Add..." button.
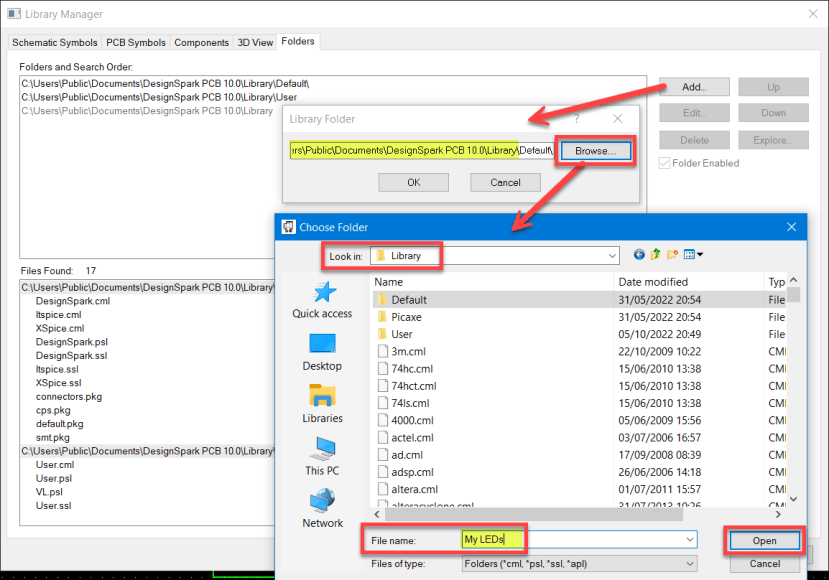
Now you need to navigate to where DesignSpark PCB saves the libraries. Click "Browse" and the folder window will appear, locate the version "Library" folder and the available libraries in this folder are listed. You now need to create your folder named as required (My LEDs in this example) and click the "Open" button.
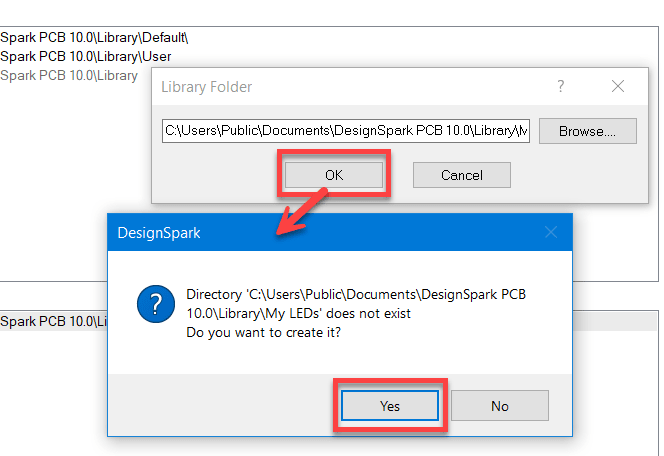
This window will close and the required library is displayed in the Library Folder path. Click "OK" and a message box asking if you wish to create the folder is displayed, click "Yes" and the folder will be created.
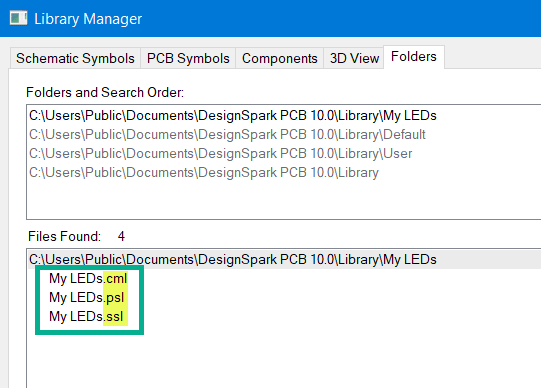
The newly created folder will now be listed in the available libraries list.

Configuring the folder as a library
The folder is mapped and ready for configuring for the schematic, PCB, and components libraries. We now need to add the schematic symbols, PCB symbols and Components to this library folder.
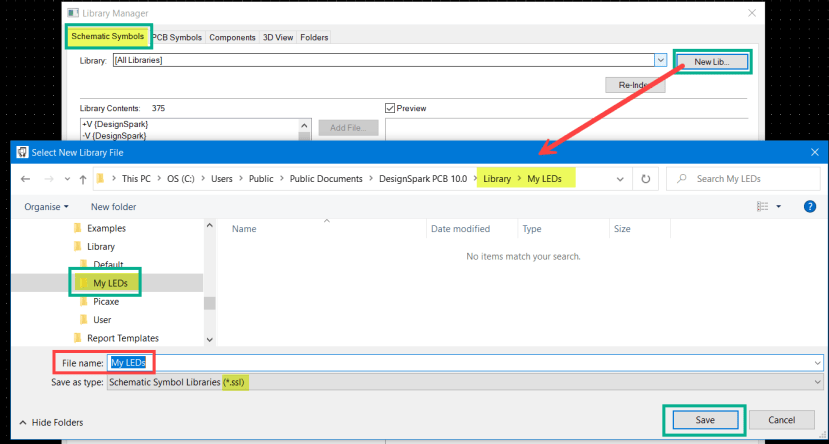
Select the "Schematic Symbols" tab and then click the "New Lib..." button. This launches the navigation window where you can create and add your required SSL library with your required name to the folder.
To confirm the action, select the Folders tab and the library and the SSL (Schematic Symbol Library) entry will be listed.

Repeat the above steps for the PCB Symbols and Components tab. The libraries will then all be created and ready for use as seen in the folder view.