How can I create a simple cone?
Follow tutorial
 Dave from DesignSpark
How do you feel about this tutorial? Help us to provide better content for you.
Dave from DesignSpark
Thank you! Your feedback has been received.
Dave from DesignSpark
There was a problem submitting your feedback, please try again later.
Dave from DesignSpark
What do you think of this tutorial?
This tutorial requires:
DesignSpark Mechanical V6.0To create a simple cone, you need to start off by drawing a circle with the diameter of one end of the cone.
1. Create the base
Here’s the base of the cone with a diameter of 15mm. Adjust it to your preference.

2. Pull in to a cone
Pull (P) the Circle to the height of the cone required

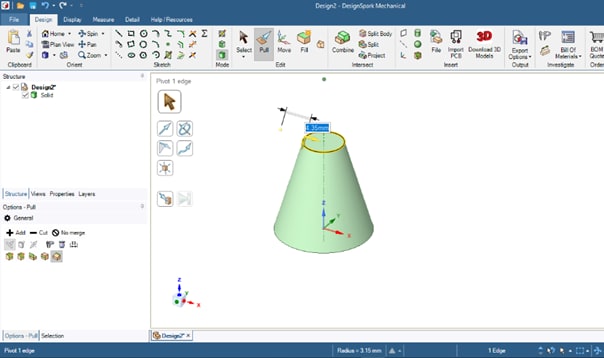
3. Pivot the edge
With the Pull tool selected, select the edge of the diameter to be reduced. A single Click on the diameter will also bring up the quick menu as shown below. Select the "Pivot Edge" tool which will change the pull arrow to show two arrows (radial and axial).

4. Diameter for the top of the cone
Select the radial arrow and pull to the new diameter