How can I add connections to a schematic?
Follow tutorial
 Dave from DesignSpark
How do you feel about this tutorial? Help us to provide better content for you.
Dave from DesignSpark
Thank you! Your feedback has been received.
Dave from DesignSpark
There was a problem submitting your feedback, please try again later.
Dave from DesignSpark
What do you think of this tutorial?
This tutorial requires:
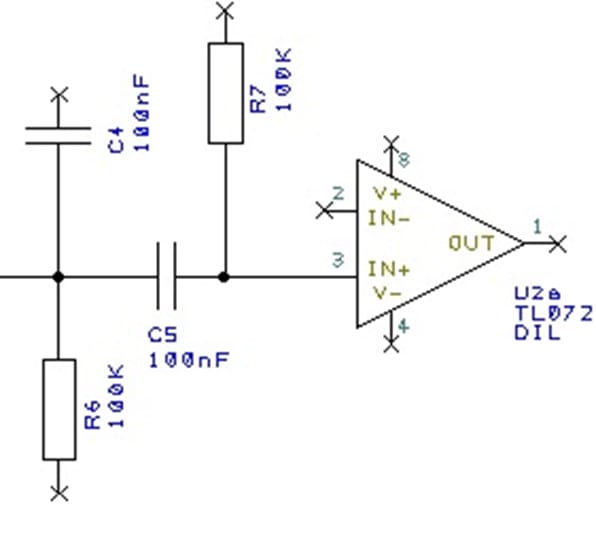
DesignSpark PCB V11.0.0Connections are added to the Schematic design to make connectivity between electrical pins. When translated to the PCB design, these connections give you your net list.
You can add connections in a number of ways:
1. Adding connections
Using the Add Connection option from the Add menu:
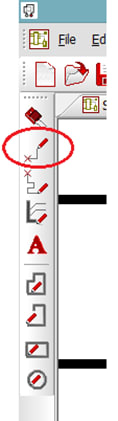
Alternatively, you can do it from the Schematic Toolbar, click on the pin to start adding a connection, or by double-clicking on a component pin to start a new connection, or 'Dragging' off an unconnected component pin to start a new connection.
To Add Connections by dragging off pins:
To aid the addition of connections to a schematic, you can simply ‘drag’ off an electrical pin, each click of the mouse will then add a corner. Moving over another electrical pin will allow you to finish the connection.
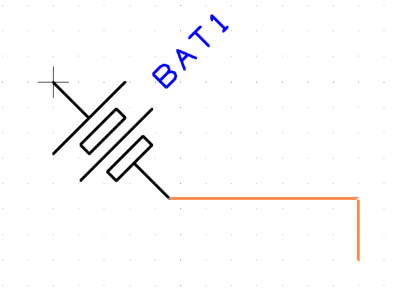
Click and drag (keeping the mouse button pressed down), this will start a new connection. Move the mouse over the pin and click to finish. You do not have to be exactly over a pin to finish a connection; as long as the cursor is within range then it will snap onto the terminal. Click the mouse button once to finish. You’ll notice that the component pin terminals ‘X’ disappear when you connect to it; this indicates that it is connected.
2. Joining Connections
Let’s assume that you’ve made a connection and now you need to connect another to it using a junction dot. When you attempt to finish a connection on an existing connection, when you release the mouse the connection will automatically be added (as if it were an electrical terminal) and a junction dot displayed to indicate it is connected like on the following example: