Home automation with Raspberry Pi 2 and Node-RED
Follow articleHow do you feel about this article? Help us to provide better content for you.
Thank you! Your feedback has been received.
There was a problem submitting your feedback, please try again later.
What do you think of this article?
Node-RED is a visual tool for wiring the Internet of Things that can be run on a Raspberry Pi and allows for rapid prototyping of projects. In this tutorial we will first set up Node-RED on a Raspberry Pi 2, before creating a flow that will read a temperature sensor and control a LightwaveRF mains socket.
We will assume your Pi is already set up on the network and you can SSH into it.
Ensure your distribution is up to date:
$ sudo rpi-update
$ sudo reboot
Wait for the Pi to reboot, log back in and execute:
$ sudo apt-get update
$ sudo apt-get upgrade
Hardware
We will be using the following hardware:
- Raspberry Pi 2 (832-6274)
- DS18B20+ temperature sensor (540-2805)
- 433 MHz transmitter module (617-2072)
- prototyping breadboard (102-9147)
- jumper wires - like this (791-6454) and this (791-6450)
- 4.7k resistor
- LightwaveRF mains socket (available via many retailers)
- 174mm length of solid-core wire (to use as an antenna for the wireless board)
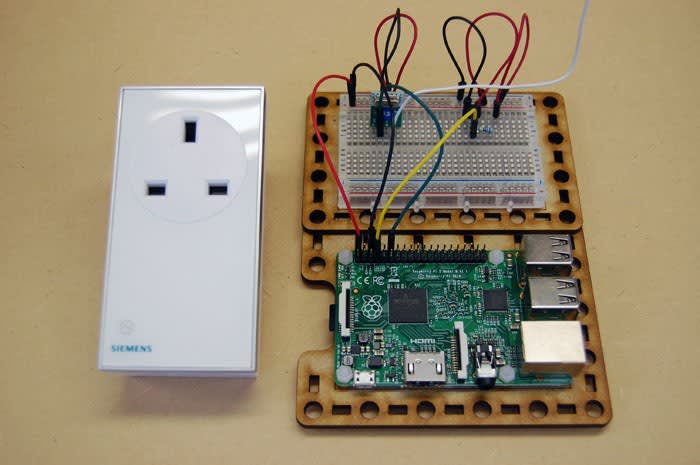
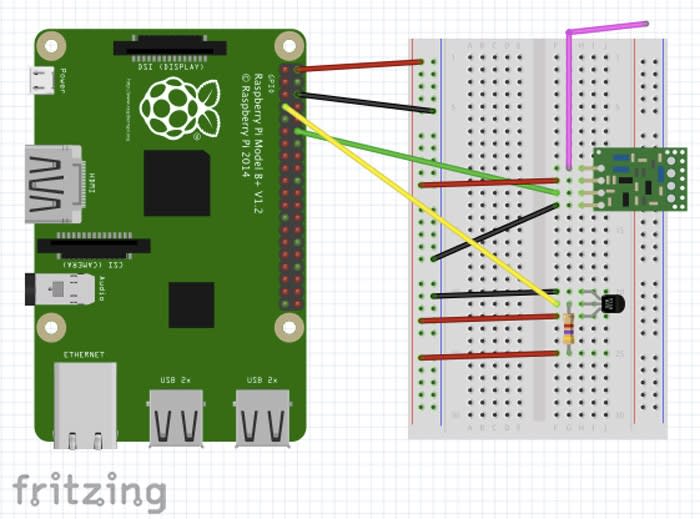
Connect the hardware as shown in the diagram below:
Here we are connecting the temperature sensor and wireless transmitter to the Raspberry Pi (832-6274) .
Ensure each has power, ground and data connections and that they are connected to the correct pins on the Pi's GPIO header. Also ensure the aerial wire is connected to the wireless module.
Setting up LightwaveRF control
In order to control wireless mains sockets we need to install wiringPi and lightwaverf-pi. First install wiringPi:
$ git clone git://git.drogon.net/wiringPi
$ cd wiringPi
$ ./build
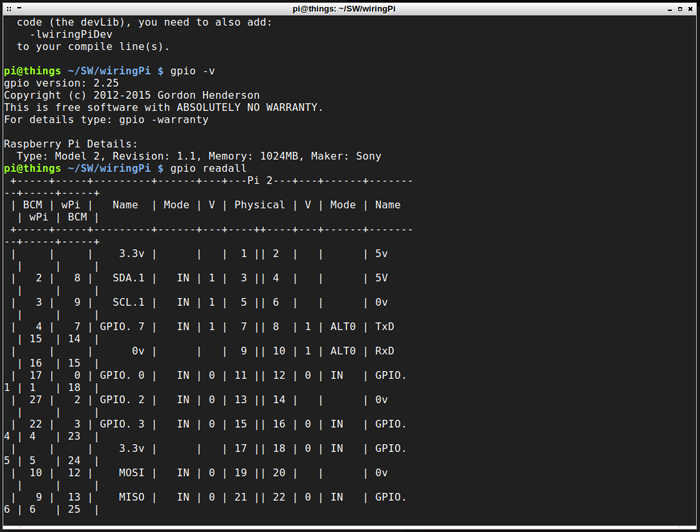
Now test that wiringPi installed correctly:
$ gpio -v
$ gpio readall
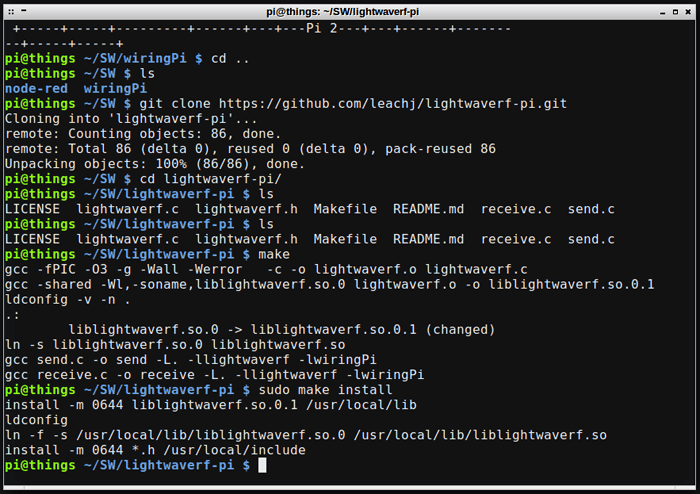
Next install lightwaverf-pi:
$ git clone https://github.com/leachj/lightwaverf-pi.git
$ cd lightwaverf-pi
$ make
$ sudo make install
Execute the test send command:
$ sudo ./send 0
This should execute without errors. Next we will test wireless control by attempting to pair the Pi with the mains socket:
Plug the mains socket in and put it into pairing mode by holding down the button on the side until the indicator light starts flashing orange/blue. Next transmit an on signal:
$ sudo ./send 1
The socket should pair with the Pi. The status light will flash more quickly to show this has successfully completed. You should now be able to turn the socket on and off using the following commands:
$ sudo ./send 1
$ sudo ./send 0
Installing Node-RED
First we will install Node.js (note this process is different on the Pi 2 compared to earlier Pi boards):
$ curl -sL https://deb.nodesource.com/setup | sudo bash -
$ sudo apt-get install -y build-essential python-dev python-rpi.gpio nodejs
Next install Node-RED:
$ sudo npm install -g node-red
Start up Node-RED:
$ node-red-pi --max-old-space-size=128
This will start the Node-RED server on the Pi. Open a new web browser tab and navigate to your Pi's IP address, port 1880. You should see the Node-RED environment loaded and ready to use.
Now we will add a new node to make use of the DS18B20 temperature sensor from within Node-RED. There are two kernel modules needed for correct operation and we will load these first:
$ sudo modprobe w1-gpio
$ sudo modprobe w1-therm
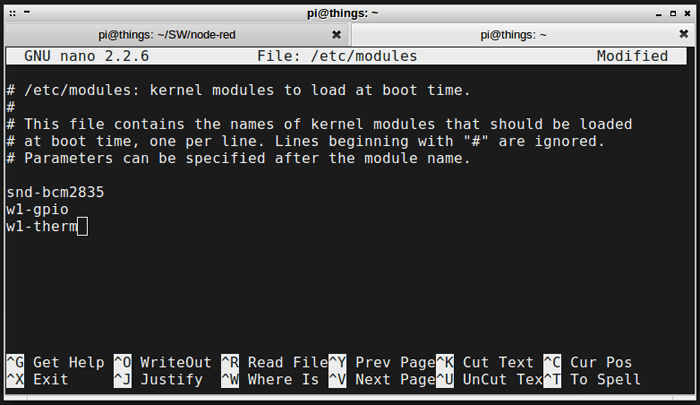
Whilst it is fairly simple to load these modules manually we will configure them to automatically load at boot time. We can do this by editing the /etc/modules file:
$ sudo nano /etc/modules
add the names of the modules, each on their own line:
Now we will install a node to read data from the ds18b20 module:
$ cd /usr/lib/node_modules/node-red
$ sudo npm install node-red-contrib-ds18b20 --save
Next we need to add a line to the /boot/config.txt file:
$ sudo nano /boot/config.txt
At the end of the file add the following line:
dtoverlay=w1-gpio,gpiopin=4
Save and exit the file, then reboot and log back in to your Pi.
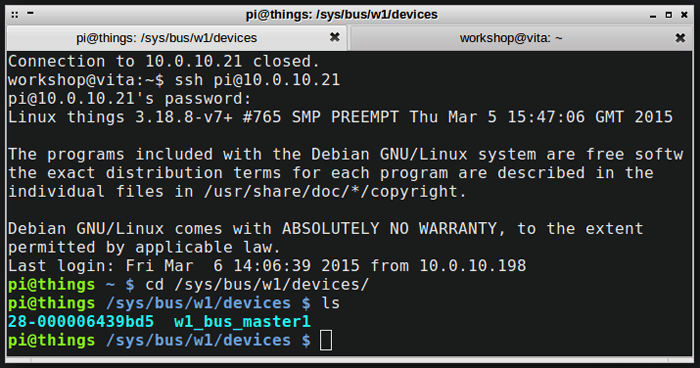
We will now test that the temperature sensor is properly connected to the Pi and data can be retrieved:
$ cd /sys/bus/w1/devices
$ ls
You should be able to see something like the above - the sensor here is shown as 28-000006439bd5. Change into the sensor directory:
$ cd
e.g.
$ cd 28-000006439bd5
The sensor will write information to the w1_slave file, so we can look in there to see if there is any data:
$ cat w1_slave
This should show two lines. If so, the sensor is connected to the Pi and giving it data.
Building a Node-RED flow
Check that the sensor node has installed correctly so that we can get our temperature data into Node-RED:
$ node-red-pi
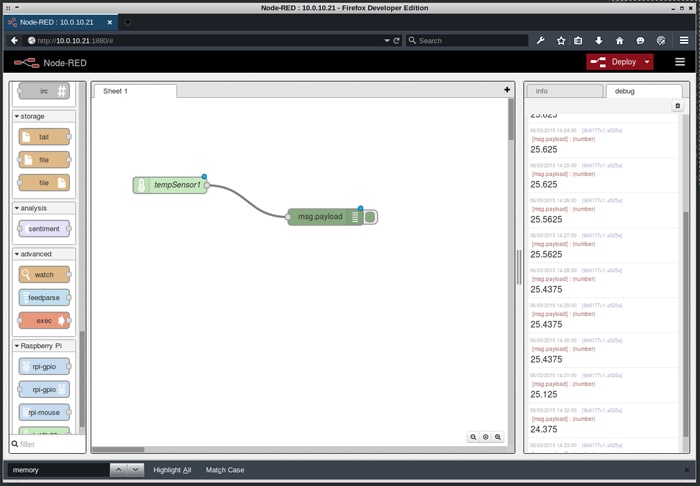
Open your web browser and go to your Pi's IP address, port 1880. You should see the new node 'ds18b20' towards the bottom of the left menu. Drag the node into the workspace. We need to configure the node and tell it which sensor ID to use, to do this double-click on the node to open the edit pane. You should be able to select the device ID from the first drop-down tab. Note that you can also change the interval time between temperature readings - default is 1 minute. You will have to wait until the interval time has passed until the first message hits the debug console, so you may wish to change the interval time to something like 0.1 during testing.
Drag in a debug node and connect the two nodes together. When you have multiple nodes connected in the Node-RED workspace it is referred to as a flow. Before the flow runs on the server it needs deploying. Click the Deploy button in the top right of the workspace to deploy the flow. If you make any changes you will need to re-deploy before they take effect to what is running on the server.
Now that we have a tested a basic flow using the sensor we can build a more complex flow that will:
- Read temperature from sensor
- Decide if it's cold enough to turn socket (heater) on
- Decide if it's the right day to turn the socket on
- Decide if it's the right time of day to turn the socket on
- Change socket status to on of off
Node-RED comes bundled with many useful nodes, one of which is the debug node used above. We will also use the inject node to assist with testing. This allows the sending of message payloads by simply clicking a button on the node, meaning that you don't have to wait for time based data to test your code.
We will make use of a function node to implement our logic and decide when the socket should be turned on and off.
Finally, the exec node allows us to execute shell commands from within Node-RED. We will make use of this node to execute the send command we used earlier to control the wireless socket.
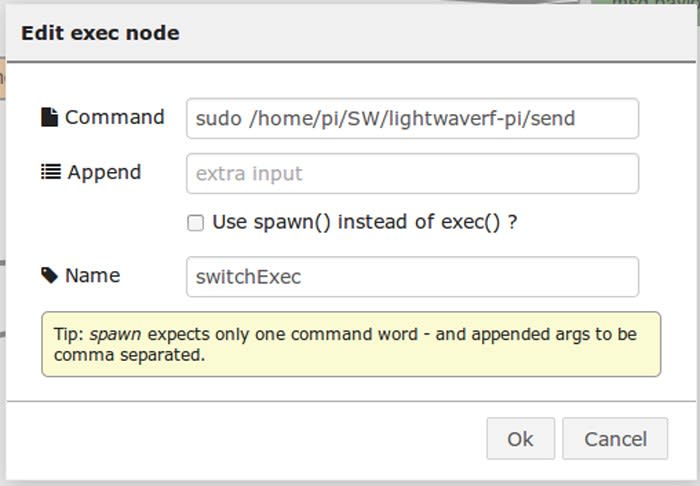
Drag an exec node into the workspace. double-click it to open the editor pane and add the following details into the 'Command' field:
sudo //send
e.g.
sudo /home/pi/SW/lightwaverf-pi/send
Add text into the 'Name' field - we used 'switchExec'. Naming your nodes helps for readability, especially with larger, more complex flows. This exec node will now try to execute the command given each time the node receives an input message. We can send the command additional arguments within the message payload. Notice how our command does not include a '0' or '1' argument that we used previously. This is because we will pass these arguments to the exec node in our flow.
We will get our function node to do this later, but for now we can use inject nodes to test that the exec node is functioning correctly. Drag in two inject nodes. Double click each one in turn and ensure that the 'Payload' type is 'string', and that each has either a 0 or 1 in the 'payload' field.
Connect the output of each inject node to the exec node, the top exec output to the debug node and deploy the flow. Now, when you click the button on either of the inject nodes you should see the exec node write 'sending command' to the debug console. You should also notice that your mains socket is being switched on and off according to your clicks. Note it is recommended that you do not switch your socket very quickly as it you may cause damage to it by doing this.
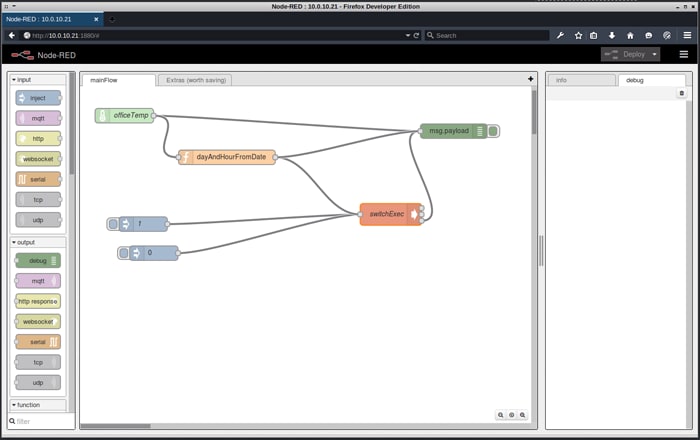
Now that we have the wireless control working we can build our flow and add our custom code to our function node. Drag in a function node and wire everything up as shown below.
Double click your function node and add the following code to it:
//Control mains socket based on day, hour and temperature
//create date object
var d = new Date();
var day = d.getDay();
var hour = d.getHours();
var DAY = day;
var HOUR = hour;
//line to accept numbers in for testing
//var day = parseInt(msg.payload);
// change var DAY to 0 or 1 depending on day - we want Monday-Friday
if (day >= 1 && day <= 5) {
DAY = 1;
}
else{
DAY = 0;
}
// change var HOUR to 0 or 1 depending on hour - we want 0700-1800
if (hour >= 7 && hour <= 17) {
HOUR = 1;
}
else{
HOUR = 0;
}
// Format payload out to 0 or 1 depending on HOUR, DAY and temp/msg.payload - we want day/time as above and temperature setting of 23 degrees C
if (HOUR == 1 && DAY == 1 && msg.payload <= 23) {
msg.payload = 1;
}
else{
msg.payload = 0;
}
return msg;
Deploy the flow. You now have a mains socket that is being turned on and off according to the temperature being read by your Pi. One final thing we will do now is to configure Node-RED to run at startup. We will use PM2 - a process manager for Node.js:
$ sudo npm install -g pm2
Determine where node-red is installed on your Pi:
$ which node-red
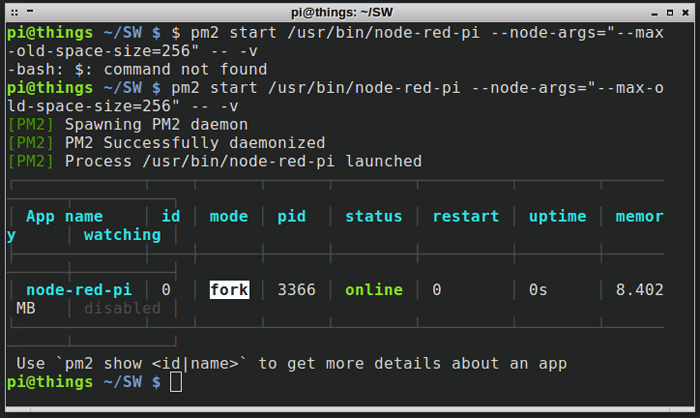
$ pm2 start /node-red --node-args="max-old-space-size=128" -- -v
This will start Node-RED in the background.
You can check up on the status of PM2 process in several ways:
$ pm2 status
$ pm2 info node-red
$ pm2 logs node-red
Now tell PM2 to start on boot:
$ pm2 startup
Reboot and check everything is working. Node-RED should start as configured and begin running the flow.
The function node can be altered as you see fit - try experimenting with different values or different conditions. There are also other output nodes that you could easily add, such as the Twitter node which could be used to notify you when a socket has been turned on or off.


