Getting Started with PSoC 6 BLE Prototyping Kit and ModusToolbox
Follow article
 Dave from DesignSpark
How do you feel about this article? Help us to provide better content for you.
Dave from DesignSpark
Thank you! Your feedback has been received.
Dave from DesignSpark
There was a problem submitting your feedback, please try again later.
Dave from DesignSpark
What do you think of this article?
Hands on with CY8CPROTO-063-BLE and the flexible ModusToolbox platform.
The Cypress Semiconductor CY8CPROTO-063-BLE (181-2207) is a low cost solution for PSoC 6 development, with integrated USB programming, debugging and bridging capability. Together with ModusToolbox this provides a powerful platform with BSP, library and middleware support, that can either be used with a supplied Eclipse-based IDE, else driven via command line tools.
CYBLE-416045-02 EZ-BLE Creator
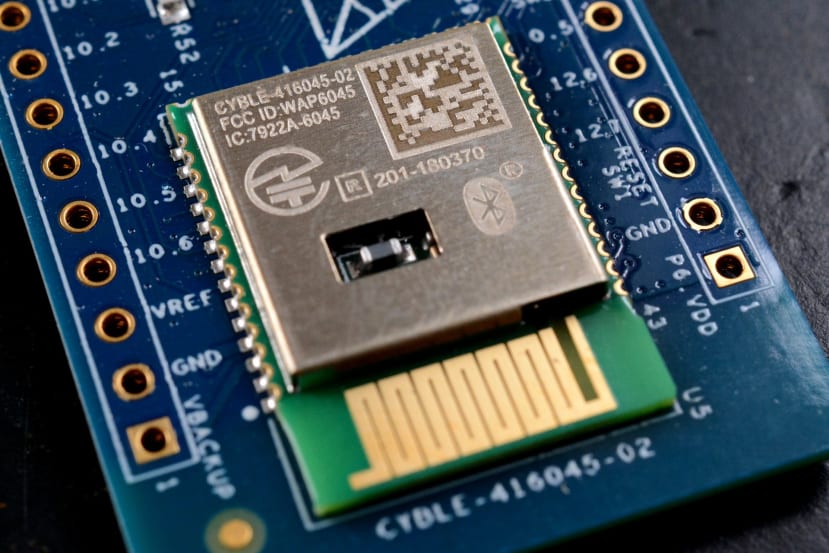
The board is based around the CYBLE-416045-02 EZ-BLE module, which includes the following key features:
- 150-MHz Arm® Cortex®-M4F CPU with single-cycle multiply (Floating Point Unit (FPU) and Memory Protection Unit (MPU))
- 100-MHz Cortex-M0+ CPU with single-cycle multiply and MPU
- 1 MB Application Flash with 32-KB EEPROM area and 32-KB Secure Flash
- 288-KB SRAM with Selectable Retention Granularity
- Up to 36 GPIOs with programmable drive modes, strengths, and slew rates (and any can be CapSense, analogue/digital)
- Bluetooth 5.0 qualified single-mode module
- I2S interface; up to 192 kilosamples (ksps) word clock
- Two pulse-density modulation (PDM) channels for stereo digital microphones
- Programmable analogue with ADC, DAC, 2x Op Amps, 2x comparators
- 12 programmable logic blocks, each with eight macrocells and an 8-bit data path. Usable as drag-and-drop Boolean primitives (gates, registers), or as Verilog programmable blocks. Support for UART, SPI, S/PDIF and other protocols
- ROM-based root-of-trust plus cryptography accelerators
This is provided in a convenient castellated module with screening, and rated for an industrial temperature range of -40C to +85C, with low power 1.71V to 3.6V operation. For further details, see the Cypress documentation.
Development kit

The kit comes supplied with an integrated USB programmer which can be broken off.

The reverse of the packaging features a Quick Start Guide, with handy pinouts for both the PSoC 6 board and the attached programmer.
There are two options available for PSoC 6 development. The first of these is PSoC Creator, a proprietary IDE that is only available on Windows and which supports a subset of PSoC 6 devices, along with other device families, such as PSoC 5LP and PSoC 4 etc. The second development platform is ModusToolbox, which is a collection of configuration tools, drivers, middleware libraries and operating system support, plus an optional IDE.
ModbusToolbox supports all PSoC 6 devices and is the preferred development platform. It is available for Windows, Mac and Linux, and can be driven by the command line and hence integrated with your favourite development tooling, else used with the optional Eclipse-based IDE.
We’ll be using ModusToolbox installed on a computer running Ubuntu 18.04.
Software setup

First we need to download the ModusToolbox software from the Cypress website. To install this on Linux we then took the following steps:
$ tar xvf ModusToolbox_2.1.0.1266-linux-install.tar.gz
$ cd ModusToolbox
$ sudo tools_2.1/openocd/udev_rules/install_rules.sh
$ sudo tools_2.1/driver_media/install_rules.sh
$ sudo tools_2.1/fw-loader/udev_rules/install_rules.sh
$ sudo tools_2.1/modus-shell/postinstall
If running Ubuntu 18.xx we are also instructed to install an additional package:
$ sudo apt-get install libusb-0.1-4If our user is not already a member of the dialout and plugdev groups, it must be added to these.
$ sudo usermod -a -G dialout,plugdev $USERFollowing which it is necessary to log out and back in again for the new groups to be picked up.
Note that comprehensive instructions can be found in the Installation Guide.
We can now launch the IDE with:
$ ./ide_2.1/eclipse/ModusToolbox
Then use the Quick Panel to create a new application and from there select CY8CPROTO-063-BLE.
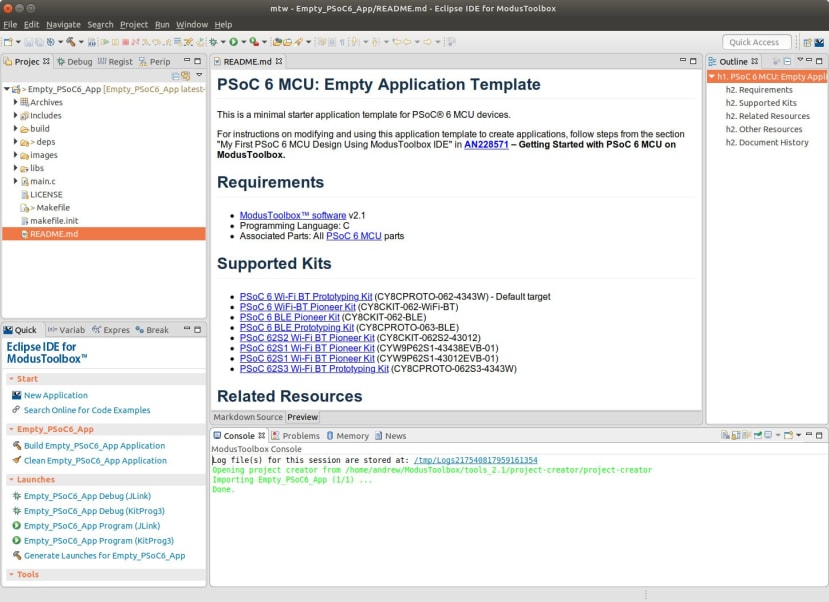
Creating an application

Once we’ve selected our module we are then presented with a list of example applications, which can be used to facilitate evaluation and as the basis for our own application. This includes one named Empty PSoC 6 App.

If we select this and create, we will see the first command in the log window is:
ModusToolbox/tools_2.1/project-creator/bin/project-creator-cli --board-id CY8CPROTO-063-BLE --board-uri https://github.com/cypresssemiconductorco/TARGET_CY8CPROTO-063-BLE --board-commit latest-v1.X --app-id mtb-example-psoc6-empty-app --app-uri https://github.com/cypresssemiconductorco/mtb-example-psoc6-empty-app --app-commit latest-v1.X --user-app-name Empty_PSoC6_App --target-dir /home/andrew/mtw --output-for-machine --use-modus-shellHence the command being run in the background is project-creator-cli and with options to specify the module and a GitHub URL for its BSP, along with GitHub URL for the example app. Following which repositories are cloned and libraries are imported.
We can now navigate the project hierarchy via the Project Explorer, where we find main.c and libraries etc. If we expand the libs folder, the folder for our target, following this the BSP folder and within this GeneratedSource.

At this point if we now double-click on the design.modus file.
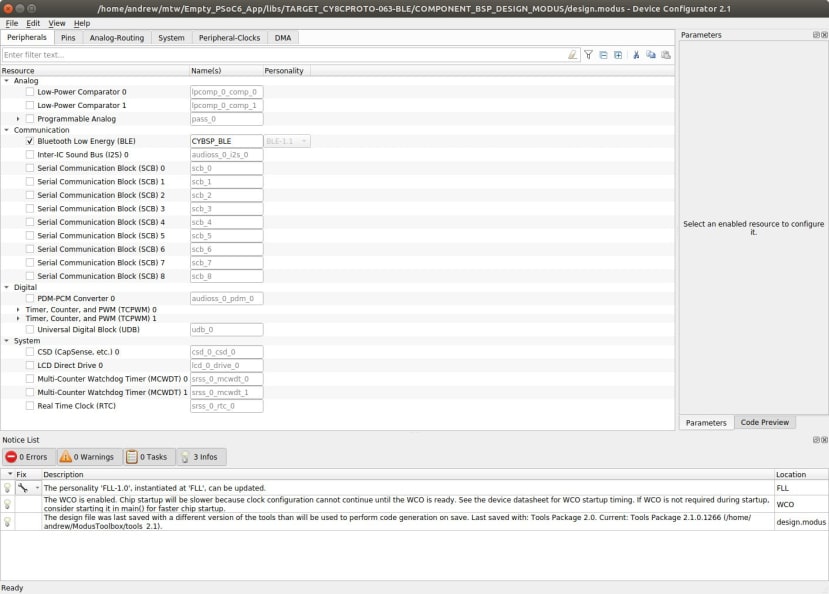
This brings up the Device Configurator application, within which we can configure the PSoC resources, such as peripherals, routing and clocks.

We could easily dedicate an entire blog post to looking at the configuration options and functionality provided here

We can also launch the Library Manager via the Quick Panel, which we can then use to configure the included libraries, along with middleware. One nice feature being FreeRTOS support, which can be configured by selecting this from the middleware list.
For further information, see Getting Started with PSoC 6 MCU on ModusToolbox, which covers many of the steps in more detail, with a worked example on how to get started writing firmware and making use of BSP/HAL/middleware functions. Also, the Device Configurator Guide, which covers configuration of device peripherals.
Running an example
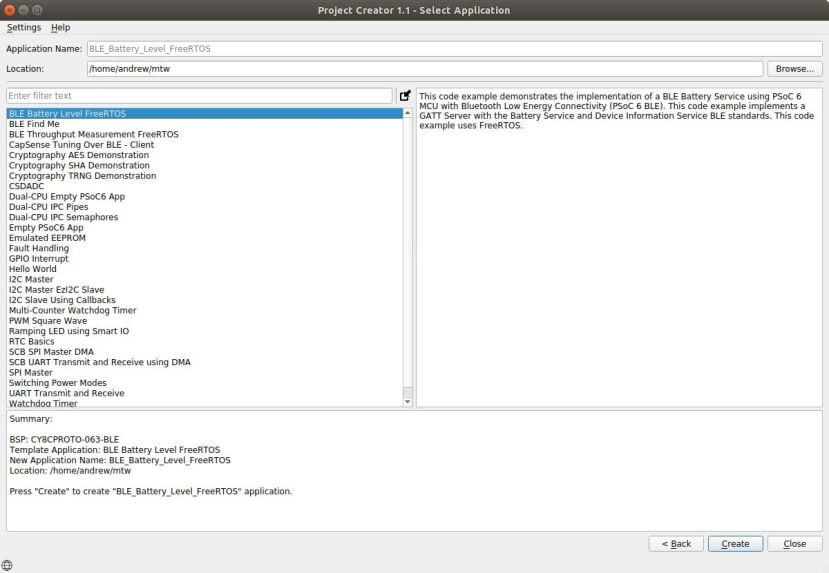
If we once again create a new application, but this time select the BLE Battery Level FreeRTOS example. This builds on top of FreeRTOS and implements a Bluetooth Low Energy GATT Server with Battery Service and Device Information Service. The battery level is simulated and changes continuously from 0 to 100 percent.
To build and program this we then return to the Quick Panel and select to launch BLE_Battery_Level_FreeRTOS Program (KitProg3).

Ah, it’s not happy with our programmer. No fear, this is simply because the kit as shipped has KitProg2 loaded and we need to upgrade the programmer firmware. This is done using the fw-loader command line utility and we can find details of this in Section 6 of the KitProg3 User Guide. The firmware loader release are available on GitHub and bundle the latest firmware.

If we first run this with the –device-list option we confirm that it is indeed running a KitProg2 firmware.
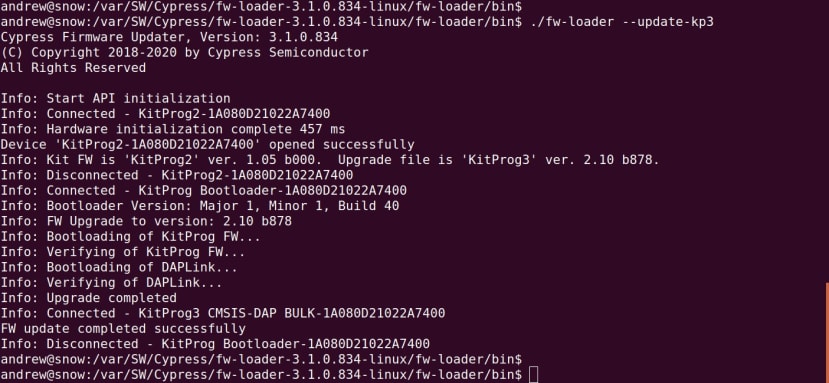
Then if we run with –update-kp3, the programmer is updated with the latest KitProg3 firmware.
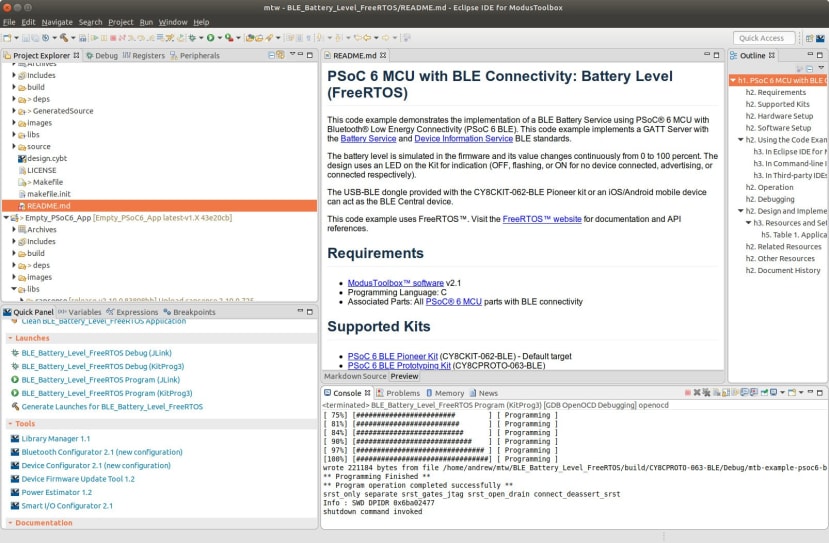
Now if we launch the program task within ModusToolbox once again, this time it succeeds.
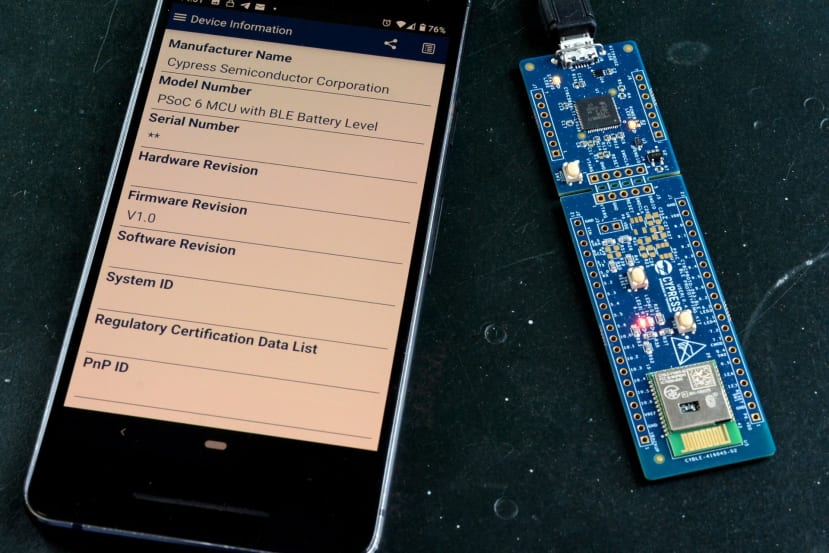
Next we installed the CySmart application on an Android device.

Upon starting the app and enabling Bluetooth, we could see the kit. Pressing SW1 on the board put it into pairing mode and we were then able to pair it with the Android device.

At this point we could now see the simulated battery level.

And also the information provided by the Device Information Service.
Wrapping up
This was just a quick run through of the PSoC 6 development kit and using it with the ModusToolbox platform, but has hopefully served to give a flavour of both. The PSoC 6 packs a lot a features around a capable BLE enabled low power microcontroller platform; most notably, of course, programmable analogue and digital capabilities for which the PSoC is famed.
ModusToolbox builds on the remarkably flexible hardware to provide BSP, libraries and middleware which will further expedite development. Not only this, but with the option to use either a provided IDE, else your favourite IDE or text editor, and then to integrate your own tooling with a command line driven development flow and all the key resources hosted on GitHub.