Field Installable: The secret to mastering connectors
Follow article
 Dave from DesignSpark
How do you feel about this article? Help us to provide better content for you.
Dave from DesignSpark
Thank you! Your feedback has been received.
Dave from DesignSpark
There was a problem submitting your feedback, please try again later.
Dave from DesignSpark
What do you think of this article?
There are a whole bunch of current trends that will increase our connector needs. The automated home, the Internet of Things, Industry 4.0 – they may focus on the use of wireless networks from your phone, but the network will require equipment to be connected. As these networks – and their applications – grow, they will spread into more diverse locations, environments and applications.

One of the good things about this new trend of equipment will be its compatibility with existing infrastructure. Few companies will be willing or can afford, to rip out their existing network to install new devices, meaning that these networks will start to grow.
With the installation of every device, however, comes a cost. The plug-n-play functionality of modern equipment makes setup easy, but most will still have to connect physically, and this is where costs can occur. Installing the device yourself can be a simple way to reduce the start-up costs.
How easy it is to install your own will depend on the design of the connector, and this can mean a heavy investment in tools and equipment or a reliance on a particular skill set. Both could be a barrier to the adoption of new systems. Let’s take a look at some of the most common techniques, and how easy they are to conquer.
Solder connectors
Solder connectors are often referred to as solder bucket or solder cup types, depending on which side of the Atlantic you call home. The description is pretty clear. The rear of each contact within the connector has a cylindrical cavity into which the wire is terminated. Each solder bucket is filled with solder before then inserting the wire itself. Solder techniques are ideal for small production runs, especially as soldering equipment is common and fairly cheap.
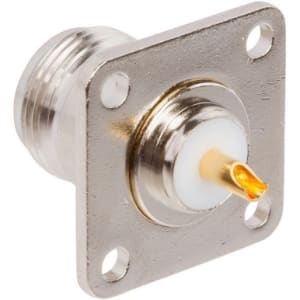
Standard solder bucket termination
Image: Amphenol
There are a few disadvantages to using solder. The key one is experience. Soldering is something that takes practice, and it is easy to become rusty if you don’t keep your skills up to date. The working environment is also an important consideration. Soldering gives off hazardous fumes that need to be handled, and soldering equipment by its very nature must be kept at high temperatures, giving rise to safety concerns.
Crimp termination
The other common termination method is crimping. Crimping involves placing a wire within a contact, which is then placed into a specialist tool and crimped. Terminating by crimping, if performed correctly, provides a good mechanical joint and good electrical connection. If the crimp tool is correctly set up, it is a process that should provide a consistent joint time after time. This allows a relatively inexperienced user to operate a crimp tool with little practice.
The main disadvantage with crimping is the crimp tool itself. Crimp tools are common and easy to get hold of, but, depending upon the design of the connector, they can be sophisticated and quite costly. If your intention is to complete only a handful of connectors, this is a very expensive solution.
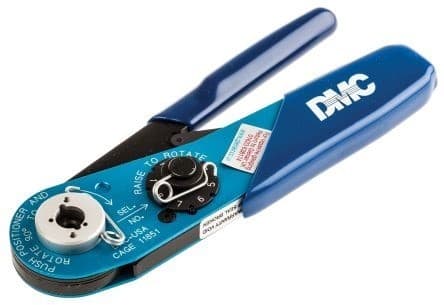
Crimp tools are useful but expensive
Image: DMC
Insulation displacement contact
There is another common method that will become relevant later on – IDC. IDC stands for Insulation Displacement Contact, and it's quite clever. It removes the need to prepare individual wires as the two prongs of the contact are designed to pierce through the insulation of the wire and then sandwich it between the prongs. It is not a new technology, having been used for decades with ribbon cable, but it is being used today in some very interesting ways.
So, we have seen that traditional termination methods may not lend themselves to a do it yourself approach. But there is hope! I will give you two words that might help you to end your connector anxiety: field installable.
Field-installable connectors
Many manufacturers have developed versions of common connectors that can be terminated under less-than-ideal circumstances. Whether designed to be used with a minimum of tools or terminated in hard-to-reach areas, ‘field installable’ is a term that covers a wide array of concepts and technologies. However, be warned: it is precisely this variation that can trip up the unwary user. There is no industry standard definition of field installable.
An industry standard is a good thing. An industry standard allows a user to be confident in a set of features or characteristics – it is a shorthand to choosing the right product.
The world of connectors is filled with standards. Standard connector types have often developed over a period of decades and can find their origins in a number of different places. Some, such as D-Subminiature connectors, can trace their origin back to a specific manufacturer but subsequently became one of the most widely produced connectors in the world (for a time). Others, such as the array of connectors that comply with military standards, can trace their genesis back to a specification written by a third party to ensure the supply of products all available to a common design.
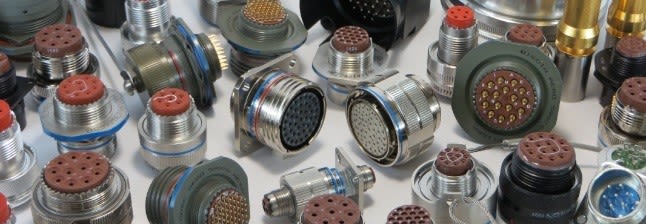
Image: Benchmark Connector Corporation
Connectors can also be classified according to their performance. When a connector needs to be used in harsh environments, the well-known IP rating defines in very precise terms exactly what a user can expect from a particular product. The same is true of other characteristics, from the expected life of the connector, as measured in mating cycles, to the expected data rate of a telecoms connector. For these and many other aspects, a user can be very clear on how to select a product.
The same is not true of field installable connectors. Designs can vary from simply removing the need for an expensive crimp tool, all the way to products that can be terminated tool-free. Similarly, field installable designs may not actually be installable in the field – they may still require a clean, safe environment.
So, the term ‘field installable’ can be a maze that is tricky to negotiate. But I want to give you a few tips and hints that will help you to select the right product for you, and, in the process, amaze your friends and co-workers with your newly found, connector expertise.
In order to demonstrate some of these tips and hints, I will use two different versions of the same connector type. I have chosen to look at the ubiquitous M12 connector. Along with its smaller brother, the M8, the M12 has a long history of use in a huge range of applications, but particularly in the field of industrial networking and controls. The M12 is made by a large number of manufacturers to a common standard that means (in theory, at least) that connectors from different sources are compatible with each other.
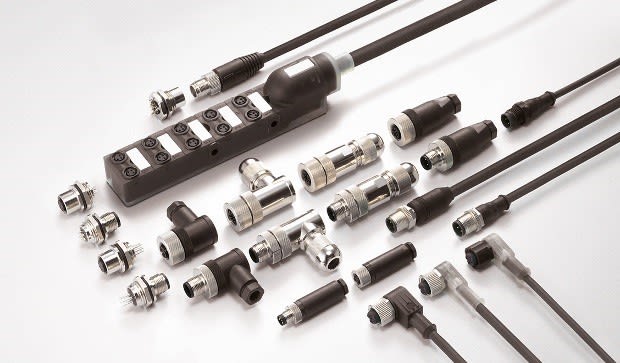
The M12 and M8 connector families from TE Connectivity
Image: TE Connectivity
For this article, I have used comparable products from TE Connectivity and HARTING, both large, well-established connector manufacturers, and each with decades of experience. They have taken different approaches to the problem of installing the M12 and will suit our purposes well.
For reference, I used the TE Connectivity T411 Series connectors – with female contacts (124-7087) ; and male contacts (124-7099) . The HARTING series used was the Harax M12 Series – with female contacts (707-3695) ; and male contacts (623-5864) .
My first tip is this: before spending a single penny on connectors, take a look at the assembly instructions. Most manufacturers make their product data readily available, and assembly instructions are usually available as part of the product catalogue or as a separate downloadable instruction sheet.

Assembly instructions
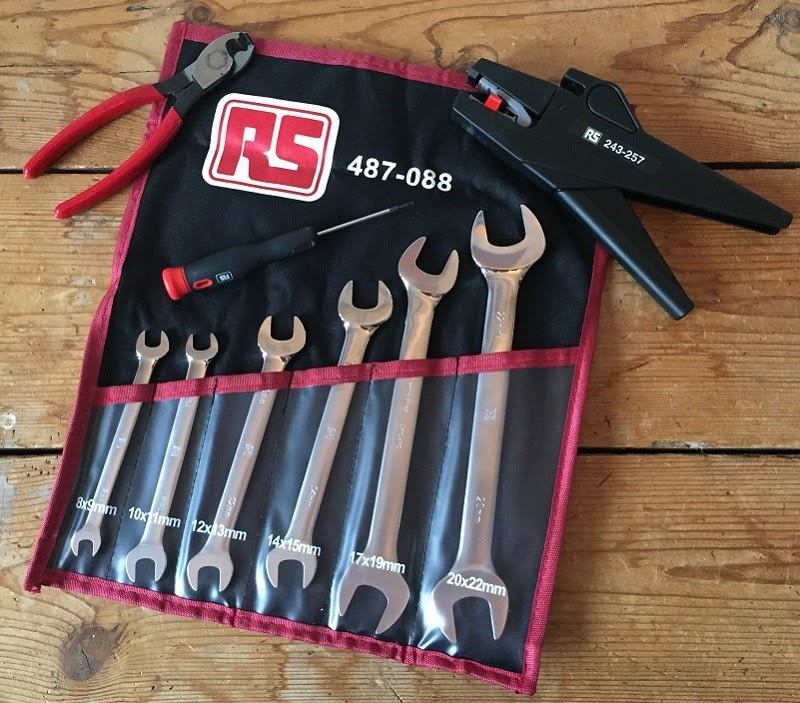
As well as giving you an impression of the process itself, the assembly instructions should make it clear how much additional equipment you will require to complete the job. In both examples that we have chosen, we will need a selection of common hand tools – more for the TE connector, less for the HARTING. Doing your initial research could be the difference between completing the job or an unanticipated delay while you wait for the one tool you need to be delivered.
As an aside, let me spend a moment talking about tooling. There are some connectors that are advertised as tool-free. They generally use clever methods like the IDC termination we mentioned earlier, and they allow the user to complete the connection with nothing more than their bare hands. In my opinion, they offer one of the pinnacles of modern connector design.
A tool-free connector may look perfect for your project, but before clicking the ‘buy now’ button, do make sure that you really need tool-free. They can be more expensive than other solutions, especially as the kind of tools you normally need for field installable connectors are probably ones that you already have! One other thing to check: are they repairable? In other words, once you have installed them, is it possible to uninstall them, and is this something you need? Once again, doing your research can reap huge benefits and potentially save you money and stress later on.
My next tip: spend time preparing the cable correctly. Assembly instructions often provide very precise dimensions for cable preparation, and while it may be tempting to adopt a ‘good enough’ approach, I would urge you to follow the instructions as closely as possible. There's a reason that the likes of TE and HARTING have been going as long as they have – trust me when I say it's worth trusting them!
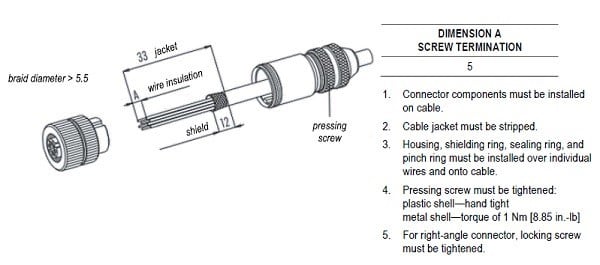
Read the instructions!
Image: TE Connectivity
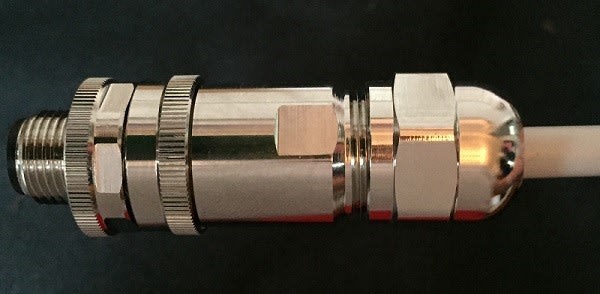
In the case of each of our M12 connectors (both of which use a collet for gripping the cable and a back nut to close the connector) the instructions are very clear that these components should be threaded onto the cable, in the right order, before you start preparing the wire. Once you have prepared the cable for termination, it is very difficult to complete this step, and it has the added advantage of stopping crucial parts falling on the floor, into the grass or down the back of your machine. As someone who has lost countless small connector components in the weirdest of places, I would heartily recommend you follow this advice.
Once the cable is prepared, this is where our two connector types start to look a little different. The TE Connectivity connector uses screw termination – small grub screws are used to secure the wires into the contacts, tightened with a fine screwdriver. In contrast, the HARTING approach employs their HARAX termination which uses IDC technology and requires the minimum of tools.
The two approaches each have their merits. The HARTING connector is not entirely tool-free, but I was able to complete this termination with nothing more than my classic Swiss army knife and a pair of spanners. The termination process is quicker – there are fewer steps – and could easily be performed by someone who is not that familiar with connectors. However, the IDC termination technology would make it harder to uninstall, making a repair job harder.
In contrast, the TE Connectivity approach is a little fiddlier. The grub screws are quite small, requiring a slightly more delicate hand, and overall the connector needs more tooling to complete. However, as the assembly process is entirely mechanical, a repair is much easier to complete. In fact, in an extreme case, the connector can be completely disassembled, the cable cut and prepared again, and the connector re-completed with little fuss.
There is also a question of cost. To terminate the TE Connectivity connector, I required a reasonable amount of common tools. To buy this little collection new would cost about £100, but I would be surprised if most technicians or maintainers did not already have a toolkit complete with all of these products. And so the only cost would be that of the connector, and the TE version can be purchased for about £6.50.
The HARTING connector with its HARAX termination technology uses even fewer tools – something to cut and prepare the cable, along with some spanners. However, the cost of the simplified installation process is born by the connector, which would cost about £20.
Summary
Hopefully, I have been able to show you that not all field installable connectors are created equal. What may appear to be a perfect solution might actually cause longer-term problems. And I haven't even addressed the question of the environment in which the work is carried out. The demands of an outside installation place a new set of demands upon the installer.
So, in summary, my final tip probably ought to have been my first: be clear what you are trying to achieve. Are you simply trying to reduce some installation costs by completing the work in-house, or do you have to install a device whilst up a ladder, in the rain?
One final comment. As we have seen, there is no standard definition of what ‘field installable’ actually means. Every manufacturer created connector designs according to their own interpretation of the title, making product selection harder for the user. Is there a place for distributors such as RS Components to provide the clarity that the user needs? And what form would this clarity take? A subject for another article, perhaps...
Field-installable connectors may be the answer to your installation dilemma. There are plenty of connectors available that can offer an alternative approach for users who need to embrace some of the new connected devices that are available. But the variety can be an obstacle to trip the unwary. Be clear in your objectives, do your homework and plan ahead. Follow these steps and you will rapidly master the art of connectors.