Exploring Ethereum with Raspberry Pi Part 3: Transacting on our Private Blockchain
Follow article
 Dave from DesignSpark
How do you feel about this article? Help us to provide better content for you.
Dave from DesignSpark
Thank you! Your feedback has been received.
Dave from DesignSpark
There was a problem submitting your feedback, please try again later.
Dave from DesignSpark
What do you think of this article?
Transferring funds, mining Ether and executing smart contracts.
In part 1 we explored Ethereum basics and installed the geth client software, before then creating an account and doing some basic testing. Following on from this in part 2, we created our own private blockchain with an initial two nodes configured as peers.
In this post we get on to actually transacting with the blockchain; first we’ll transfer some preallocated funds and mine some ether, before moving on to executing a smart contract — which is actually one of the most interesting aspects to Ethereum.
Setting up / updating geth
We decided to start afresh and to reinstall our Raspberry Pi. So first Raspbian Lite was loaded, before performing the customary sudo apt-get update and sudo apt-get dist-upgrade.
If you’d like to run a recent build of the geth client it appears that, at the time of writing, the Raspbian packaged version of golang is too old. So if installed, remove this first:
$ sudo apt-get remove golang
$ sudo apt-get remove autoremove
If starting from scratch you’ll need git and another dependency, which can be installed with:
$ sudo apt-get install git golang libgmp3-devNow it seems it can be a bit tricky with geth vs. golang versions. For the geth release 1.8 branch it appears golang 1.9.2 works, whereas much more recent versions were problematic.
$ wget https://dl.google.com/go/go1.9.2.linux-armv6l.tar.gz
$ sudo tar -C /usr/local -xzf go1.9.2.linux-armv6l.tar.gz
$ export PATH=$PATH:/usr/local/go/bin
It also makes sense to add the last line — which updates the path — to your ~/.profile, so that the newly installed go binary is always available upon logging in.
With golang installed we can now get the geth 1.8 sources, build and install.
$ mkdir src
$ cd src
$ git clone -b release/1.8 https://github.com/ethereum/go-ethereum.git
$ cd go-ethereum
$ make
$ sudo cp build/bin/geth /usr/local/bin/
This process is mostly as detailed in part 1, but worth noting how to get up and running with a later geth build, since it requires installing a later version of golang outside of package management.
Creating the private blockchain
The steps detailed in part 2 should be followed to create the private blockchain and initialise this with two nodes, so no point in repeating the steps verbatim here.
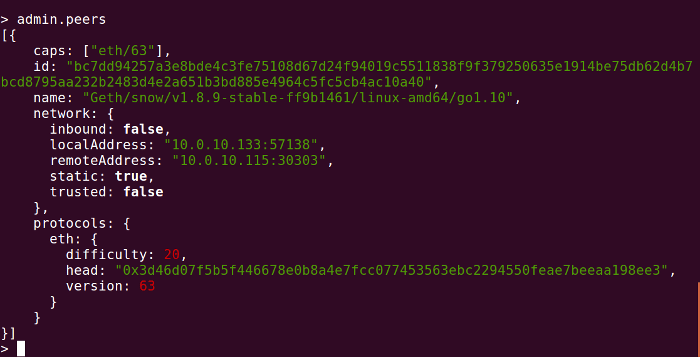
Once completed, when executing admin.peers from the geth client console on each node, the output should be similar to above, indicating that the two nodes are indeed peers.
Transferring funds and mining

So if we start by checking the balance for the accounts configured on each node, using:
> web3.fromWei(eth.getBalance(eth.coinbase), “ether”)Above we can see this for the account on the Pi, which did not have funds pre-allocated.

And above we can see the balance for the account configured on a laptop, which did have funds preallocated.
Note that this is actually the reverse of the situation in the previous post, where the Pi had funds preallocated and the account on the laptop did not. It doesn’t actually matter which way round you do this and of course you could preallocate funds to both accounts — or indeed many — when you initialise the blockchain.
So in our case we’ll send ether from the account on the laptop to the one on the Pi. First if we just confirm the address of the latter.

Then from the laptop we enter at the console:
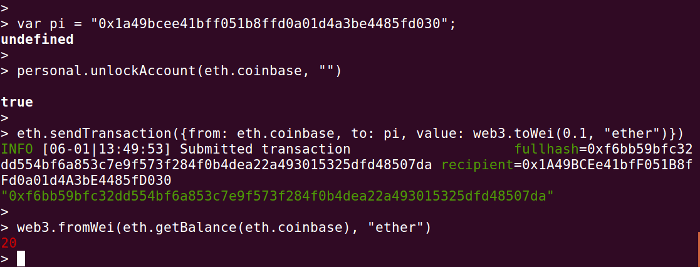
> var pi = "0x1a49bcee41bff051b8ffd0a01d4a3be4485fd030";

> personal.unlockAccount(eth.coinbase, "")

> eth.sendTransaction({from: eth.coinbase, to: pi, value: web3.toWei(0.1, "ether")})
This first line defines a handy variable for the address of the account on the Raspberry Pi, then the second unlocks the account on the laptop, and the third sends ether from the latter to the former.
At this point if we were to check the balance on each machine it would still be the same, since synchronisation is not taking place. We can start this by starting a miner of the laptop with:
> miner.start()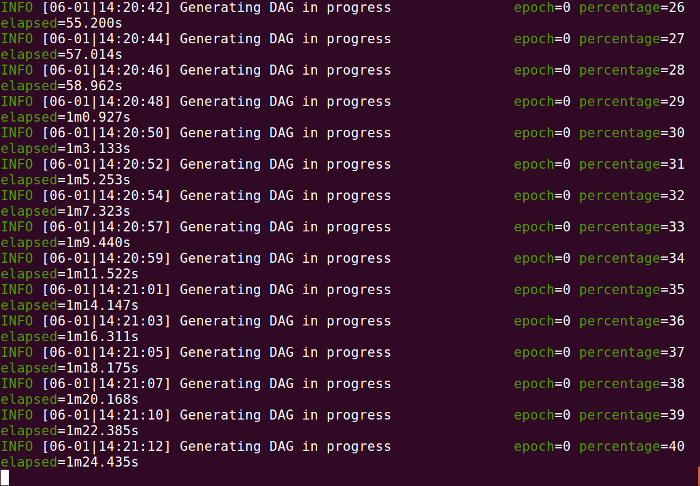
First the DAG — a directed graph data structure that is used to record proof-of-work — has to be generated and following which mining, and synchronisation, will commence.
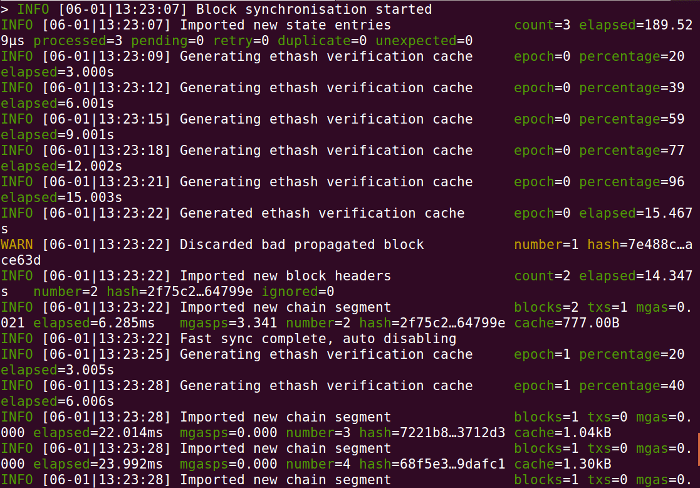
Above we can see the console output on the Pi once sync starts.

And if we now check the balance of the account on the Pi we can see that we have received funds!
Since we don’t have any competition and the mining difficulty is low, it doesn’t take long before the miner running on the laptop has mined us a lot more ether than we pre-allocated.

Finally, we can stop the miner by entering at the console:
> miner.stop()Note how we only need one miner instance running to produce a stream of new blocks, which is able to run on, as was the case here, a less resource constrained machine.
Our first smart contract
Next we’ll build the Greeter, a Hello World smart contract in Ethereum. This is described as “an intelligent digital entity that lives on the blockchain and is able to have conversations with anyone who interacts with it, based on its input.”
Back in part 1 we noted how smart contracts are written in a language called Solidity, that like Java, is compiled to bytecode. So to start we’ll install a compiler for it on our laptop running Ubuntu.
$ sudo add-apt-repository ppa:ethereum/ethereum
$ sudo apt-get update
$ sudo apt-get install solc
In our case the first step wasn’t actually necessary, since we already had the PPA configured as this was how we had installed geth.
If we take the following Solidity code and save it to a file named Greeter.sol.
contract Mortal {
    /* Define variable owner of the type address */
    address owner;

    /* This function is executed at initialization and sets the owner of the contract */
    function Mortal() { owner = msg.sender; }

    /* Function to recover the funds on the contract */
    function kill() { if (msg.sender == owner) selfdestruct(owner); }
}

contract Greeter is Mortal {
    /* Define variable greeting of the type string */
    string greeting;

    /* This runs when the contract is executed */
    function Greeter(string _greeting) public {
        greeting = _greeting;
    }

    /* Main function */
    function greet() constant returns (string) {
        return greeting;
    }
}
To compile we enter:
$ solc -o target --bin --abi Greeter.sol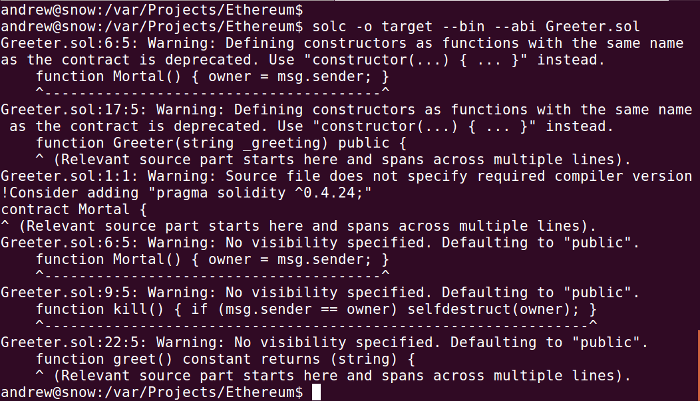
This results in some warnings, but a target directory is created containing four files: an abi and bin file each for the Greeter and Mortal contracts. We only require those for the Greeter contract, since this inherits from the Mortal contract.
The easiest way to get this loaded into geth is to create a script, which we named greeter.js. If we take a look at the completed file.
var greeterFactory = eth.contract([{"constant":false,"inputs":[],"name":"kill","outputs":[],"payable":false,"stateMutability":"nonpayable","type":"function"},{"constant":true,"inputs":[],"name":"greet","outputs":[{"name":"","type":"string"}],"payable":false,"stateMutability":"view","type":"function"},{"inputs":[{"name":"_greeting","type":"string"}],"payable":false,"stateMutability":"nonpayable","type":"constructor"}])

var greeterCompiled = "0x" + "608060405234801561001057600080fd5b5060405161039b38038061039b83398101806040528101908080518201929190505050336000806101000a81548173ffffffffffffffffffffffffffffffffffffffff021916908373ffffffffffffffffffffffffffffffffffffffff1602179055508060019080519060200190610089929190610090565b5050610135565b828054600181600116156101000203166002900490600052602060002090601f016020900481019282601f106100d157805160ff19168380011785556100ff565b828001600101855582156100ff579182015b828111156100fe5782518255916020019190600101906100e3565b5b50905061010c9190610110565b5090565b61013291905b8082111561012e576000816000905550600101610116565b5090565b90565b610257806101446000396000f30060806040526004361061004c576000357c0100000000000000000000000000000000000000000000000000000000900463ffffffff16806341c0e1b514610051578063cfae321714610068575b600080fd5b34801561005d57600080fd5b506100666100f8565b005b34801561007457600080fd5b5061007d610189565b6040518080602001828103825283818151815260200191508051906020019080838360005b838110156100bd5780820151818401526020810190506100a2565b50505050905090810190601f1680156100ea5780820380516001836020036101000a031916815260200191505b509250505060405180910390f35b6000809054906101000a900473ffffffffffffffffffffffffffffffffffffffff1673ffffffffffffffffffffffffffffffffffffffff163373ffffffffffffffffffffffffffffffffffffffff161415610187576000809054906101000a900473ffffffffffffffffffffffffffffffffffffffff1673ffffffffffffffffffffffffffffffffffffffff16ff5b565b606060018054600181600116156101000203166002900480601f0160208091040260200160405190810160405280929190818152602001828054600181600116156101000203166002900480156102215780601f106101f657610100808354040283529160200191610221565b820191906000526020600020905b81548152906001019060200180831161020457829003601f168201915b50505050509050905600a165627a7a72305820467ac32dfa208b06ba97f3a7f72d039f2f912938b54b9881c603d80f6b004df40029"

var _greeting = "Hello DesignSpark!"

var greeter = greeterFactory.new(_greeting,{from:eth.accounts[0],data:greeterCompiled,gas:1000000}, function(e, contract){
    if(e) {
      console.error(e); // If something goes wrong, at least we'll know.
      return;
    }

    if(!contract.address) {
      console.log("Contract transaction send: TransactionHash: " + contract.transactionHash + " waiting to be mined...");

    } else {
      console.log("Contract mined! Address: " + contract.address);
      console.log(contract);
    }
})
The first two lines contain the contents of the abi and bin files (these respectively describe the contract’s functions and are the compiled bytecode).
var greeterFactory = eth.contract(<contents of the file Greeter.abi>)

var greeterCompiled = "0x" + "<contents of the file Greeter.bin>"
The _greeting variable is used to define the greeting message that is returned when the contract is executed.
Next if we make sure that we have a miner running on suitable node and then unlock the account on the machine from which we wish to deploy the contact. In our case we again executed miner.start() at the geth console on the laptop, and decided to deploy the contract via the Raspberry Pi.
So on the Pi we entered:
> personal.unlockAccount(eth.coinbase, "")

> loadScript("greeter.js")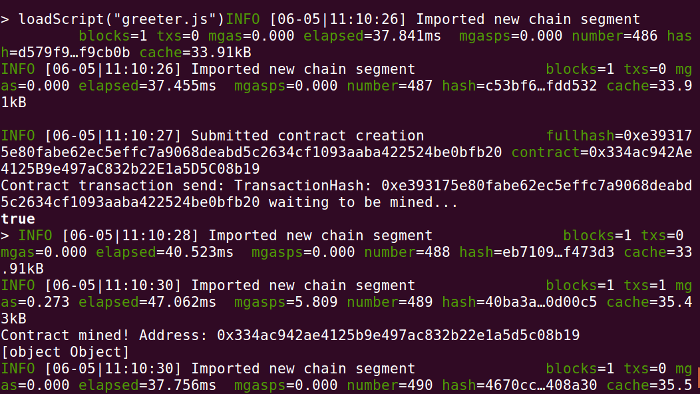
Success! In amongst the synchronisation messages we can see the contract transaction being sent, a notice that it is waiting to be mined, and then notification that this has completed.
We can then verify this with:
> eth.getCode(greeter.address)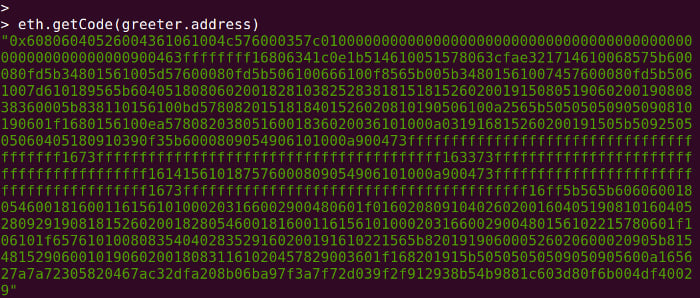
Checking the balance of the account on the Pi, we see that this has reduced slightly.

The funds will have gone to the appropriate miner, in our case the account on the laptop.
Finally, we can execute the contract with:
> greeter.greet();
As noted on the Ethereum website, this returns immediately, since the call doesn’t change anything on the blockchain and has no gas cost.
Documentation and debugging
It should be noted that the Ethereum documentation is out-of-date in places and with this spread across the website and various wiki pages, it can be confusing and even quite frustrating at times, when documented steps don’t work. A good example of which is contract tutorial on the geth wiki, which suggests Solidity compilation from within geth — however, this is no longer supported.
It’s fair to say that Ethereum, like many blockchain technologies, is a fast moving target, with regular improvements being made to increase resilience to attacks and efficiency. As such the documentation can lag behind, so if something doesn’t work, check to make sure that you are using the correct documentation for the version of Ethereum. In private test networks one possibility is to also use older software releases, although this is likely not advisable for any live networks.
If you’re not quite sure what state things are in, a handy command to reset the blockchain:
$ geth removedb --datadir .designsparkAlthough note that after this you will need to init again with the custom network .json file.
Conclusion
So to summarise we have:
- Seen how in theory a small node such as a Raspberry Pi can participate in a large blockchain network, such as a public network, using light synchronisation;
- Demonstrated how a private network can be set up;
- Sent ether between accounts configured on nodes in a private network, and then compiled a smart contract, deployed this from a Raspberry Pi and then called a function.
From here it would be possible to add more nodes, and to create contracts that perform some useful function and which benefit from the features afforded by Ethereum blockchain technology.