Diary of a Trainee Electronics Engineer: August 2016
Follow articleHow do you feel about this article? Help us to provide better content for you.
Thank you! Your feedback has been received.
There was a problem submitting your feedback, please try again later.
What do you think of this article?
Random Number Generation, LittleWire and Lots of Kitting Up.
Back in my June diary post I mentioned that 23rd was a busy day for me – not only was this the date of the EU referendum, but it was National Women in Engineering Day and here at AB Open we were visited by RS Components to do some filming. At the beginning of this month I saw the finished piece where I talk about what I do as a trainee electronics engineer and a student.
To read the accompanying blog post by Greig from DesignSpark click here.
The annual Wuthering Bytes technology conference is fast approaching so we’ve all been busy preparing for this. I have taken on the roll of getting all the kits ready for the Open Source Hardware Camp and GNU Tools Cauldron, while preparing for running a soldering workshop for the third consecutive year.
Random Number Generation
When assembling OSHCamp 2016 kit I learned quite a lot about random numbers. Most people have a brief understanding of what a ‘random’ number is and that is that they cannot reasonably be predicted through pattern or equation.
Methods for producing random outcomes have been around for a very long time: flipping a coin, rolling a dice, shuffling a deck of cards… The list goes on of physical ways we can get random number generation.
When it comes to computers generating random numbers there are two main methods, pseudo random number generation (PRNG) and true random number generation (TRNG). The way these work varies; Pseudo random number generation uses mathematical formulae with a seed (starting number) or pre-calculated tables to determine a random output, whereas true random number generation is derived from an input which a computer cannot determine such as a mouse movement or thermal noise. Where TRNG is concerned there is usually an analogue to digital (ADC) of some kind so that a computer is able to take this external input.
Depending on the application either type of number generation can be used. For example, lotteries, gaming, draws, gambling and random sampling for drug testing will use TRNG, whereas simulation and modelling will typically use the PRNG method.
Although TRNG is seen as the much more true way to get random numbers you do have to be careful; take using the interval between key presses as the factor for the random output, you have to be incredibly mindful of operating system delays as these can often interpret several separate key presses as simultaneous due to the delay in the system.
Although I don’t fully understand the schematic circuit – I still have a lot to learn about analogue electronics – for the random number generator I can just about make out that the ATTINY44 produces a square wave input which then goes to a boost converter and is stepped up to 12V, which is then fed into a noise generator circuit using transistors. This is then fed to both the speaker and the ATTINY44, where this is sampled by the ADC and used to generate a random number.
I programmed all of the ATTINY44s for the kit using avrdude from the Linux command line, after changing directory into where I had saved the .hex file which needed to be uploaded to the chip.
Checking out the Source Code
From looking at the source code I can just about figure out what’s happening. To begin with all the necessary libraries are included and the internal oscillator speed is defined. The kit does not use an external crystal and instead uses an internal RC oscillator which is built into the processor, which isn’t the most accurate form of clock, however for this application it doesn’t really matter as nothing is very time sensitive and the main task is measuring the voltage.
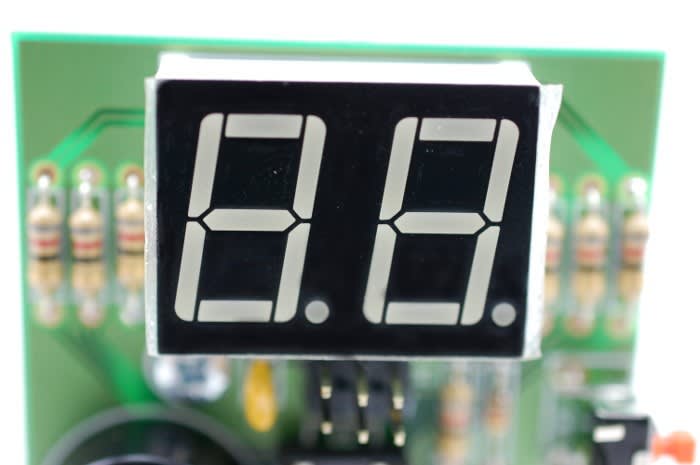
There is also some set-up in the code for multiplexing the dual 7-segment display, to display the numbers 0 to 9, the symbol ‘-' as well as a blank space. There is also similar set-up for the animation of a spinning pattern. The ADC ISR (analogue to digital converter interrupt service routine) then gets called when the ADC has data and the interrupts are enabled on the processor – data is sampled from the noise signal which was input on an analogue input pin.
I’m not sure exactly how it does it, but from the source code it looks like more than one sample is taken to get a byte of random data.
When you get to the program main you can see that there is a lot of set up done for both the ADC and a timer. After this the spinner animation begins, this gives the charge pump time to fill up and the noise generator to start working. Following this the battery is checked by looking at the voltage on the analogue input. Providing this is OK then a number is displayed to the dual 7-segment display, if it isn’t then an error message is displayed. Once a number has been displayed interrupts are disabled and the processor is put into sleep mode after ten seconds. I decided to test this by holding my finger down on the button and indeed after 10 seconds the display did appear to sleep, following which for a couple of seconds after I could hear the sound generated from the piezo fading – I soon realised that this was because the energy from the charge pump was dissipating as the processor went into sleep mode and was no longer generating a square wave.
The battery test is included in the code because if at any point the battery level drops low this could potentially interfere with the results as it will affect the voltage supplied to the noise generator circuit, which could then produce an output which is less random.
I published a blog post this month about Assembling the OSHCamp 2016 Kitwhich can be found on DesignSpark.
GNU Tools Cauldron Kit
In addition to the Noise Generator kits for Wuthering Bytes I also ensured that all the GNU LittleWire kits were ready for the GNU Tools Cauldron, which will take place over the last three days of the festival.
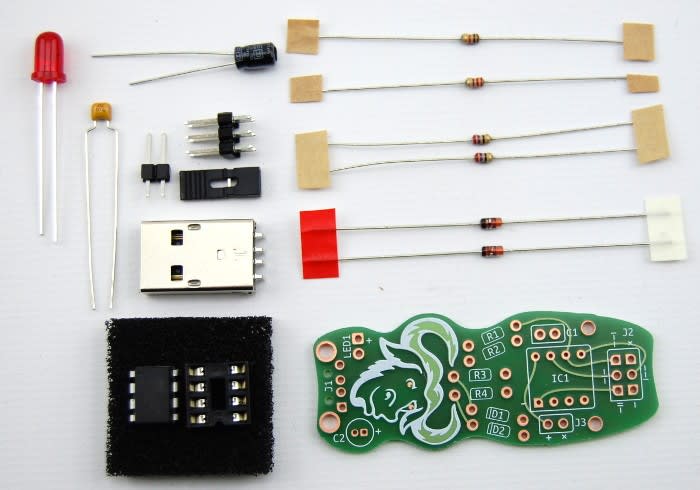
The GNU LittleWire is a PCB assembly with 5 resistors, 2 capacitors, 2 diodes and an LED in addition to an ATTINY85. Similar to the Wuther which was the 2013 OSHCamp Kit, the GNU LittleWire is a special edition of the Little Wire USB multi-tool designed by Ihsan Kehribar. Like the Wuther this has a artistic PCB layout designed by Boldport.
Once kitted up I assembled one of the kits with a programmed chip to ensure everything worked as it should. The assembly of this kit is really simple, with less than a dozen through-hole components and a couple of pin headers, including the ATTINY and USB plug. For anyone with soldering experience this will be very simple and will probably take around 5 minutes.
For anyone with little/no soldering experience it may take a little longer, but as a word of advice just follow the silkscreen markings on the PCB and ensure the LED, diodes and electrolytic capacitor are orientated the right way and if needed use Blu-Tack to secure components before soldering them into place and not too much can go wrong!
For details of the GNU Tools Cauldron programme please visit the website.

It doesn’t seem long ago at all since I helped out at my first ever Wuthering Bytes festival back in 2011! Can’t wait to meet some more interesting people and listen to some more great talks this year.
More Festivals
I decided that I would buy a last minute ticket to the Sunday of Leeds Fest, it was the first year I’d been and I thought I’d try something new. I can happily say that Leeds Fest isn’t for people like me and that I should remember that I prefer being able to walk round in shoes rather than wellies. I think I’ll just stick to the Wuthering Bytes Festival next year!


