Using the CanaKit Raspberry Pi Zero W Starter Kit with a TV Hat
Follow article
 Dave from DesignSpark
How do you feel about this article? Help us to provide better content for you.
Dave from DesignSpark
Thank you! Your feedback has been received.
Dave from DesignSpark
There was a problem submitting your feedback, please try again later.
Dave from DesignSpark
What do you think of this article?
Setting up the Raspberry Pi Zero W and using it with a DVB TV Hat to stream TV stations around the house.
Like many others at the moment I am currently working from home and, due to personal circumstances, will not be going out — apart from occasionally walking the dog — for some time. A perfect excuse to try out some of the things that I have been meaning to get round to.
I have a CanaKit Raspberry Pi Zero W Starter Kit (181-2039) and a Raspberry Pi TV Hat (180-6177) both still in their boxes, so now seemed like a good time to unpack them and give them a whirl.
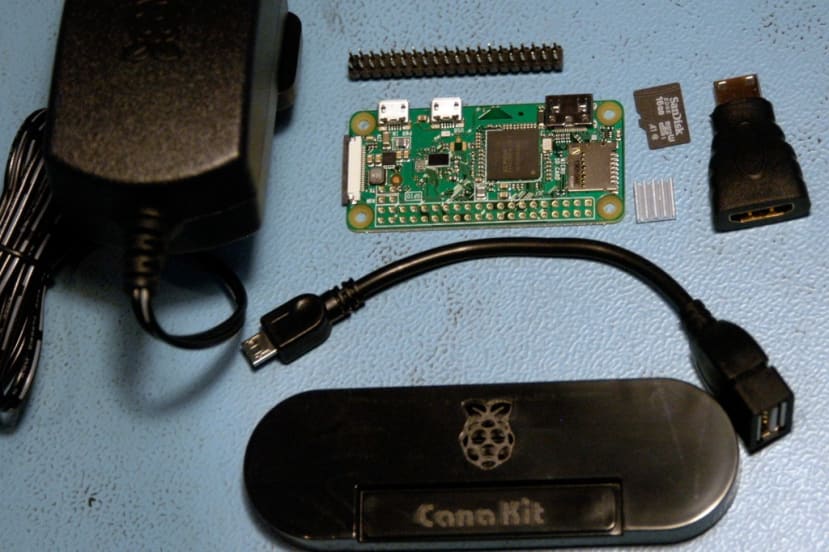
The CanaKit Raspberry Pi Zero W Starter Kit consists of:
- Raspberry Pi Zero W
- Micro USB to USB socket adapter cable
- Mini HDMI to HDMI adapter
- MicroSD card with Raspian NOOBS on it
- Plastic case
- Adhesive heat sink
- Power supply
… everything you need to get started with the Pi Zero W
The Raspberry Pi Zero W
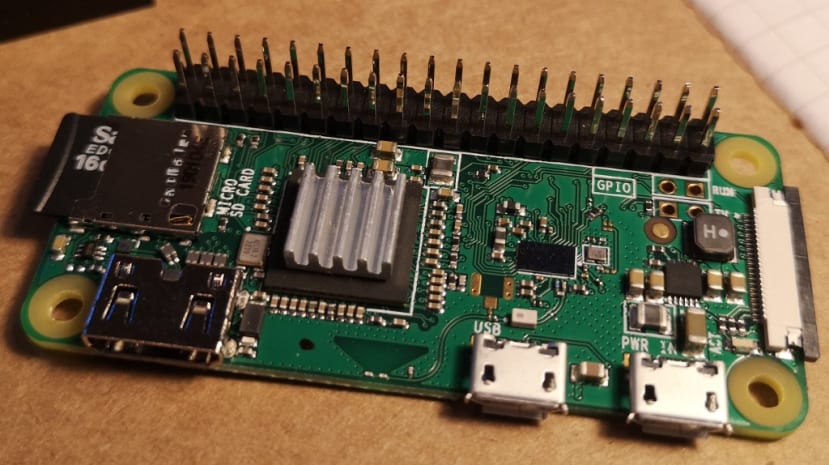
The Raspberry Pi Zero is a tiny Raspberry Pi computer measuring a diminutive 65mm x 30mm. The W version included with this starter kit has built-in WiFi and Bluetooth. Apart from that, it has two micro USB connectors, but one of those is solely for power. It also has a Mini HDMI socket and the standard 40-pin GPIO connection. Processing power is taken care of by a Broadcom BCM2835 1GHz processor with 512MB RAM.
The Kit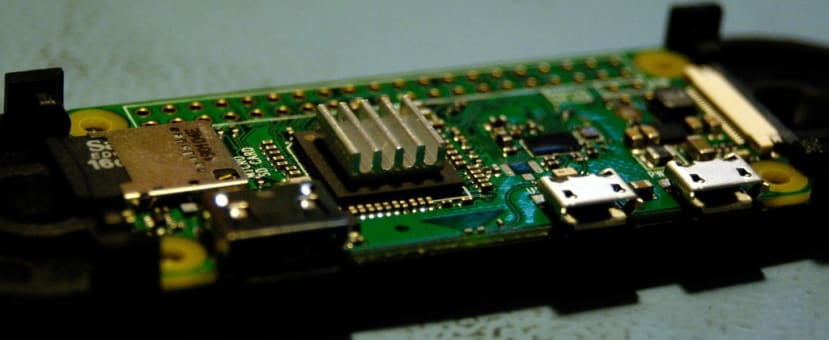
I needed to do a couple of things before putting the Pi Zero in the case. First I fitted the heat sink by removing the protective layer from the adhesive and pressing it firmly onto the processor. Then I inserted the provided Micro SD card in its slot, as it would not be accessible once the Pi was in the case. I found it difficult to open the case and needed to apply quite a lot of pressure. In the end, I used a guitar plectrum to prize it open, so as to avoid potential damage using a screwdriver. The plastic is fairly flexible, so you can bend it slightly to clip the Pi Zero in place and then clip the lid back on.
Once that was done I connected the two adapters for the USB and the HDMI.
Raspian Noobs
Now I needed to install an Operating System. The Starter Kit includes an SD card pre-loaded with the Raspberry Pi Foundation’s "NOOBS" (New Out of Box Software), which is an easy-to-use operating system installation manager for the Raspberry Pi. With the SD card already inserted in its slot and a keyboard and mouse and screen connected, when I powered up the Pi I was presented with a screen with options to install various operating systems – in this instance I opted for the full desktop version of Raspbian.
As the Pi Zero only has the one USB socket, for this initial setup I used a Wireless keyboard and mouse that shared a single adapter. (Once the OS was set up I could use a Bluetooth keyboard and mouse to free up the USB).
A few tweaks
Raspbian more or less installed itself and all I had to do was wait. Since I only had a small 7” screen available, once the OS was up and running, I set up remote access so I could control it from my laptop. It was simple to set up following the instructions on the Raspberry Pi Foundation web site – I opted to use VNC (Virtual Network Computing), as I was familiar with it from my days working in IT Support. The direct connection option was ideal for my situation.
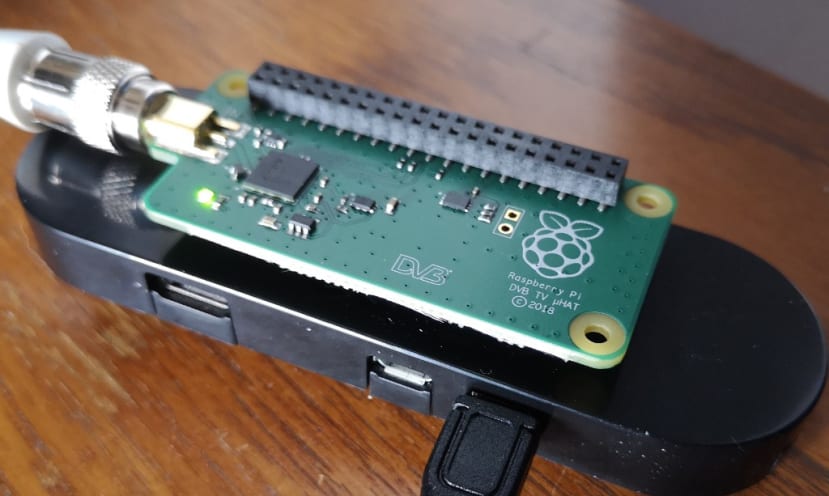
Installing the Raspberry Pi TV Hat
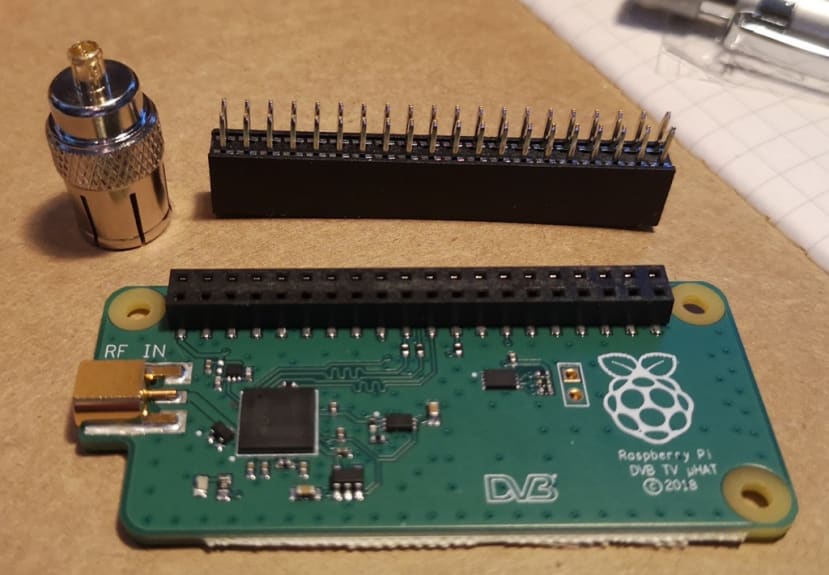
Having gone to the trouble of getting the Pi Zero in its case, I now needed to remove it to solder the header pins in place. Once that was done I added the spacer that is supplied with the TV Hat, and with the Pi is back in its case, and the case header cover removed so that I could connect the TV Hat to the Pi Zero.
The recommended software to decode the TV streams (known as multiplexes, or muxes for short) and view content is called TVHeadend, so I needed to install that on the Pi Zero. The TV HAT can decode one mux at a time, and each mux can contain several channels to choose from. Content can either be viewed on the Raspberry Pi to which the TV-HAT is connected, or sent to another device on the same network. When using the Pi Zero, due to its limited processing power, it is recommended to do the latter.
I plugged my TV aerial into the TV hat using the supplied adapter and then powered up the PI
I then connected to the PI from my laptop using VNC, opened a terminal window and ran the following two commands to install the TVHeadend software:
sudo apt-get update
sudo apt-get install tvheadend
I could then access the TVHeadEnd interface via my web browser by going to http://raspberrypi.local:9981/extjs.html
Initially, I found that the password I had set up during the installation process did not work – it could well have been an error no my part as I am typing on an unfamiliar laptop keyboard, but searching the Internet for a solution on how to access the TvHeadEnd interface without a working password, it seemed to be a common problem, so maybe it is a bug. Anyway, I found that opening a terminal on the Pi Zero and entering
sudo dpkg-reconfigure tvheadend
let me re-enter the administrator username and password, and this time it worked fine and I was presented with a series of setup screens.

I set up a network, user, and administrator access. I entered the details for my network and entered an asterisk in username and password fields. This will let anyone connected to my local network access TVHeadend.

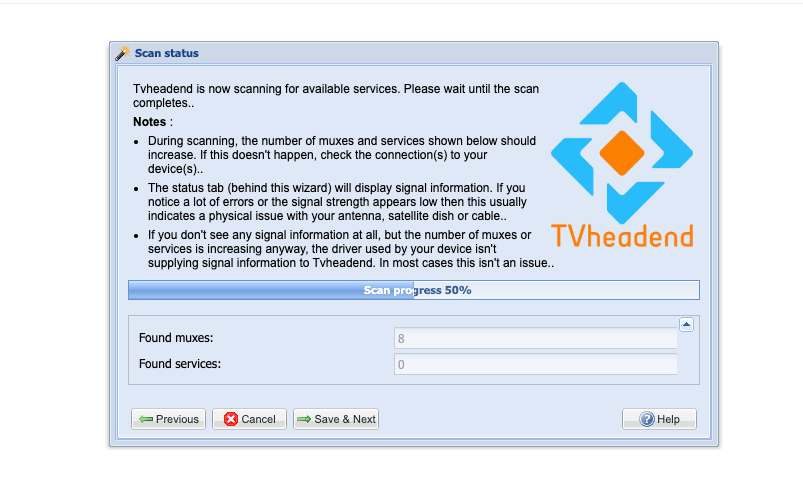
The notes at the top of each screen explained clearly what information needed to be input. When I came to the Pre-defined muxes option I selected the transmitter I thought was physically closest to me, but as I watched the scan for stations progress on the next page I could see it only picked up 8 muxes and no services, so when it finished I pressed the back button and selected an alternative transmitter that I thought might avoid some of the big hills we have round here.
This time the scan produced the number of muxes and services you would expect.
In theory, you can go to the Freeview website and enter your postcode and house number and it should tell you which transmitter to pick, but in my case, it came up with one that was in the TvHeadEnd list, so I had to make an informed guess.
Anyway, once that was done I could select the Electronic Programme Guide tab and double-clicking a channel launched a new window that played that broadcast.
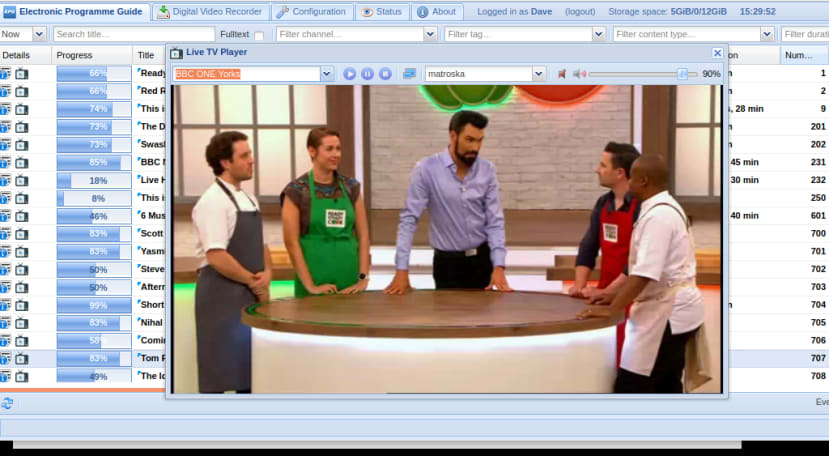
I can now watch broadcast TV on any device connected to the network in my house, although I think I will be able to resist the distraction of daytime TV on my working-from-home laptop, it could be useful to have the BBC News channel on in the background.