Upcycling an E-cig Salvage, a UV pen torch.
Follow article Dave from DesignSpark
How do you feel about this article? Help us to provide better content for you.
Dave from DesignSpark
Thank you! Your feedback has been received.
Dave from DesignSpark
There was a problem submitting your feedback, please try again later.
Dave from DesignSpark
What do you think of this article?
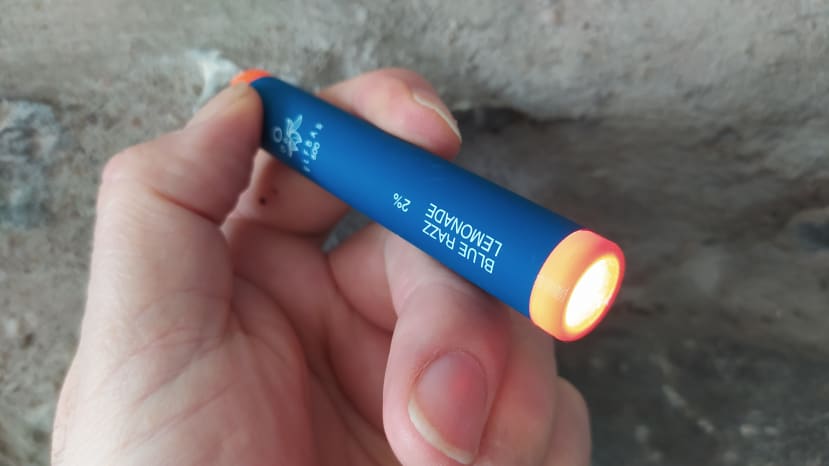
Since starting my adventures in salvaging LiPo cells from discarded “single-use” e-cigs I’ve wanted to also try and reuse the metal body tubes that many e-cig often are built around. Anyone who has ever tried to roll a small diameter metal tube using pinch rollers probably has a good idea of how tricky they are to make and it seems such a waste for them to get discarded. I used an e-cig tube and some of the end caps over on the e-cig MP3 player build and that got me thinking.
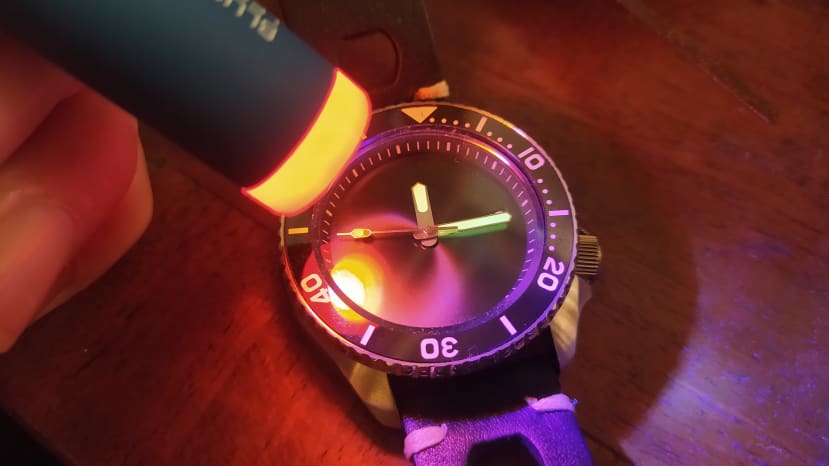
In the last year, I’ve also got into building watches and watch modding, I wrote an article about watch building for Hackspace Magazine issue 60, which you can download for free here, where I built the equivalent of a £250-500 mechanical watch using around £90 worth of components. In the watch modding/building communities there’s an interest in showing off your “lume” the luminous pastes on your watch dials that allow you to tell the time in dark. In fact there’s almost a sub-community who are devoted to buying different lume paint and pastes and painting dials and showing their work. I’m not quite there yet, but It would be nice to take a few photographs of the watches I’ve built showing off their lume at its best. One way to do this is to shine a UV light source onto the watch face which instantly charges the luminance to its most glowy state. So, the idea for a small UV torch using E-Cig salvage was born!
We covered safely stripping down discarded e-cigs back in the article where we used an E-Cig LiPo to fly an Air:Bit quadcopter and so the start point of this build was to grab an E-Cig body tube and a pair of callipers to get a decent measurement of the internal diameter. With this knowledge, we set about designing a simple torch head that would slide into one end of the tube. All the 3D printed parts are attached to this article including STl files and also RSDOCX files so you can adapt them in using Designspark Mechanical.
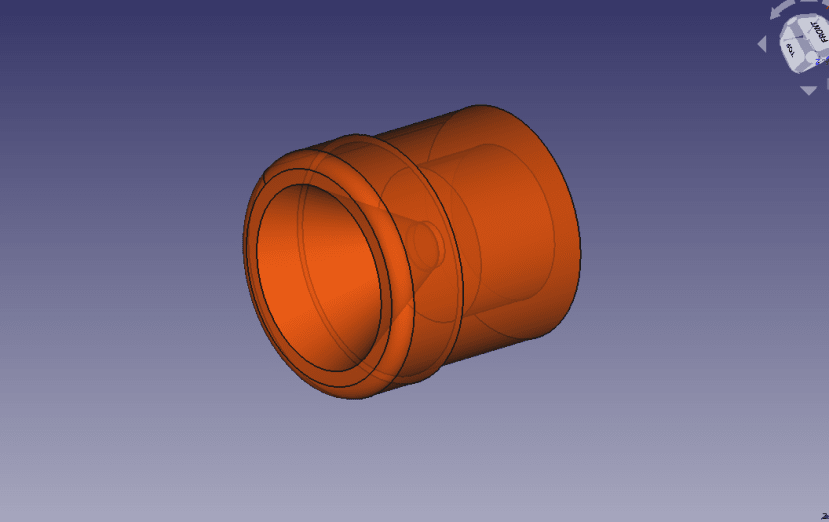
Whilst the 3D printed plastic won’t particularly reflect or focus the beam it did seem only correct to include a conical shape to the torch head to make it at least look correct! The plan is to keep this simple with the LED glued into place with a blob of hot glue. The LED will need a resistor to limit the amount of current supplied to it from the LiPo, if you connected the LED directly to the LiPo the LED would simply burn out in a fraction of a second. Whilst you can use an online LED resistor calculator it’s not too arduous to do the maths! You need to know the voltage supply (Vs), in our case, our full charged LiPo will be at 4.2V. We need to know the forward voltage (Vf) of our LED and this can be found in the devices data sheet, note that this is a different value for different LED types and varies a lot with the LED colour. For our device, the forward voltage was listed as 3V. Finally, we need to know the forward current (If) which again is usually listed in the datasheet. For our device, this was 20mA or 0.02A. We can then use the following formula to find the resistance required (R). R=(Vs-Vf)/If. So for our device, this looks like, R= (4.2-3)/0.02 which equals 60 ohms.
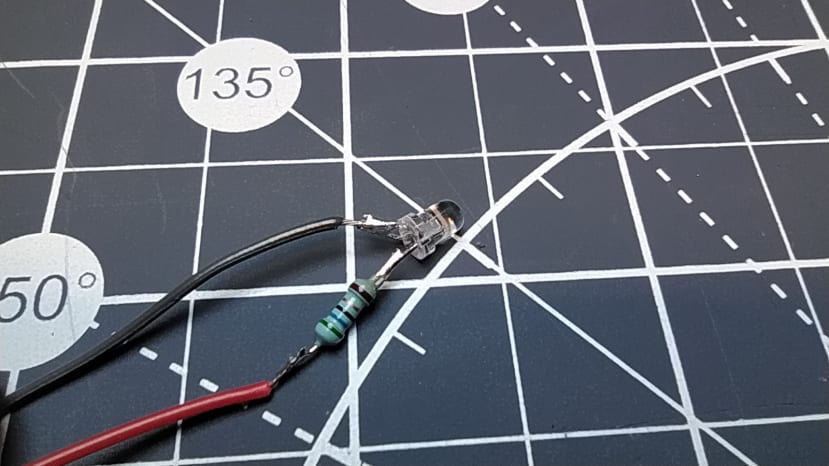
The closest value in our collection was 56 Ohm and we simply soldered this inline with the anode lead on the LED. To reinforce this a little we then covered it in some heatshrink tubing, but it’s fair to say we aren’t building this torch to be particularly rugged, more of a desktop tool.
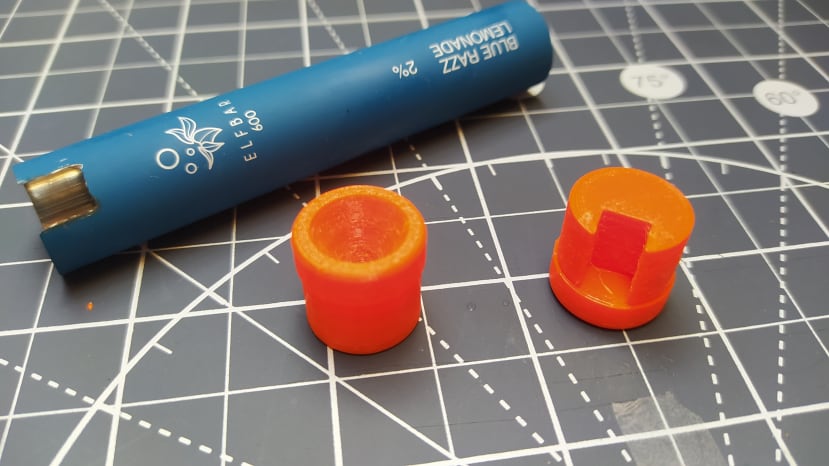
Jumping to the other end of the torch we designed a rear cap which has a cutout section that could receive a 6mm square momentary press switch and we used a Dremel tool to carefully grind a section out of the metal tube so that the button could sit just proud of the surface. Again we will hold the switch in place using a blob of hot glue. We planned to glue the front end of the torch in position permanently whereas the rear section we want to be able to remove to insert and remove the LiPo cell, therefore making the rear end a tighter tolerance fit.
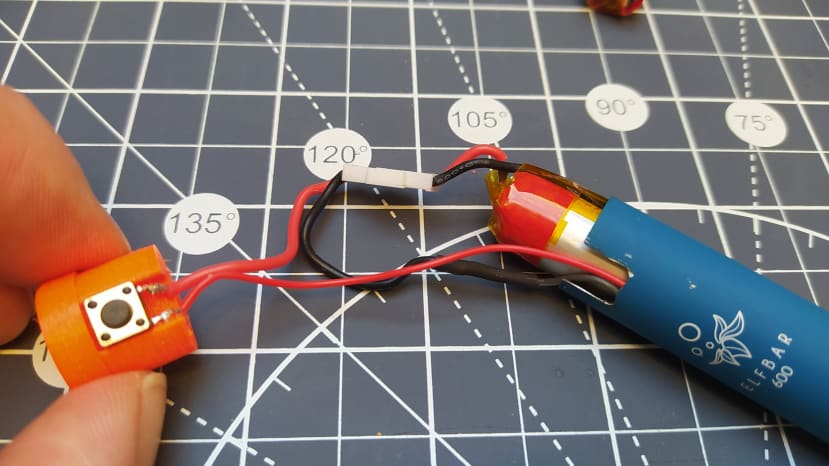
With a little extra wire to spare we wired up the LED to the button and included a LiPo connector in the small wiring loom. We’ve added extra wire so we can clear the rear cap out of the way to slide in a LiPo cell and we’ve used a salvaged cell which has a small piece of foam attached, which the original E-cig’s use to restrict the cell from moving around inside the tube. Putting it all together was pretty straightforward and the 3D-printed end parts went into the tubes well. It’s a very handy little device and works really well to charge up the lume sections on watches, but it’s not just limited to that, you could use it to help cure small sections of trapped UV resin in SLA 3D prints, or, you could combine it with a UV pen for secret spy messages!