Building a Portable DJ System into a Traditional Red Metal Toolbox Part 4: Adding a Cold Cathode Tube VU Meter
Follow article
 Dave from DesignSpark
How do you feel about this article? Help us to provide better content for you.
Dave from DesignSpark
Thank you! Your feedback has been received.
Dave from DesignSpark
There was a problem submitting your feedback, please try again later.
Dave from DesignSpark
What do you think of this article?
Adding a Cold Cathode Tube VU Meter for extra visual impact
Attention seeking behaviour
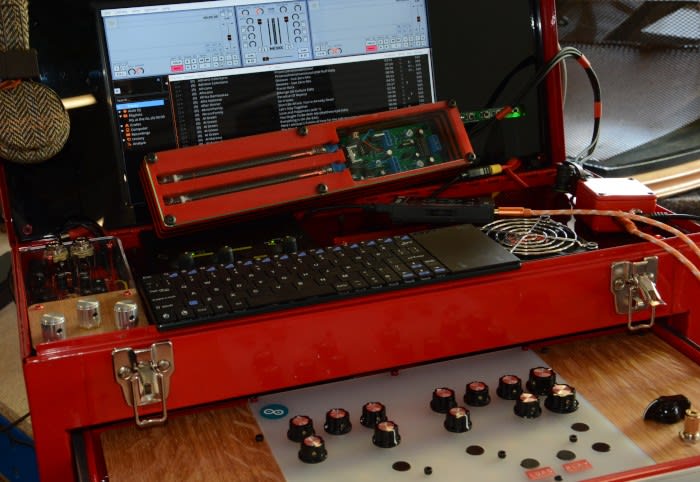
I’ve mentioned before that digital DJs can find it difficult making their presence felt when performing. Fiddling with a laptop isn’t exactly the most exciting visual spectacle. The Red Tin goes some way to counteract that – it certainly draws attention, but more would be good. Short of practising my DJ “Jesus pose” I was not sure what else I could do, until, that is, my colleague mentioned that he had a kit for building a “Nixie” tube VU meter. A couple of 13 cm orange glowing tubes pulsating in time with the music should certainly draw attention.
About the Nixie ИН-13
Nixie tubes are a favourite of DIY electronics enthusiasts. The internet is littered with plans and kits for clocks and thermometers. Although “Nixie” and similar cold cathode display tubes were originally patented and developed in the US, it seems the USSR really embraced the technology and continued producing and using them in large numbers long after the West had largely switched over to LED displays. The reasons for this don’t seem particularly clear — maybe the state had so much invested in the technology they did not want to abandon it. The consequence of this is that nearly all the tubes come from Russia or other former Eastern Bloc countries. If you are interested in how a cold cathode tube works there is a good detailed description here
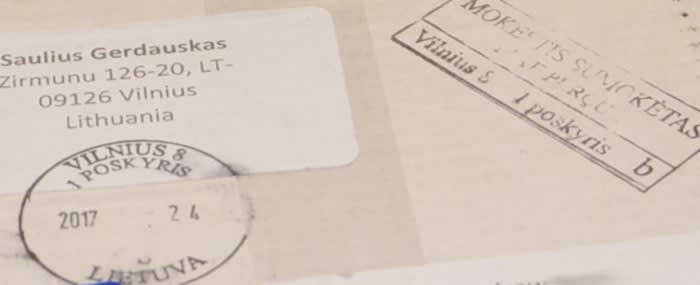
Components – From Lithuania with love
The kit I got came from Lithuania and was complete with circuit board and all the components but, unfortunately, no tubes. As noted above, the only place to source the IN-13 tubes that the kit specified seems to be Eastern Europe, which meant there was a little wait before they arrived.
I decided to crack on with putting the kit together anyway.
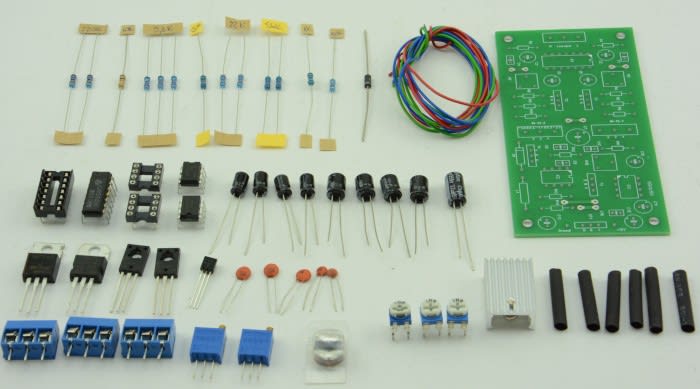
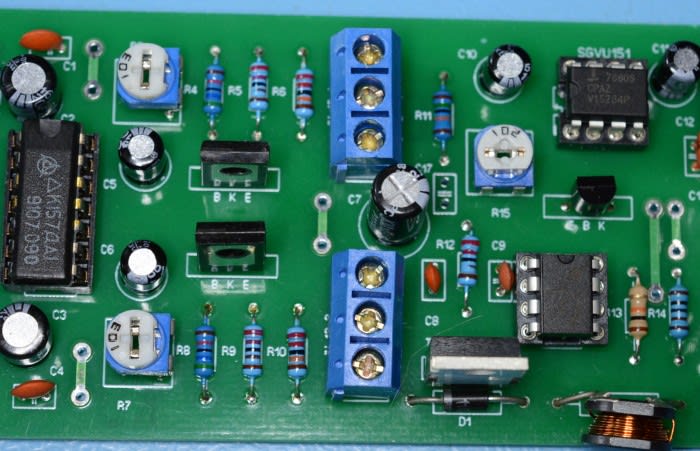
I found the kit that I had listed on ebay, including some pictures of an assembled board which I thought would prove useful. I always think that when it comes to working out what component goes where the more information I can get the better. I also had the schematic that came with the kit and thankfully all the resistors were labelled with their values.
The kit didn’t come with sockets for the Integrated Circuits, intending that they should be soldered directly on to the board. As they can be susceptible to damage from overheating I thought sockets would be a good idea and luckily we had some “in stock” that I could use.

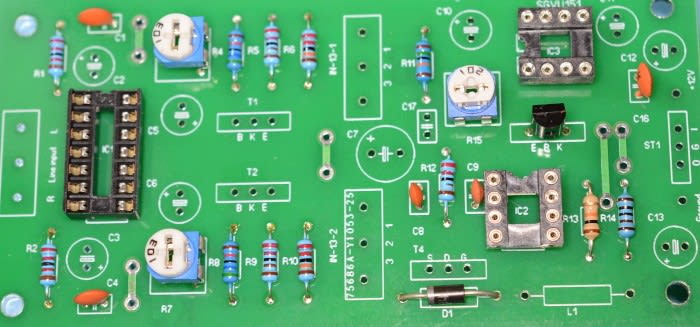
As usual, I started with the smallest components and worked up to the large transistors and connectors, taking care along the way that the capacitors were correctly aligned.
I could then fit the Integrated Circuits into their sockets, again making sure they were the right way round, and fit the heat sink.
I should at some point give credit to the Metcal PS-900 Soldering Station
(045-6018)
that I’ve been using. It is a joy to solder with and has made my recent Red Tin projects that involve soldering an awful lot easier.

Set up and adjustments
Once the board was fully assembled I followed the setup instructions. This involved measuring the output voltage and adjusting one of the variable resistors until this was the 140 volts required by the tubes.
The tubes had now been delivered and so I connected them and then input a 1kHz sine wave at 0dB, and adjusted the other 2 variable resistors to set the desired 0dB position of the glow.
I connected it to my ‘phone to provide a musical audio source to see how it behaved and the left and right tubes reacted as expected – bouncing up and down to the music, although as the signal was a bit weak it was a bit more of a flicker than a bounce.
Connecting it the Red Tin, with its much louder output, produced a far more desirable effect.
Enclosure – keeping the tubes safe
My initial plan for fixing the tubes to the tin was to build a laser cut acrylic enclosure for each one and fix them to either side of the tin on hinges, reminiscent of the old Morris Minor indicators (or “trafficator” as Morris called them).
This unfortunately proved to be impractical and I decided to put both tubes in one enclosure made from multiple layers of acrylic. This would have the benefit that the meter was a handy self-contained unit that could be used to monitor audio levels in all sorts of situations, and I would be able to place it in a prominent position when I was using it with the Red Tin.
Once again I used corrugated cardboard for the prototype.
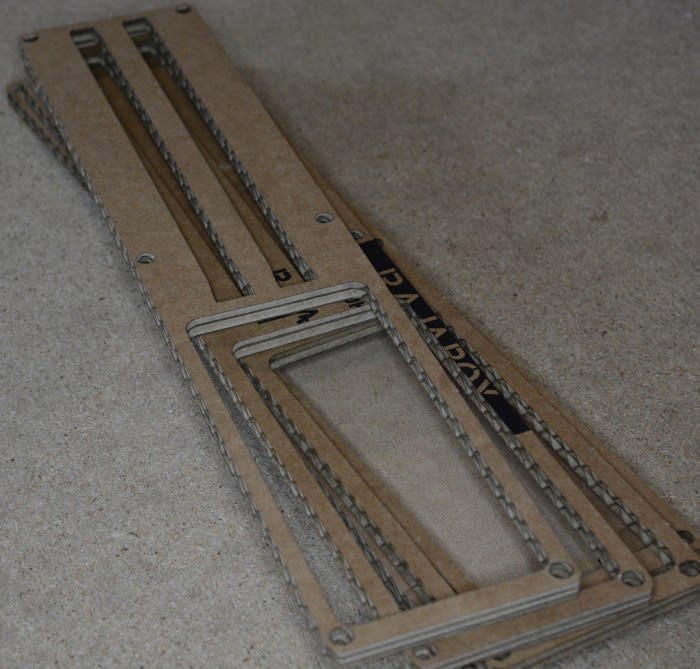
The finished enclosure is made of alternate layers of black and red which gives it a decidedly Dennis The Menace appearance.
Finished off, of course, with a transparent layer to show off the tubes and the circuit board.

Connections
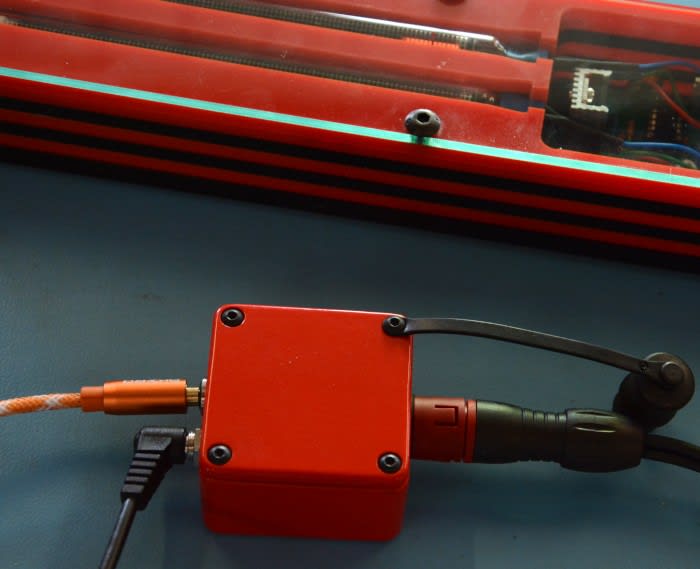
I made up a cable to connect up power and audio in one handy unit using the 5 pin version of the Binder connector (734-5502) I had used in the 12V Power Supply for the tin.
I then made up a “break out” box with a 2.5mm 12V socket (048-7842) and a mini-stereo socket (907-5680) housed in one of the nice red aluminium boxes (797-0870) so that the meter could be connected to commonly found power and audio sources.

Taking it out for a spin
Mixxx, the open source DJ software, lets you use two sound cards, so I plugged my spare one in and assigned Booth output to channel 1 and 2 in the Mixxx settings.

I can then just plug the VU meter into the spare sound card, play some music and watch the pretty lights!