Hands-on with the Thermochron iButton Starter Kit
Follow article
 Dave from DesignSpark
How do you feel about this article? Help us to provide better content for you.
Dave from DesignSpark
Thank you! Your feedback has been received.
Dave from DesignSpark
There was a problem submitting your feedback, please try again later.
Dave from DesignSpark
What do you think of this article?
Getting to know the Thermochron iButton Starter Kit and using the OneWire Viewer to set up and read an iButton.
Maxim's iButton devices are small, durable modules. Each one has a unique digital address and communicates with the outside world using Maxim’s 1-Wire protocol. The iButton is housed in a stainless steel can which, as well as protecting it, acts as its communications interface. The data contact is the lid of the can and the ground contact the base. These are connected to the chip inside the can. The two contacts are separated from each other by a polypropylene grommet running around the inside of the lid.
The iButtons are rugged and Maxim claims they can survive being dropped and stood on, are water-resistant and certified to IP56 standards, although they are not waterproof.
iButtons are frequently used to monitor and record atmospheric conditions, such as temperature and humidity in circumstances where such things are critical. They can also be used to control doors and monitor access to buildings and containers, or for asset management.
Maxim cites a typical application in Life Science Supply Chain Management: “Once placed in a medical transport container and instructed to start its mission, an iButton device can log the temperature … throughout its journey. The duration and recording intervals can be variable”. Rather more prosaically, I am going to use one to monitor the temperature of our work ‘fridge.
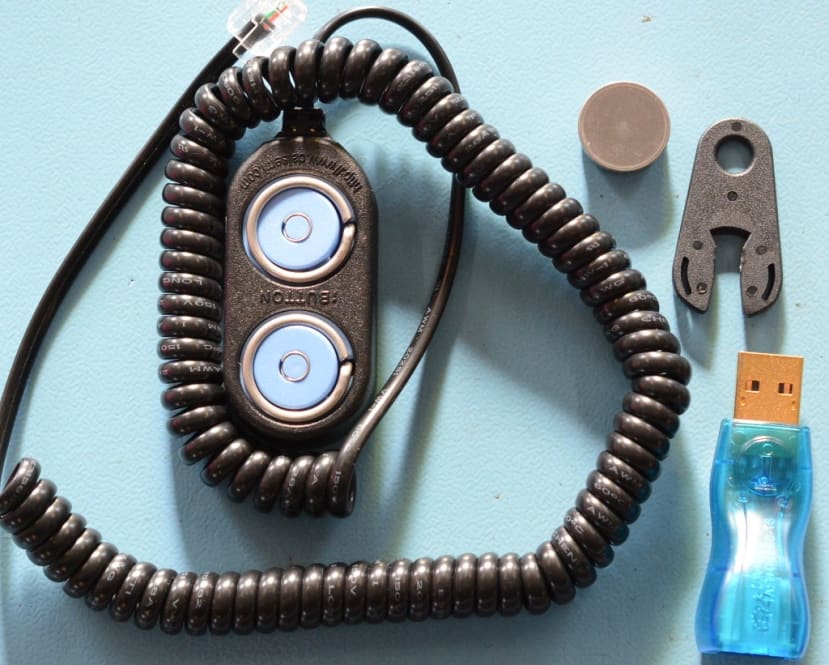
The Starter Kit
The Starter Kit (191-4207) comes with a Thermochron iButton which records temperature. In addition to the iButton, the kit includes the Blue Dot Receptor and a USB adapter and cable which, when connected to a Windows PC, allows communication with the Button.
The iButtons come in 3 basic varieties; enclosed with a battery, without a battery and as a chip without the enclosure. The Thermocron is the first of those and reading through one of the FAQs on the Maxim website, I discovered that the button’s battery is not rechargeable, but claims to have a life of 5 years at temperatures below 50C (I also discovered that it is not recommended to use the button inside any living creature). The iButton is shipped with the clock disabled to preserve battery life.

Talking to the iButton
To start communicating with my iButton I needed to install a Windows application and drivers. These can be downloaded from the Maxim web site and come as a single zipped-up Windows installation file. When un-zipped, double-clicking the resulting .msi file will install the necessary drivers and the application. This needs doing before the iButton reader and adapter are plugged into the PC. As the OneWire Viewer application requires Java 6 or higher, you may also need to install this and the installation file can be downloaded from the Java website.
Once the installation is complete, the USB adapter can be plugged in and the drivers will then install automatically.
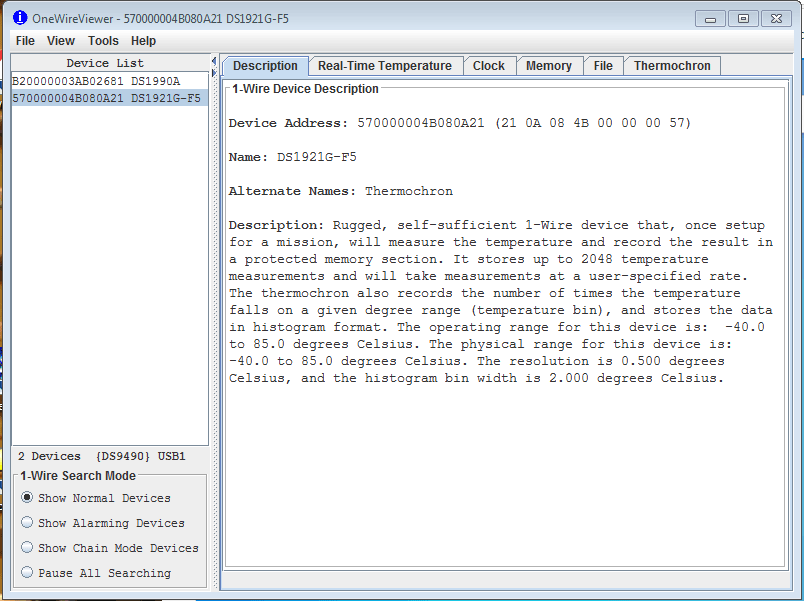
The OneWire Viewer - “OneWireViewer.jar” - can be found in Windows Start in the "1-Wire Drivers x86" folder under All Programs and double-clicking it will launch the application.
There is a Quick Start Guide for the iButton and OneWire Viewer on the Maxim website that I found helpful.
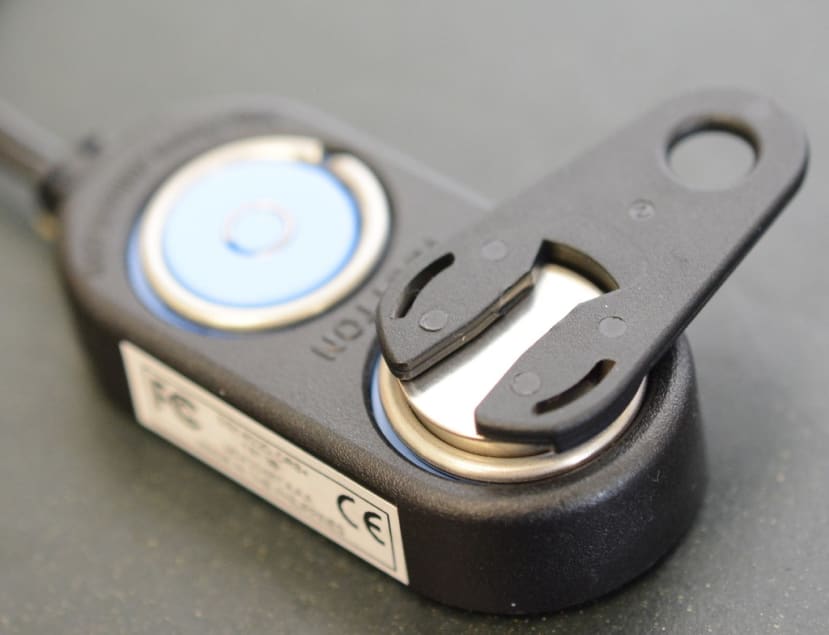
The iButton snaps into the reader and can optionally be clipped into a fob, which makes it easier to remove. With the iButton in the reader and the reader connected to the PC, when the viewer is launched the iButton will be listed in the left-hand column. Clicking on the listing will display details of the iButton under the Description tab.
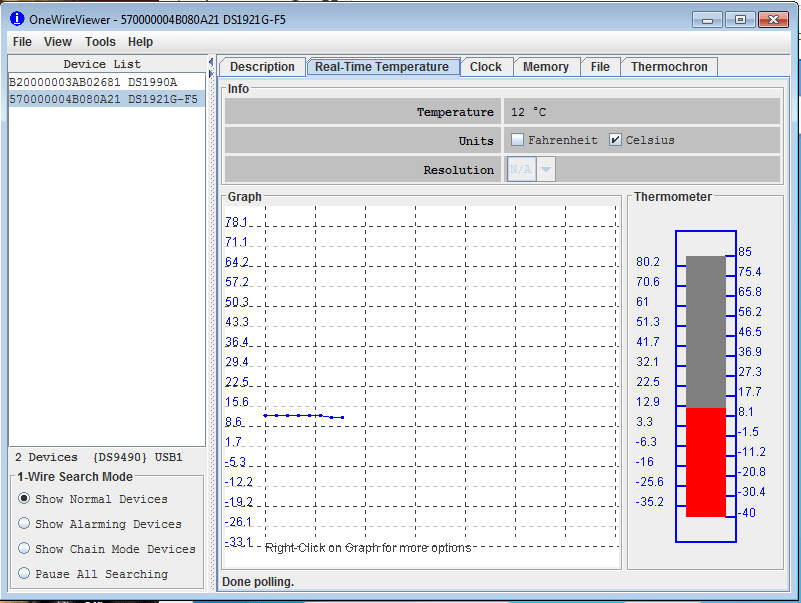
The Thermochron is already monitoring temperature and this can be displayed in the viewer’s Real-Time Temperature tab.
Setting up a Mission
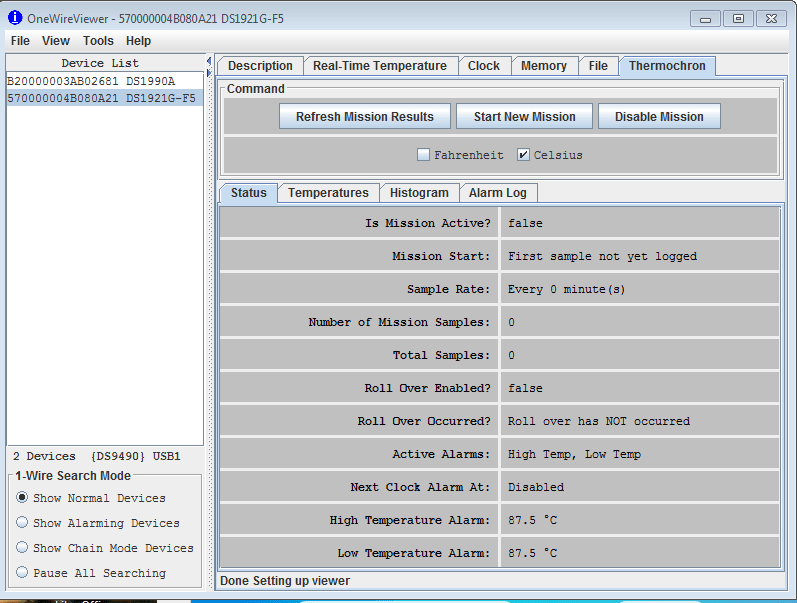
The set of instructions governing how the iButton records and saves data are described as a “Mission”. The parameters are set in the OneWire Viewer and there is a comprehensive guide available as a PDF document.
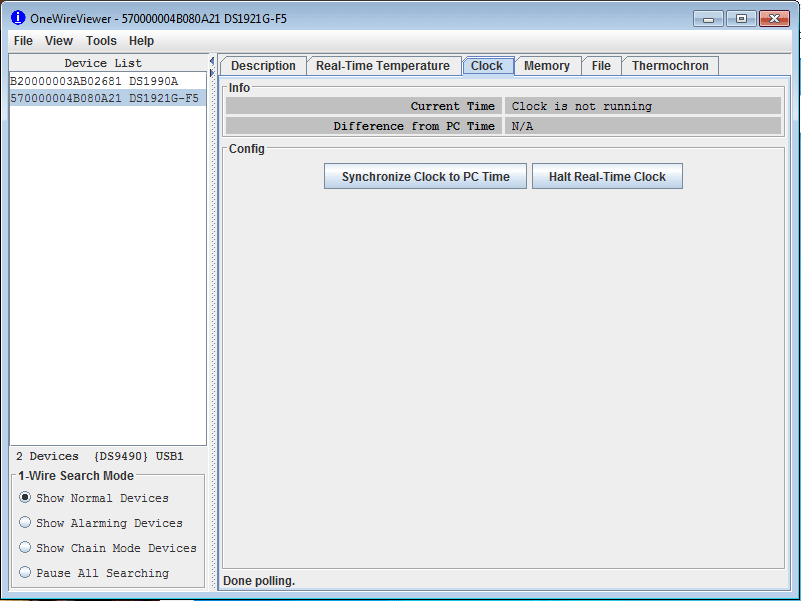
The first thing to do is set the clock on the iButton by clicking on the Clock tab and clicking the “Synchronize Clock to PC Time” button.
Then a Mission can easily be set up by opening the Thermochron tab in the viewer software. Here you will see 3 buttons, including the “Start New Mission” one.

Clicking on this brings up a new window where the Mission settings can be input. These are fairly straightforward. As a “real-life” test I was intending to put the button in our fridge at work which has taken to occasionally freezing things. I set the sample rate to 10 minutes, a low-temperature alarm at -1C and a high alarm at 5C. I left the Clock Alarm settings as they were – as it says in the guide “The clock alarm functions are not relevant for a device on a mission”.

Although not relevant here, “Enable Rollover” is used on longer missions and comes into effect when the iButton’s memory is full. If checked it will overwrite the existing logs and if left unchecked it stops recording when it runs out of space.

Having set the button up I unplugged it from the reader and put it in the fridge.
The next day I retrieved the Thermochron from the fridge and plugged it back into its reader.

Once the iButton is back in the reader and selected in the viewer, clicking the Thermochron tab will reveal the device data tabs. Selecting the Temperature one will display a graph. Right-clicking on the graph gives the option to export the data as a text or .csv file.
I could also see information about when the alarms I had set had been set off. It looks like our fridge is getting too cold a lot of the time and probably has a faulty thermostat.

My next question was how to turn the iButton off until I wanted to use it again. I had seen that it was monitoring temperature right out of the box, but not logging it until a Mission was started. I disabled the current Mission by clicking the appropriate button and then, as suggested in the FAQ, in order to preserve battery life, I disabled the clock by clicking the 'Halt Real-Time Clock' button under the Clock tab of the viewer.
I have used the OneWire Viewer here as a simple way to set up a Mission and view data, but an SDK is also available from the Maxim website and can be used for developing custom applications.
The Thermochron iButton was simple to set up and it was fun to try it out in a real-life scenario. I can also see how much more useful it would be in monitoring the temperature of medical supplies or food, for example.