Useless Machine: Make a Mess & have Fun! Part 2
Follow article
 Dave from DesignSpark
How do you feel about this article? Help us to provide better content for you.
Dave from DesignSpark
Thank you! Your feedback has been received.
Dave from DesignSpark
There was a problem submitting your feedback, please try again later.
Dave from DesignSpark
What do you think of this article?
In Part 1, I described the base part of a rather useless machine. Here I will talk about the top part with all its stylish tubes, valves, pumps, and tanks. I also explain in detail how I prepared the RevPi Core for its tasks. Please flip back to part 1 if you missed it and want to know what this is all about.
Initially, we wanted to power the system with the mighty RS Pro power banks, but all the illumination resulted in an average power consumption of about 30 W. This would flatten even a 15 Ah power bank (= 75 Wh) in two or three hours. Taking into account the transport difficulties of Li-batteries (there are strict regulations for air traffic) we decided to use a 12 V lead gel battery with 22 Ah (= 264 Wh) to give us power for at least ten hours for a full trade show day. Alternatively, we could also use a regular 12 V 120 W power supply which would cover even the worst case of all pumps, valves, and LEDs being switched on. Using standard 12 V car cigarette lighter plugs makes power connection easy.
The second part of the machine is the top framework which loosely sits on the base part and is held in place by little guiding plates mounted to the base. The top framework is mainly made out of 20 mm aluminium struts and a 36 x 66 cm aluminium base plate. Most of the parts are mounted to this base plate by using 4 mm screws and threads tapped into the plate. For the taller parts, I thought it would be wise to support them by a vertical back-framework to which they got attached. Here are some pictures I have made during the positioning and mounting of containers, pumps, and valves:
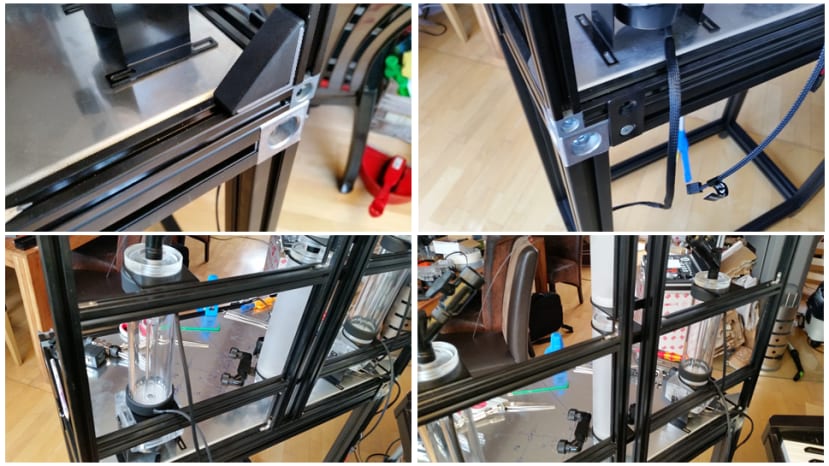

As you may imagine, this was kind of iterative work. To find the right position of drilling holes for the threading. Drawing some symmetry axis on the baseboard did help a lot. My 3D construction drawing did not include most of the tubes. They cannot be readily bought bent for my construction, but instead, I had to bend them. They are made out of acrylic glass and can be bent over hot air. To prevent changing the diameter while bending you pull a silicon rope inside the tube and leave it there during this process. Alphacool provided me with professional bending tools, but still, those tools would only be useful for 2D bendings while I needed complicated and asymmetrical 3D bendings. So I struggled many days and wasted plenty of deformed tubes along the flat training curve before I learned to choose the right moment, temperature and force to bend this stuff correctly. Thanks to DesignSpark Mechanical and my Prusa i3 MK3, I could print some stylish tube holders to hold the complex shaped curves firmly in their position. This was important to make the setup rigid and reliable (you won't believe where visitors are pulling and pushing once they started touching an exhibit). The following pictures may give you an impression of the result. Please note the chrome rings around the tubes. They are LED lights with built-in LED strips (their wires are dressed in neon cable sleeves):
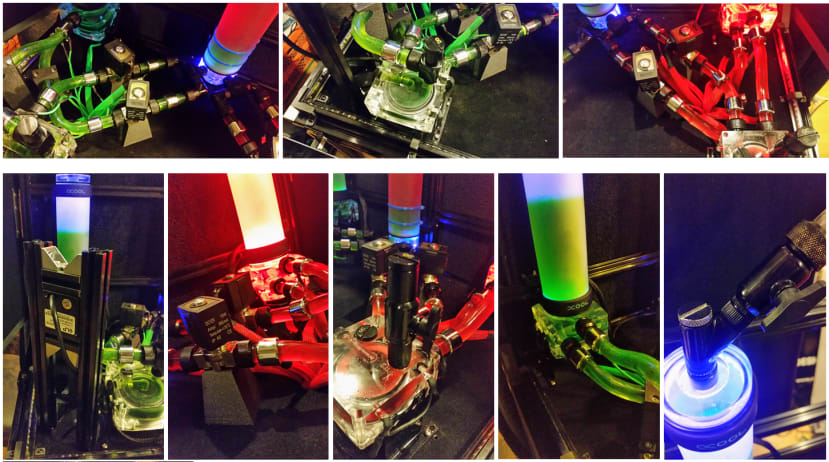
There is a UV LED stripe at the border of the ground plate. Together with the dark black felt foil covering the aluminium plate, you get a first-class eye-catcher.
The USB camera is tight mounted on a post in the left front corner of the plate so that it can get a picture of all three containers. Have you already detected the two blue lines around the middle tank? These are blue neon straps which mark the edges of the level range of uncertainty. The upper outlet is a tube in the centre of the container reaching its bottom. Its top end is positioned right in the middle between the two blue lines. By getting the position of these lines, the picture analysis software knows the height of the tube’s ending. The water level must be lowered to the lower blue line to ensure that no water will be sucked in the upper outlet.
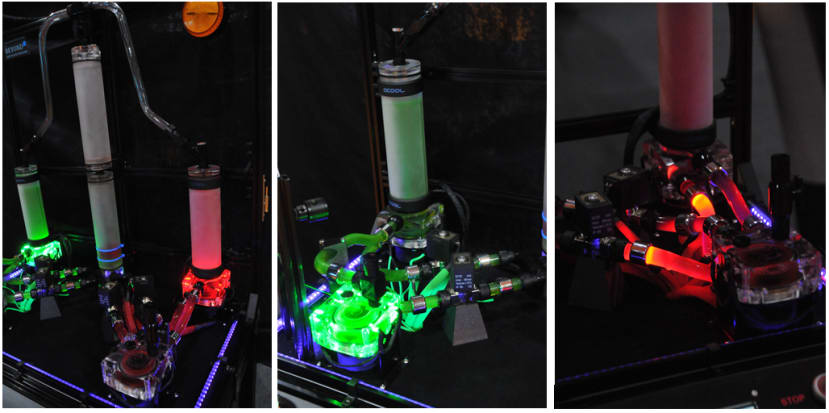
Let’s talk about the fluids:
The green fluid is a mixture of distilled water and green cooling liquid from Alphacool. I added a few crumbs of Uranin, a potent fluorescent colour. The New York Irish community used to tint the Hudson River green on St. Patricks Day using some cups of this powder.
Oil is quite challenging to colour. Very often people use pigment colour to do so. But pigment colour does leave its traces on the surface of the container and does merge (although very bad) with water. As I also wanted to use a non-hazardous liquid, I decided to take low viscosity paraffin oil. You get this fluid red-tinted as “lamp oil”. Although its viscosity is quite low, the original pumps nevertheless had several ramp-up problems – they did not always start after switching the related relays. So I needed to replace the modern electronic pumps having the soft start to an older type without this feature. Completely emptying the system was a big mess. Although I had attached an extra outlet hose to the lowest point of the middle tank, lots of paraffin stayed in the tubes, and I needed tons of tissue paper to prevent it from drowning my base plate. But such things happen when you want to operate high-tech pumps outside the specified operating conditions. They are constructed for water and not for oil.
Preparing the RevPi Core
Installing openCV on a RevPi is challenging. You need to get the sources from GitHub and compile them. The free EMMC space on a RevPi3 is not sufficient for this procedure. So you may use a USB memory stick to get more GB disk space, or you might use the new RevPi Core 3+ with 8 GB eMMC (or even more). I was lucky to get the RevPi Core 3+ from Kunbus, so there was enough free memory on the eMMC. I will give you complete instructions for the installation at the end of this article.
Additionally, I installed the matplotlib:
sudo apt-get install python3-matplotlibI also installed Sven Sager’s RevPiModIO library (see PYTHON – Let the „Monty-language” enter Automation). Thank you, Sven, for the quick updates containing new features that fit my demands!
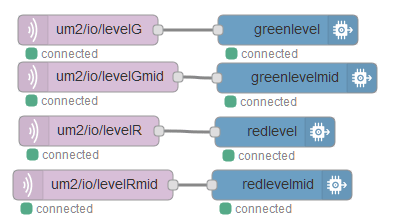
To make MQTT data exchange easy, I integrated my openCV results in a so-called virtual device which can be configured in the RevPi browser-based configuration tool “PiCtory”:

You can write and read the process image’s values of such a module, just like any real IO device. PiCtory only reserves input and output bytes in the process image for a virtual device. By writing the results of the openCV calculations into the input bytes, any software (including RevPiModIO) can handle these input bytes as if they have come from hardware sensors. Let me know if you want to know more about this fantastic possibility to add your own software-based inputs.
I installed a MOSQUITTO MQTT server. RevPiModIO does allow you to publish process values to such a server automatically (please enable and configure this function by editing the revpipyload.conf file - see the article mentioned above). Any client connected to this server can subscribe to receive a message whenever the value of the topic subscribed to has changed. I use a simple NodeRed flow with an MQTT client node to do so and an IBM Watson node to get this value up the cloud. My flow contains four of these node pairs for outer and inner, as well as green and red fluid levels.
For some unknown reason, the actual RevPi image no longer contains NodeRed. So we need to install this great tool manually using the command line prompt in a terminal window (or ssh connection):
bash <(curl -sL https://raw.githubusercontent.com/node-red/raspbian-deb-package/master/resources/update-nodejs-and-nodered)You also need to autostart the NodeRed service permanently by entering the command
sudo systemctl enable nodered.servicePlease refer to the article mentioned above to find details of how to use MQTT, IBM Watson and NodeRed on RevPi.
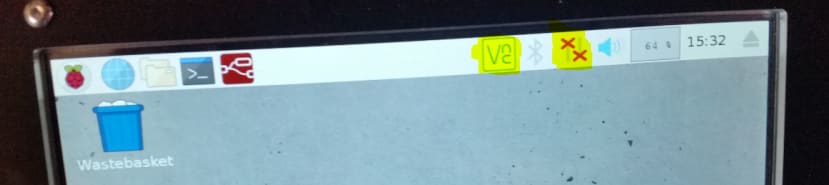
As we need an internet connection for this IoT functionality, I added a Wifi-Stick to the USB hub. Doing so with a RevPi can be quite pesky. Due to a bug, you cannot use the graphical desktop to easily search for a network and connect to it the first time you want to do so. The list of networks (usually seen when clicking on the network symbol in the taskbar – right of the two yellow marked icons in the picture) is initially empty.
The only way to get this functionality is to configure the first connection manually. When you have done so once, you can then always use the desktop to search for networks and connect to them. The reason for this bad behaviour seems to be an empty network entry in the "wpa_supplicant.conf" file. So start by deleting the empty default network entry in "wpa_supplicant.conf" which seems to block the system finding networks.
sudo nano /etc/wpa_supplicant/wpa_supplicant.confYou then can manually configure a Wifi connection using the following commands (replace WLAN-NAME and WLAN-PASSWORD by the correct credentials):
sudo -i
wpa_passphrase "WLAN-NAME" "WLAN-PASSWORD" >> /etc/wpa_supplicant/wpa_supplicant.conf
exit
These commands add a network entry in “wpa_supplicant.conf” using encryption for the passcode.
The Waveshare 7” Display does not run on a Raspi or Revpi out of the box. Its resolution of 1024 x 600 pixels at 60 Hz is uncommon, and therefore you need to adjust the HDMI resolution manually:
# uncomment if HDMI display is not detected and composite is being output
hdmi_force_hotplug=1

# uncomment to force a specific HDMI mode (this will force VGA)
max_usb_current=1
hdmi_group=2
hdmi_mode=1
hdmi_mode=87
hdmi_cvt 1024 600 60 6 0 0 0

# uncomment to force a HDMI mode rather than DVI. This can make audio work in
# DMT (computer monitor) modes
hdmi_drive=1
I enabled the VNC server on the UM2 so that I can support DesignSpark from Germany in case of any trouble. This can be done using the raspi-config command. Follow the instructions after clicking on the VNC icon on the desktop’s taskbar (see left of the two yellow marked pictures of the above screenshot) to use a remote connection (you need an account and credentials to do so). To establish a so-called “Kiosk mode” (full graphical screen without the possibility for users to get to the desktop or the command line and without displaying the cursor) you need to follow this instruction:
- Use “sudo raspi--config” to change the boot mode to “Desktop with autologin”.
- Install "unclutter" (sudo apt-get install unclutter)
- Edit the unclutters configuration file (sudo nano /etc/default/unclutter) by changing this line:
EXTRA_OPTS="-idle 30 -root"- Add the following lines to the LXDE autostart file to get rid of power-saving screens and screen savers (sudo nano ~/.config/lxsession/LXDE-pi/autostart):
@xset s 0 0
@xset s noblank
@xset s noexpose
@xset dpms 0 0 0
@starter.sh &
- The last line does start a shell script (“starter.sh”) which needs to be created (sudo nano starter.sh):
#!/bin/sh
python3 UM01.py
python3 wd.pi- It does start the main program (UM01.py) as well as a little software watchdog (see below why using such a watchdog) as soon as the graphical desktop has been started. Do not forget to make all three files executable for the system:
sudo chmod 0777 UM01.py
sudo chmod 0777 wd.py
sudo chmod 0777 starter.sh
By the way: When installing so many large libraries and making so many configurations, it is always wise to create an image copy of the eMMC before and after installation and configuration. You can save a lot of time in case of an unintentional system crash.
Enough for this part. But the cool stuff is yet to come: In part 3, I will describe the Python control software and how I used openCV to detect the fluid levels. So stay tuned for the next part!
Addendum: Installation instructions for openCV
I used these sources of information:
https://www.pyimagesearch.com/2017/09/04/raspbian-stretch-install-opencv-3-python-on-your-raspberry-pi/
and
https://revolution.kunbus.de/tutorials/software-2/opencv-installieren/
UPDATE YOUR SYSTEM:

sudo apt update
sudo apt upgrade
sudo apt update
(you definitely need the second update after the upgrade!)


INSTALL DEPENDENCIES:

sudo apt-get install build-essential cmake pkg-config
sudo apt-get install libjpeg-dev libtiff5-dev libjasper-dev libpng12-dev
sudo apt-get install libavcodec-dev libavformat-dev libswscale-dev libv4l-dev
sudo apt-get install libxvidcore-dev libx264-dev
sudo apt-get install libgtk2.0-dev libgtk-3-dev
sudo apt-get install libatlas-base-dev gfortran
sudo apt-get install python2.7-dev python3-dev
(my image already had the newest version 2.7.13-2+deb9u3 / 3.5.3-1 of Python)


DOWNLOAD SOURCE CODE:

cd /mnt
wget -O opencv.zip https://github.com/Itseez/opencv/archive/4.1.1.zip
unzip opencv.zip
wget -O opencv_contrib.zip https://github.com/Itseez/opencv_contrib/archive/4.1.1.zip
unzip opencv_contrib.zip


UPDATE PIP:

wget https://bootstrap.pypa.io/get-pip.py
sudo python get-pip.py
sudo python3 get-pip.py


COMPILE:

cd opencv-4.1.1/
mkdir build
cd build
cmake -D CMAKE_BUILD_TYPE=RELEASE \-D CMAKE_INSTALL_PREFIX=/usr/local \-D INSTALL_C_EXAMPLES=OFF \-D INSTALL_PYTHON_EXAMPLES=OFF \-D OPENCV_EXTRA_MODULES_PATH= ../../opencv_contrib-4.1.1/modules \-D BUILD_EXAMPLES=OFF ..

Do not use a larger SWAPSIZE as several instructions recommend! The RevPi Core does not have enough memory for a large SWAPSIZE (e.g. 1024)

make -j4

(this takes more than an hour, and you might need to repeat the command if due to the lack of memory only part of the make process could be finished!)


INSTALLATION:

sudo make install
sudo ldconfig


CHECK YOUR SUCCESS:
(use Python, e.g. Idle)

>>> import cv2
>>> cv2.__version__
'4.1.1'