The RF Solution for Arduino
Follow article
 Dave from DesignSpark
How do you feel about this article? Help us to provide better content for you.
Dave from DesignSpark
Thank you! Your feedback has been received.
Dave from DesignSpark
There was a problem submitting your feedback, please try again later.
Dave from DesignSpark
What do you think of this article?
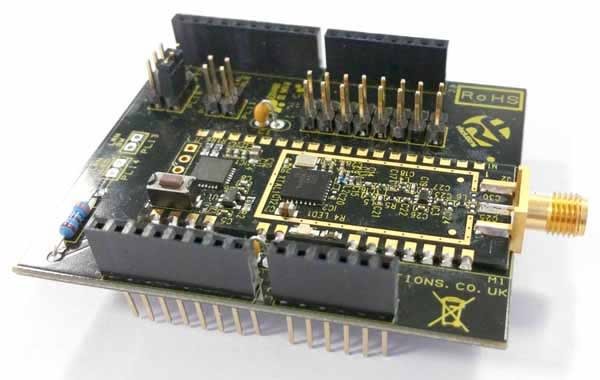
The popular UK Electronics manufacturer, RF Solutions Ltd, have developed a range of Arduino Uno shields containing their RF modules.

The new shields act as an interface between a range of RF Solutions' modules and the Arduino Uno. Versions available include; BRAVO, ZETA, KAPPA and GAMMA - their 16km radio module.
The shields are easy to mount, simply plugging in to the top of an Arduino Uno. They have been created to add wireless functionality to applications using the Arduino.
Application Example:
The below example uses 2 GAMMA-ARD's and 2 ARDUINO-Uno's. A simple send/receive setup is shown using 4 inputs and 4 outputs on both of the shields.
In the example each of the outputs are wired into LED's and the inputs are wired into push buttons.
As the GAMMA can act as a transceiver module, the two shields are able to communicate with one another. Identifying when a signal has been sent (from the push switch) and received by the other shield (lighting an LED).
Setup
Step 1: Programme the Arduino Uno to suit the applcation (there is some sample code attached).
Step 2: Mount the GAMMA-ARD to the top of your Arduino Uno.
Step 3: On each shield, wire in pins 3, 4, 7 and 8 to the outputs (LED's).
Step 4: On each shield, wire in pins 9, 11, 12 and 13 to the inputs (push buttons).
Step 5: Ensure jumper link OPT1 is connected and OPT2 is not connected on both shields. This tells the GAMMA module to operate in transceiver mode (for other modes see datasheet attached).
Step 6: Apply power to both of your Arduino Uno's.
Step 7: Pair your GAMMA shields together so that they can communicate. Each GAMMA module has a unique serial number identity. GAMMA modules may be paired together using the on-board 'Learn' button so they can operate together.
Pairing process:
1. Press and hold the 'Learn' button on one of the GAMMA shield's for two seconds, or until the LED begins to flash. This places the module in pairing mode.
2. On the other GAMMA-ARD momuntarily press and release the 'Learn' button (this sends a pairing packet to the other shield).
3. The two shields are now paired.
4. Briefly press the 'Learn' button to exit the mode on the first shield you staretd with.
5. Repeat steps 1-4, starting with the other GAMMA-ARD from what was started with before. This allows the GAMMA shield's to communicate in both directions.
Pairing is complete!
Potential Applications
The above example is a simple and basic setup to show how the shield works and can be used.
RF Solutions' shield range allow RF to be added to the Arduino, quick and simply.
Full Product Range:
GAMMA-ARD: RF Solutions' most impressive module yet is available for the Arduino. The GAMMA is a telemetry module, allowing two way communication to be made. What's more, this module can achieve a range of over 16km!
BRAVO-ARD: A reliable transceiver shield which can achieve a range of up to 1km. Two or more shields can be used to provide a simple or complex network of radio switches.

KAPPAM-ARD: The KAPPAM shield provides a reliable module to module radio link. A range of up to 500m can be achieve in a KAPPAM-ARD to KAPPAM-ARD setup.
