Step-by-step for installation of Cura 4.7 | 3D Design | DesignSpark
Follow project
 Dave from DesignSpark
How do you feel about this article? Help us to provide better content for you.
Dave from DesignSpark
Thank you! Your feedback has been received.
Dave from DesignSpark
There was a problem submitting your feedback, please try again later.
Dave from DesignSpark
What do you think of this article?
 In this guide we will take you through the process of installing Ultimaker Cura 4.7. Prepare print with a few clicks, integrate with CAD software for an easier workflow, or dive into custom settings for in-depth control.
To install Ultimaker Cura, please visit the software product page on our website. Select download and choose your operating system. After downloading, run the installation wizard.
Note: The experience of the installation wizard may differ per operating system.
Ensure your operating system is supported by Ultimaker Cura. See the list of supported operating systems and versions for more details.
Ultimaker Cura has some hardware requirements to keep in mind. Please check the full list of minimum and recommended hardware requirements to see if your system is compatible.
Run Ultimaker Cura for the first time
After installation, you can open Ultimaker Cura. Start Ultimaker Cura from your applications or programs folder.
Welcome setup
When you open Ultimaker Cura for the first time, you will enter the welcome setup.
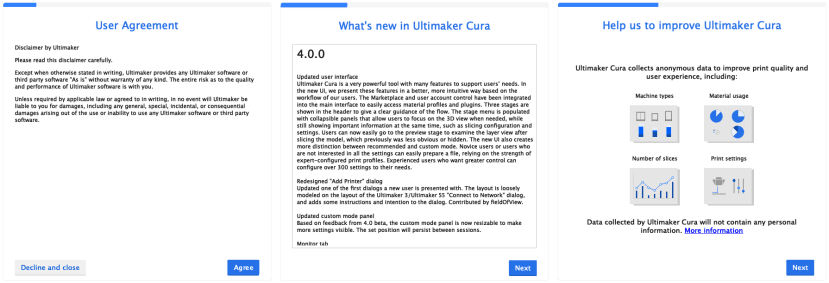
User agreement, release notes, and data sharing
The first few screens allow you to review and accept the user agreement, read the latest release notes and decide whether to allow Ultimaker Cura to collect anonymous user data. Click ‘more information’ to learn what user data will be shared and provide the option to turn data sharing off.
Add printer
Networked and non-networked 3D printers can be added to Ultimaker Cura. If your Ultimaker is connected to the same local network, you can connect to it directly to automatically configure your setup.

- List of networked printers, shows all printers Ultimaker Cura has found on your local network. Default names are shown for Ultimaker printers connected over LAN
- Refresh, click this button to refresh the list of visible printers
- Add printer by IP, this feature can be used if Ultimaker Cura has trouble finding your Ultimaker printer. The IP address can be found on the printer, in the network menu
- Add a non-networked Ultimaker printer, a custom printer or choose any of the available third party printers available
- The type of Ultimaker printer is displayed, to indicate what kind of printer you connect with
- Troubleshooting, links to our resources pages on the Ultimaker website
- Click next to add your printer to Ultimaker Cura
Ultimaker Cloud
The last step is to sign up and log in with your Ultimaker account. An Ultimaker account provides cloud-based tools to make your 3D workflow easier.
- Send and monitor print jobs outside of your local network
- Back up your Ultimaker Cura settings and print profiles
- Get exclusive access to plugins and print profiles from leading material brands in the Ultimaker Marketplace

Interface overview of Ultimaker Cura
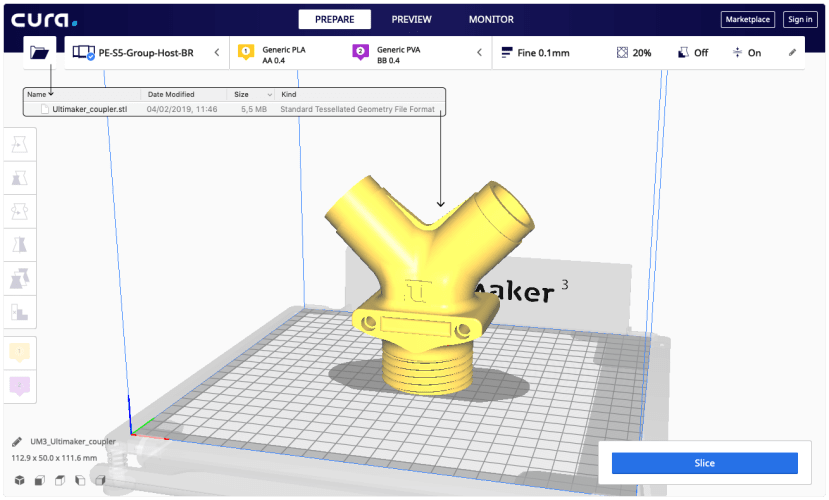
- Open file. Opens a 3D file.
- Printer selection panel. Displays the selected printer.
- Configuration panel. Contains the material and print core setup.
- Stages. The prepare, preview and monitor stage. Each stage is arranged to efficiently go through each 3D printing step.
- Print settings panel. Contains all slice strategy parameters.
- Marketplace. Contains plugins and material packages.
- Ultimaker account. Allows access to cloud functionality, Marketplace plugins and print profiles, backups and more.
- Action panel. Contains an action button dependent on the current stage.
- Print over network. Save to removable disk or save to file.
- Preview. Proceeds to the next stage, the preview stage.
- Camera position tool. Easily positions the camera to default show default viewing angles.
- Model information. Contains the 3D model name and dimensions of all printable models on the build plate.
- Adjustment tools. Move, rotate, mirror, scale, and more options.
How to start your first print in Ultimaker Cura
Open 3D files
The easiest way to open 3D models is by the ‘open file’ button. The button is in the top left corner and is the first button in the stage menu. Select the model you want to prepare for printing and open it. The model will now be loaded and shown on the 3D viewer.
Configure your setup
The second button in the stage menu contains the printer selection panel. Network enabled printers will indicate a valid connection with a checkmark icon. Select the printer you would like to use.
The third button in the stage menu contains the configuration panel. Once opened, the panel displays your current print core/nozzle and material setup. Networked printers will display available configurations in your printer group. Non-network enabled printers need to be configured manually.

Print settings
The rightmost button in the stage menu contains the print settings panel, which includes all settings that define the printing strategy. By default, it opens in the recommended mode. This mode is ideal if you want to do a quick print with optimized printing profiles. There are a few parameters you can set:
- Print settings panel. This panel shows the current printing strategy at a glance, click it to view the entire panel
- Print profiles. The available profiles for the current configuration are visible. Some Ultimaker 3D printers offer intent-based profiles, fine-tuned to meet specific needs
- Infill. The infill slider can be used to easily set the overall model strength
- Support. Enable or disable automatically generated support structures, with either of the available extruders, to get reliable and successful prints when necessary
- Adhesion. Enable or disable additional adhesive printed parts, the type of adhesion is automatically set by the print profile
- Custom mode. This will open the custom mode to manually finetune printing profiles

Slice and preview
Now that the printer type, configuration and print settings are in place, it’s time to slice the model, with the button in the bottom right corner. When the process completes, it will immediately show a ‘preview button’, click it to go to the preview stage.
This view is ideal for seeing what the inside of your print will look like and how it will be printed. Use the layer slider and simulation view to check important parts of your 3D slice.

Save the file
Evaluate and improve the printing strategy until you are satisfied. You can then print directly over the network using Cura Connect, save to removable disk or save the file to your computer.