Serigraphy for PCB
Follow article
 Dave from DesignSpark
How do you feel about this article? Help us to provide better content for you.
Dave from DesignSpark
Thank you! Your feedback has been received.
Dave from DesignSpark
There was a problem submitting your feedback, please try again later.
Dave from DesignSpark
What do you think of this article?
What is serigraphy?
Serigraphy is considered the oldest printing method in the world, we live surrounded by things made on serigraphy, this method is very simple and cheap to implement, you only need ink, a frame, and the necessary chemicals to reveal your artwork in to the frame.
The serigraphy method is expensive?
Not really, its a very cheap method, in the beginning the initial investment can be a little expensive since you need to buy all the equipment and chemicals, but overall still very affordable.
Can I use serigraphy to create a PCB?
Yes, you can use serigraphy to create a PCB, is very easy to do so, once you have mastered the method, you’ll be creating PCB for your prototypes in the blink of an eye. It is possible to create singleand two layer PCB's, of course to create a two layer PCB is a little more complicated than creating a single layer PCB.
With this method, you can create a PCB in your own home. Since the materials required aren’t hard to handle, and you can buy chemicals friendly with the environment, there is not much to worry about this method. With a little practice you will become a serigraphy master.
Some equipment can be made in home, this makes things much cheaper, and easy to get, for example you can create your own revealing table with four chairs, a piece of glass and a light bulb, this doesn’t affect quality at all, but you have to practice knowing how many times you have to expose your frame to light, this is a test and error method, the equipment we need to create a revealed frame is list below.
- A frame (these ones can be obtained in many measurements so you have to calculate how many space you’ll need).
- Emulsion, this can be purchased with a separate catalyst, so you need to make a mix, or you can buy one already catalyzed which makes thing easier.
- Squeegee's one needs to be made for the size of the frame and a second one smaller, for applying the ink in to the design.
- Transparent film for translating your design into the frame, so you can insulate the frame to get the design reveal on it.
- Spatula.
- Hairdryer.
- A piece of glass and sponge.
- Laser printer.
- Chemicals for the ink, you need to dilute the ink in order to get the ideal consistency and be able to work, since the ink normally comes in a thick state.
- Screen printing press, for holding your frame and getting it to the correct angle for working.
- Acid for making your PCB.
- Oven.
- Chemicals for cleaning the frame.
- Transparent and brown adhesive tape.
- You can get all these items at your local store or buy them from the internet. You need to speak with your seller and he will explain which chemicals he can offer you. Remember there are catalyzed solutions, and noncatalyzed solutions, so depending on these factors you need to buy different chemicals, also the ink can be catalyzed or noncatalyzed. I’ll leave you this link so you can see some of the items of interest.
http://www.screenprinting.com/
Getting started
The first thing to do is to have a nice design for your PCB. I recommend you have a track thickness of 0.7 millimeters at least. You can work with smaller thickness but This makes things a little more complicated since the revelation of the frame becomes harder to do, and requires more specialized equipment.
Once you have considered these factors you can proceed to print your artwork on the transparent film. You must ensure your printing is clear, if it has small stains or drained ink, you will have a wrong disclosure, and your PCB will be trash. The next images shows stained films, remember you mustn’t use a film if you see any errors like the ones you’ll see below.
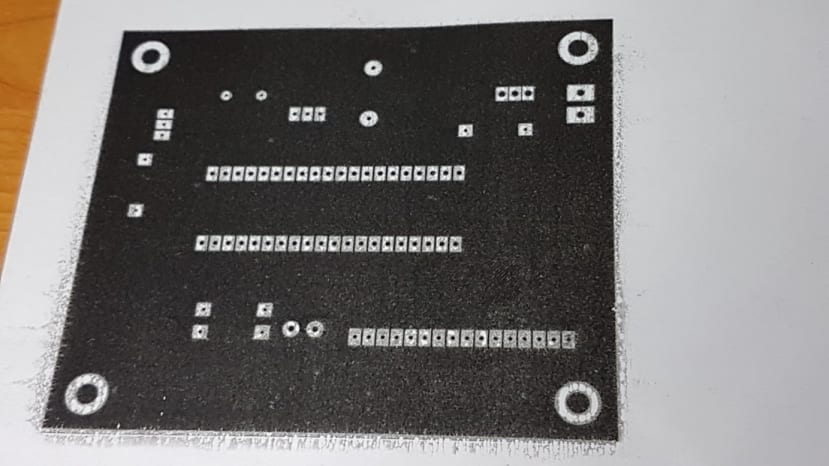
Printed artwork on transparent film, stained, and drained ink.

Stained artwork.
As you can see these artworks are stained and present drained ink, if you try to reveal an artwork like these, you will get errors on your design. The stains and drained ink will prevent the light from solidifying the emulsion on the frame, causing your design to have the same stains, and when you apply the ink on the frame you will get the same stains on the PCB.
Your artwork must be clean and crisp so you can achieve a quality job, this way you can ensure your PCB will not have any short cuts due to bad printing artwork on your frame. The images below show an excellent quality printing.
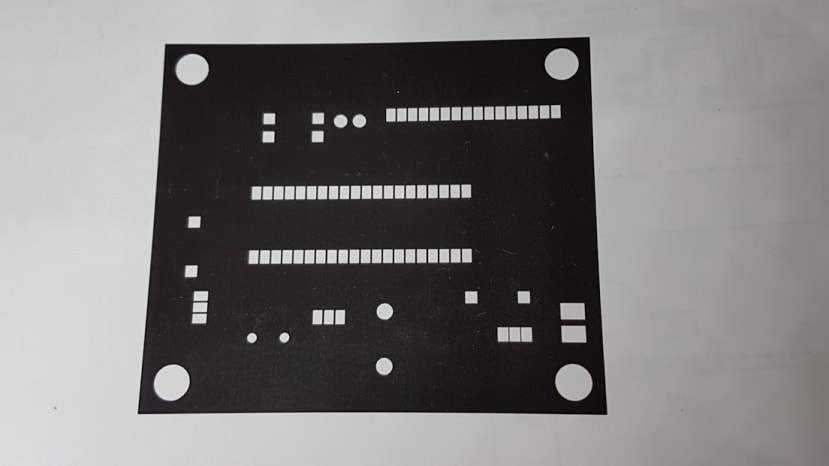
Excellent printing artwork

Clean artwork, with no stains or drained ink.
Once you have a good printing design you can proceed to emulsify your frame. For this you need a squeegee to the size of your frame. This ensures the correct application of the emulsion and ensures you will not have drained emulsion on the middle of your frame as this leaves revealing errors. After you emulsify the frame you will need to use the spatula to clean the drained emulsion from the sides of your frame. If you don’t clean this, you will have a thick solid line that will prevent the correct pressure of the frame against the glass and the film being applied, this cause part of your artwork not being revealed on the frame.
The emulsion needs to be prepared in dark room, in my case I use a bichromate emulsion, so I need to mix ten parts of emulsion and one of bichromate (some emulsions don’t require any mix, as it's already have done it for you), to make my homogeneous mixture. Now you can proceed to apply a generous amount of emulsion to the frame, use the squeegee to make a uniform colour and ensure there are no areas without emulsion, as this will leave an error on your design. Use the spatula to remove all the rest of emulsion from the border of the frame, if you don’t the emulsion will harden and the lines one the sides will prevent the frame making full contact with the isolator glass, this will result in many errors on your design.
Use the brown adhesive tape to cover the sides of your frame, this will make easier to clean and will prevent the metal parts on the frame from scratching the insolator glass. As you can see on the next picture some frames are made of wood, and the use staples to fix the mesh on the frame.
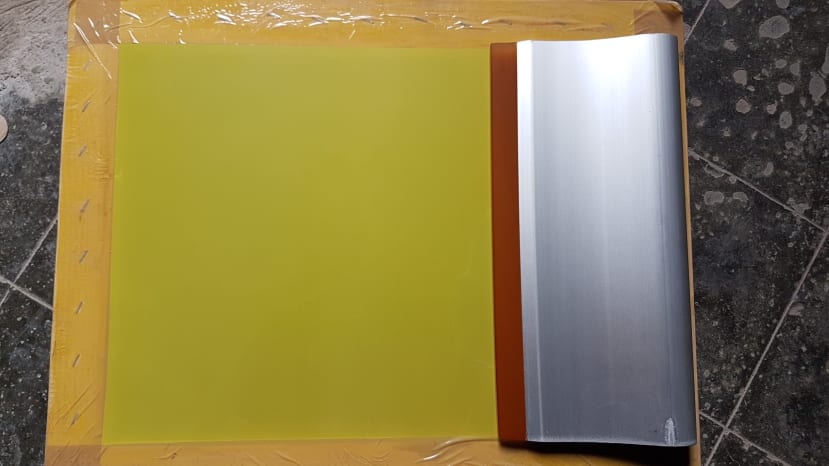
Squeegee size of the frame.

Remove the rest of emulsion from the sides of the frame to guarantee full contact of the frame and your design.
After this you will need to use a hair dryer to make the emulsion dry on your frame.Use only the cold air setting, and try to avoidi the light exposition of your frame to guarantee the best possible result. Don’t worry if your frame is stained by the emulsion that’s ok, you just need to remove all the emulsion reliefs.
Once you have done this and you have a dry frame, iis time to use the transparent film with your designs to make the revelation of the frame. Make sure you leave space between the designs so you have a good space to work, use the transparent adhesive tape to fix the designs to the frame.
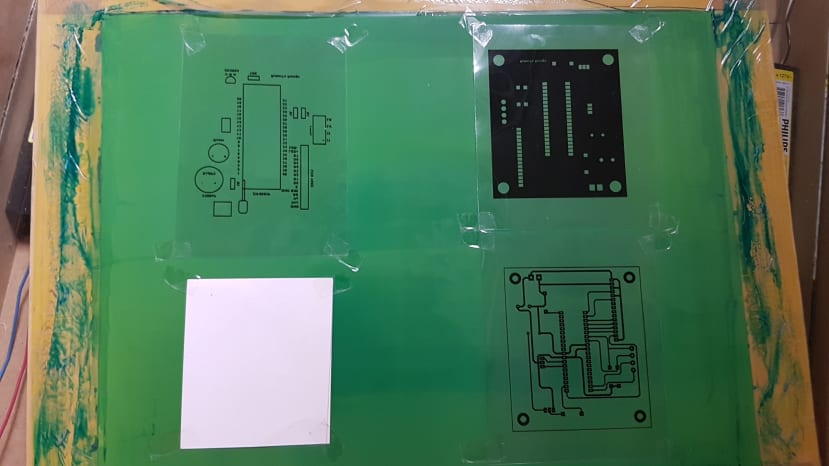
Fix your designs and expose your frame on your insolator for about 5 minutes (this time depends on your insolator).
You’ll need to apply something heavy to the design to guarantee full contact with the glass and the frame. For that purpose I normally use the sponge and glass, I put the sponge on the back of the frame, over the designs, and the glass over the sponge.

Use the sponge to cover all your design and put the glass over the sponge.
Once you have done this, apply pressure to the make contact between the and insolator glass, you can use a brick on each piece of glass for example. In my case I need to expose the frame to light for 5 minutes to make a pre-revealed frame, this will help me to easily remove the emulsion from the finer details like the text.
The insolator I use is home made uing normal fluorescent tubes. I’m using four 17W tubes, each separated by 11cm, and positioned 6cm from the glass.

Homemade insolator.
If you can’t afford to buy a professional UV unit, you can build your own using normal fluorescent tubes, or light bulbs, a piece of glass and four chairs. The insolation time will change and you’ll need to learn this by test and error method. there are many factors to consider, like the distance on from the light bulb to the glass, the potency of the light bulb, the number of light bulbs and others.
After 5 minutes have past its time to take out the frame from the insolator, and apply water pressure on the frame to remove the emulsion we don’t want.

Apply cold water with a hose or tap to remove the unwanted emulsion.
Make sure to apply a good amount of water, on the frame you will see the yellow colour of the mesh and the green color of the emulsion in contrast. Sometimes it appears all the emulsion went off, but has not and you will see this error later when you are applying the ink.
To guarantee a correct washing process you need to put the frame against the light, and be able to see light through the mesh, if you note some dark spots, its highly probable your mesh is not going to allow the correct pass of the ink, and you will need to reveal it again, unfortunately my camera can’t capture a clear image of this part of the process.
When you have more experience, you’ll be able to spot this quickly, so you’ll know if you need to try again or you can proceed to harden the frame even more.

This is how the frame needs to look.
Be careful of not harden the frame too much, if you do so you’ll never be able to recover your frame, and you’ll have to buy a new one. The cleaning process can be really hard, so it’s important to know how to care for your frame, never leave it in sunligh. The sun makes the frame hard, if you leave your frame in the sunlight for more than a day, it’s probably ruined.
If you have small scratches you can repair them with a small amount of emulsion, you don’t need to insolate again, just dry the emulsion with your hair dryer and use hot air this time, make sure the frame is clean before applying the ink.
For this case, I’m using the policat ink (there are many kinds of ink on the market, ask your supplier about this). This needs to be mixed, three parts of ink and one of catalyst, 5% of conditioner (conditioners make the ink liquid, you can use more than 5%, to make the ink more fluid it you lilke). The best ink for producing PCB is the UV ink, but in this case I only useD the serigraphy for test prototypes, so I try to reduce the cost of this, the policat ink works just fine, and only needs to dry for 7 minutes in the kitchen oven at 180ºC.
Before you have prepared the ink, it’s time to fix your frame design and some stops for your PCB in to the working table. For this you’ll need to use the screen printing press, and some pieces of PCB, or any material with a very similar thickness. Be careful that the material you’re using is thicker than the PCB, or this will result in printing problems. The mechanical stops are useful for serial production, you only need to place a clean PCB and the register will always match, also this will prevent the PCB from moving when you apply the ink. For better fixation you can put some adhesive tape on the back of your PCB, or use some serigraphy “glue” for fixing the material on the working table.
Normally I always use transparent adhesive tape, its cheaper and does a great job, is easy to get, and very simple to use. If you are creating prototypes you may be able to reduce your production cost, this kind of tip will help you to achieve that.
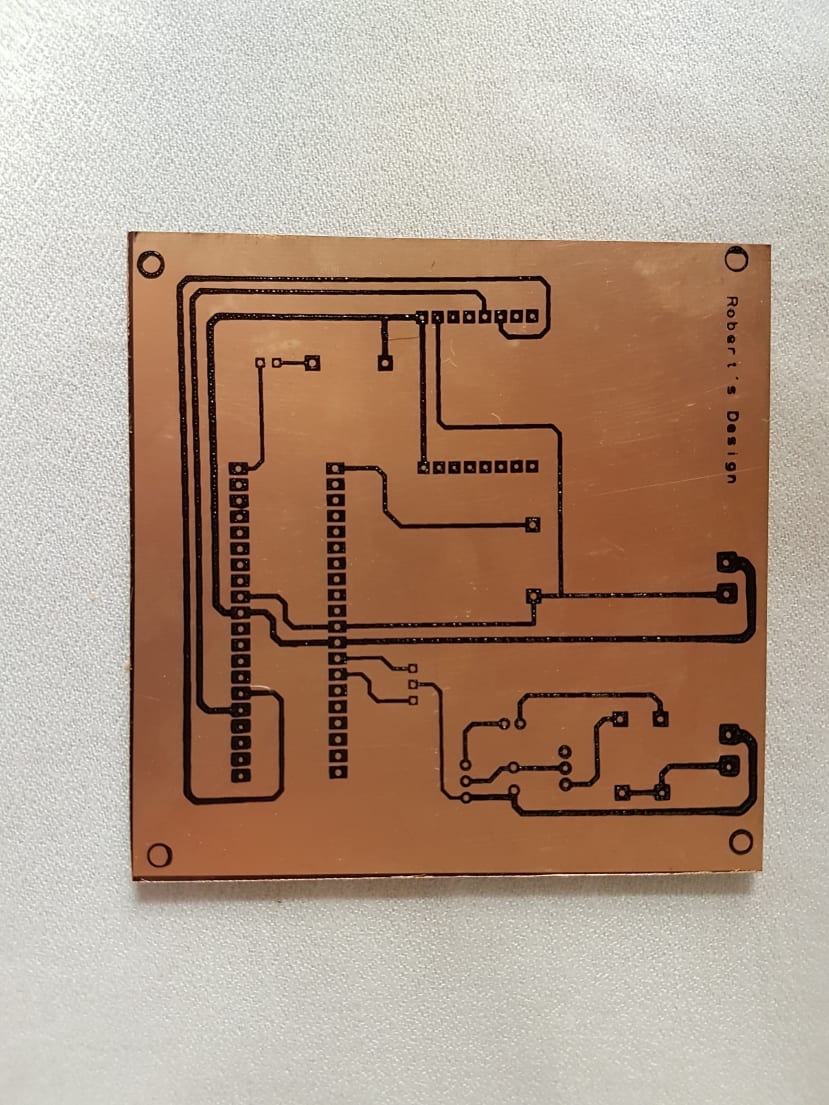
Once you have printed your design search to ensure there are no errors.

Mechanical stops help guarantee a correct position and fast change of the PCB.
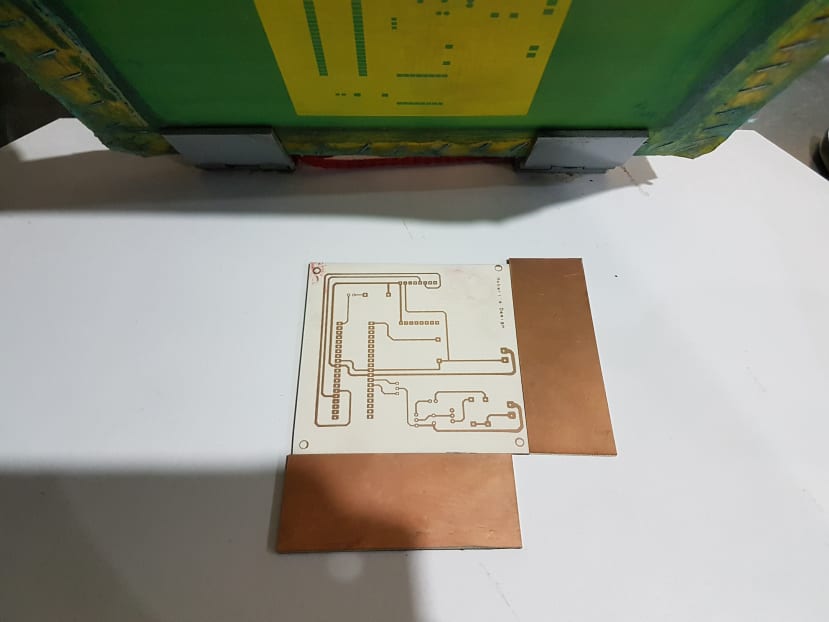
If your design wasn’t transferred on the first hand at 100% you can always apply a second one to guarantee a perfect design. Once you have a good design its time to use the oven to harden the ink on your PCB, 7 minutes at 180ºC. After this remove the PCB from the oven and let it cool at ambient temperature, once is cooded you can use the acid for creating your PCB.
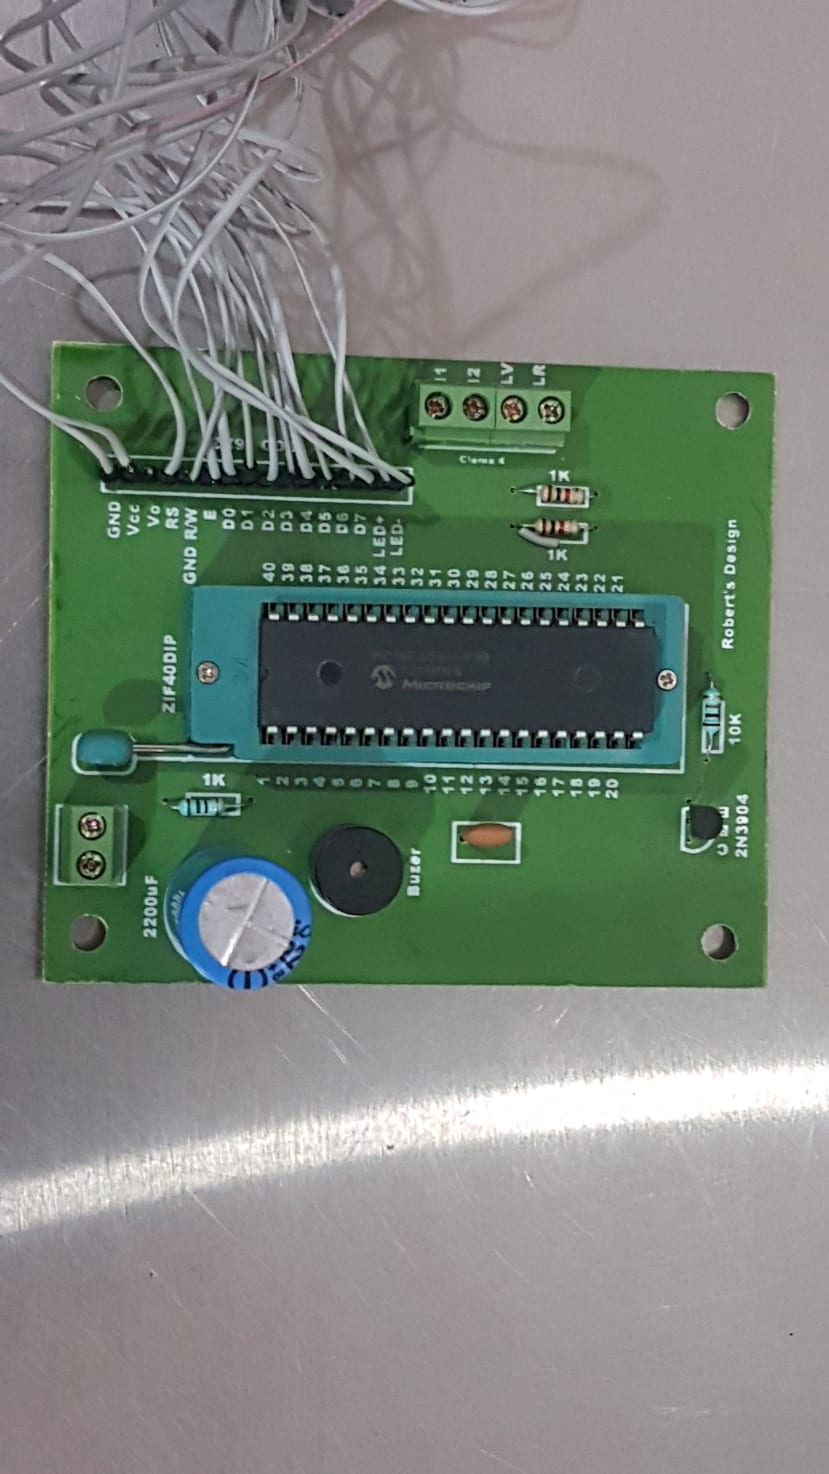
I fully recommend you do an electrical test on your PCB, this will help you to detect any issues on your frame. If you have any error you’ll need to clean your frame and reveal your frame again. This is the time to avoid any serial production. The track path is the most delicate stage in the process. If everything works fine and you are satisfied, proceed the next stage, the solders mask and the colour on the top of your PCB (the top colour is only for esthetics, you can avoid this).
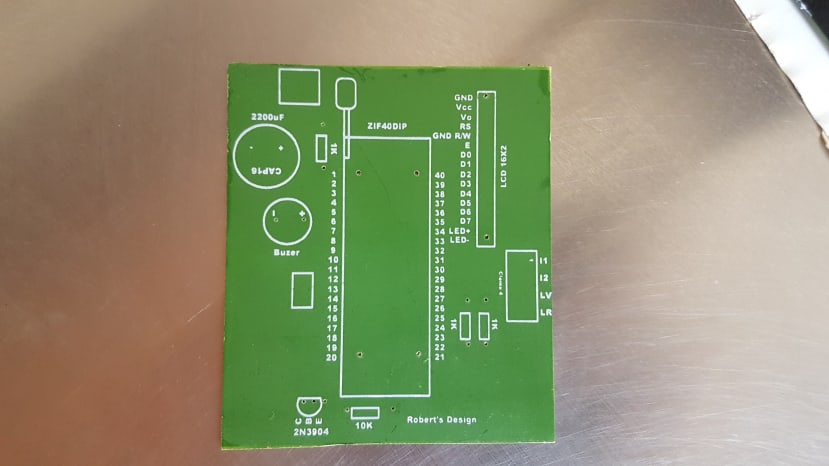
Mechanical stop and preparing PCB for solder mask.
Second ink hand on text design.
If you have any mistakes on the solder mask you can clean this with the ink cleaner and apply the solder mask again on the PCB.You will need to clean your frame to before the ink solidifies on the frame, use the ink cleaner to do this.The design on the frame will be ok, the prepared ink should last for about 3hrs, but once you apply ink on the frame it tends to dry faster, so you need to produce all the PCB you’re going to do on each step on serial process. If you need a second hand on the layer of ink you already applied you will need to the dry the first one in the oven first.
As you can see on the pictures the entire PCB is white in colour, so you need to apply a green screen on the top side in order to apply the text. For this we will use piece of cardboard the size of PCB and apply first the green screen, dry it on the oven, and finally the text.
Its very important to make your ink liquid, but not too fluid, you`ll need to find the exact mix depending on the mesh and kind of ink you are using. This isn’t hard to learn so you’ll be creating an excellent quality job in a few days.
Roberto López Martinez.