Getting Started with the SDRplay RSP2 and SDRuno
Follow article
 Dave from DesignSpark
How do you feel about this article? Help us to provide better content for you.
Dave from DesignSpark
Thank you! Your feedback has been received.
Dave from DesignSpark
There was a problem submitting your feedback, please try again later.
Dave from DesignSpark
What do you think of this article?
Setting up the SDRplay RSP2 and using the SDRuno software to see what is out there.
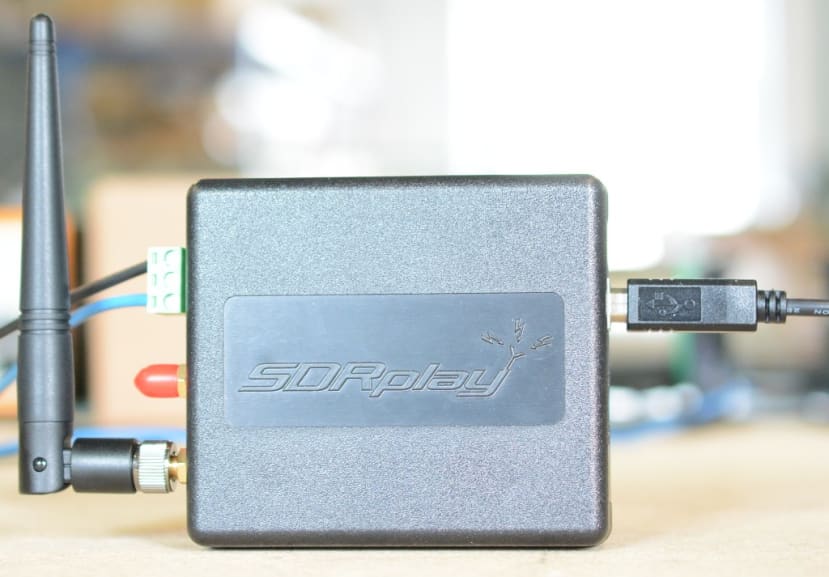
The SDRplay RSP2 (124-9619) is a Software Defined Radio (SDR) receiver. Put simply this means that the receiver uses your computer to process the incoming radio signals. It will operate on frequencies from 1 kHz to 2GHz and so you can listen to everything from amateur radio, shortwave stations, aircraft and shipping signals, as well as FM and MW radio stations.
The SDRplay plugs into a USB port on your PC, which provides power as well as communication to the computer.
SDRuno
The software side of SDR can be taken care of by all sorts of different applications, but it seemed sensible as I was having my first go with SDR, to use the SDRuno software provided by the makers of the SDRplay. This can be freely downloaded from the SDRPlay web site.
It was straightforward to install on a Windows PC, but you do need to make sure that your SDRplay is not connected while it installs, since this will interfere with the correct installation of the drivers; if you wait for the installation to complete and then plug the SDRPlay in, it will be detected and drivers will be installed automatically.
I found SDRuno appeared quite daunting on the first encounter — all those buttons! The User Manual PDF gives a comprehensive rundown of what everything does and I will cover some of it here. There is also a YouTube Channel with a range of tutorials and reviews.
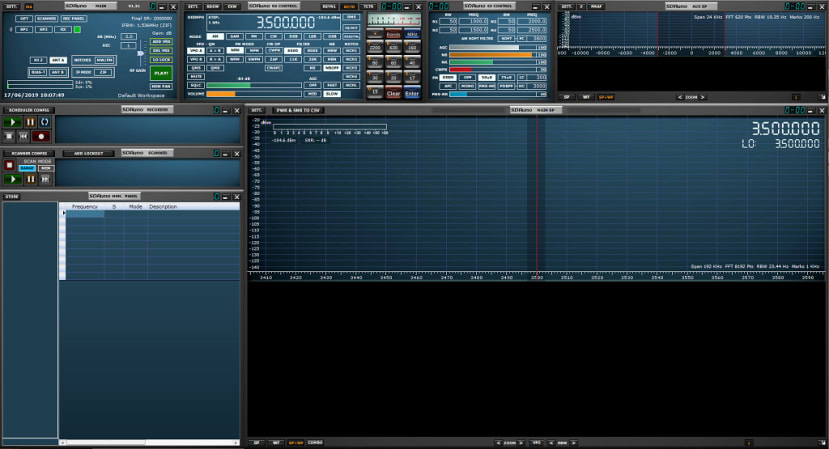
The software opens up as a collection of windows or panels that are referred to as a Workspace. You can rearrange them or close ones you do not need and then save your preferred Workspace by pressing Ctrl-W to bring up the Workspace dialogue. I will give a brief introduction to the main panels here, but there is more detailed information in the User Manual PDF.
Main
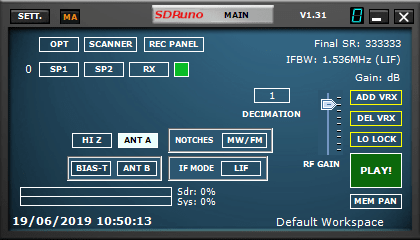
This is where you can turn the other panels back on if you have closed them. You can turn the SDR stream (signal reception) on and off by clicking Play/Stop. If you have more than one sound card on your PC you can also select which one you want SDRuno to play through by clicking the SETT. Button in the top-left corner and selecting your sound card from the drop-down menu. At this stage, I left everything else alone.
RX Control
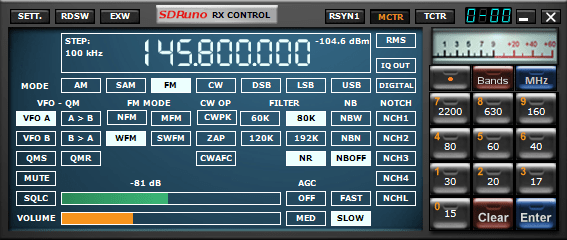
This is where you input the frequency — just by click on the frequency display, hit the space bar and input the frequency you want. Pressing M after a number will give you megahertz. There are also some useful pre-set frequency ranges which can be accessed by using the Bands section on the left of the panel. The buttons under the frequency change the Mode (more about modes later).
You can alter the volume by clicking and dragging the green bar at the bottom of the panel.
Main SP
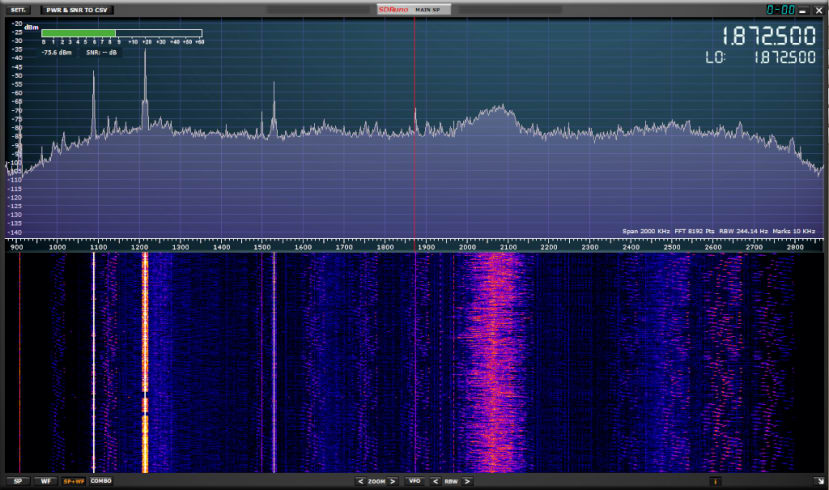
This displays the signal you are receiving as a Spectral Display in the top section and a Waterfall Display underneath. The former shows the real-time spectrum, with amplitude plotted against frequency. While the latter shows the frequency with amplitude represent by colour and time going down the display. You can also adjust the frequency here by clicking on any of the numbers in the top-right corner and using your mouse wheel to scroll up and down.
Antennas
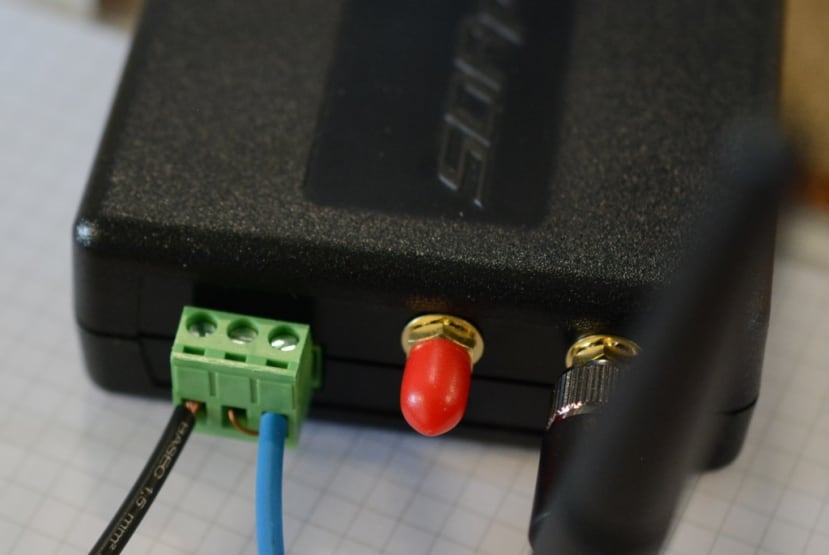
The SDRplay will accommodate three antennas: two via the SMA sockets and one a “High-Z” port in the form of a standard CTB9028/3 socket and plug that comes supplied.
To get started I attached an antenna (542-563) to one of the RF ports and a simple “long wire” antenna to the High-Z port. As its name implies, this is just a long piece of wire that attaches to the P terminal. The other 2 terminals can be connected to earth. I used a length of wire about 15m long, that I strung up on the beams in our workshop, with the other end of the wire at a window.
The long wire antenna is best for receiving signals below 30MHz and the SMA antenna above that. Conveniently, with both connected, you can switch between them in the Main panel in the SDRuno software.
Looking for a Signal

Once the antennas were connected I could start searching for a signal. For a beginner I found the presets in the Bands section a good place to start. Clicking on the Bands button you can select Ham Upper, Ham Lower or Broadcast from the pop-up menu and then select frequencies within those ranges by clicking the buttons. As you can see from the image above when Broadcast is selected buttons 0 and 3 are labelled LW and MW.
Modulation
One of the handy things the preset bands do is also set the Mode or Modulation. It took me a little while to get my head around modulation, but the way I think of it now is like the relationship between sound and language; if I produce sound in a certain pre-defined way and the person I am aiming that sound at understands that definition, I can communicate with them. So I think of the different modulation schemes as different languages. There is a better, but not too technical, explanation in this video that I found helpful.
Anyway, the upshot of this is that you need to apply the select the right modulation type for a signal – the one that was used to broadcast it – to receive (demodulate) it correctly. I am reliably informed that, with experience, you can look at a signal in the Spectrum display and have a pretty good idea of what modulation it is using. I am a long way off that!
What to Listen For
Unsurprisingly the easiest broadcasts to find are the multitude of MW and LW Radio stations. There are also shortwave stations, but they are a little more dependant on getting a good antenna set up, preferably outside. Apart from my simple long wire, there are all sorts of different antenna types – a web search will reveal a vast range of varying complexity and cost.
A web search will also provide links to sites that list radio frequencies and modulation types used for all sorts of broadcasts. I found the SigidWiki Signal Identification Guide site interesting, as it includes audio samples and spectrum display images.
I also looked at the UK Scanner Frequencies site, which has a comprehensive list of everything from aircraft, marine and emergency services, to shortwave radio broadcasts.
I’m quite interested in listening to signals from the International Space Station (ISS), which broadcasts on Amateur Radio Frequency 145.800 MHz FM. You can track the ISS and work out when it may be in a position for you to pick up the broadcast. I have not managed yet, but I’m going to keep trying now I at least have a basic grasp of what the SDRPlay and SDRuno software can do.