Building a Custom Keyboard
Follow article
 Dave from DesignSpark
How do you feel about this article? Help us to provide better content for you.
Dave from DesignSpark
Thank you! Your feedback has been received.
Dave from DesignSpark
There was a problem submitting your feedback, please try again later.
Dave from DesignSpark
What do you think of this article?
Assembling a high quality custom keyboard with Cherry MX switches
What could be more joyful than a keyboard featuring keys with a satisfying travel and characteristic sound as they bottom-out, topped off with solid, colourful keycaps of your own choosing.
In this post we take a quick look at the custom and collectible keyboard scene, before moving on to the sourcing of parts and assembly of a custom “ortholinear” keyboard with Cherry MX switches.
Deskthority

Without a doubt the main resource for custom and collectible keyboards — and a gateway to a world of seriously obsessive collecting and custom builds — is the website and online community, deskthority. Here you can find details of the many different variants of the venerable IBM Model M that is loved the world over by programmers and those who appreciate “clicky” keyboards, along with all manner of other keyboards of just about every possible configuration.
The deskthority wiki also contains a ton of information on keyboard switches and keycaps, along with modification tips and guides on layouts, terminology and much, much more.

Space-cadet keyboard. Image: Dave Fischer, CC BY-SA 3.0.
In addition to the forums and wiki there are also group buys organised by the community that provide the opportunity to buy into highly limited production runs of custom keycap sets, many of which inspired by classic designs, such as the Lisp machines space-cadet keyboard.
Some personal favourites
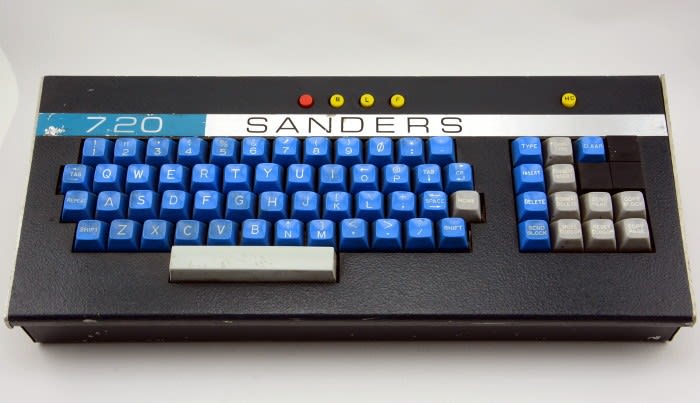
As alluded to earlier, I’m quite a fan of colourful keycaps and a favourite vintage keyboard in my own modest collection is from a Sanders 720 terminal that dates to the late 1960s.

Detail from Sanders 720 Data Display System Product Description, May 1969.
This keyboard features bright blue and grey keycaps, with a heavy switch action and that is packaged in a robust steel and aluminium enclosure.

Sadly, I don’t have the CRT unit that goes with this keyboard.
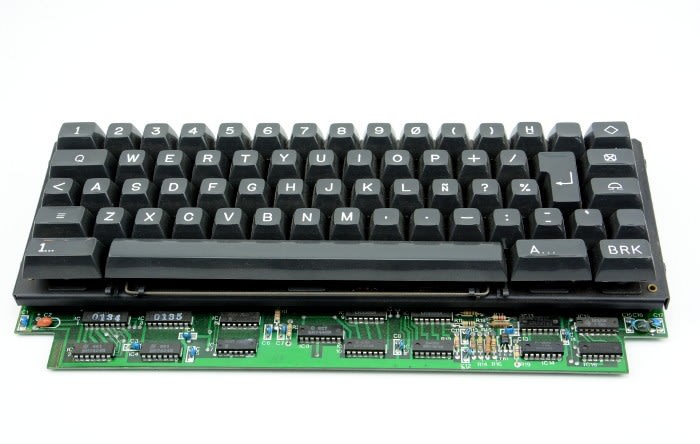
Another favourite is one that I managed to pick up two “new old stock” examples of and are comprised of the PCB, switch and keycap assembly, that were replacements for a teleprinter.

These were bought at a radio amateur rally and in addition to having the loudest typing action of any keyboard I’ve ever experienced, they also feature a selection of cryptic symbols which would very likely mean something to a teleprinter operator.
A DIY ortholinear keyboard
There now exists ever growing number of keyboards available off-the-shelf which cater to specialist markets, with various layouts, high quality key switches and the ability to easily swap keycaps out for custom ones. However, for the ultimate custom keyboard you can build your own.
Some go as far as laying out their own PCB and having this manufactured, but a good compromise is to buy this and the enclosure ready made, then select your own switches and keycaps.
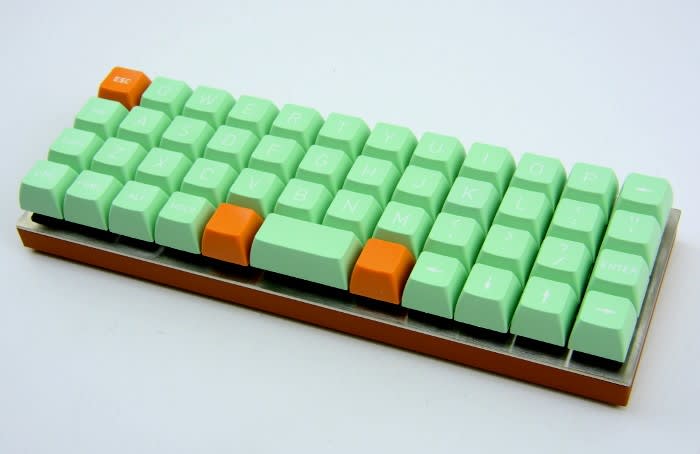
Intrigued by the rather neat “ortholinear” keyboard where keys are aligned in a grid rather than as is generally the case, staggered, I decided to build a keyboard based on the Planck DIY design.
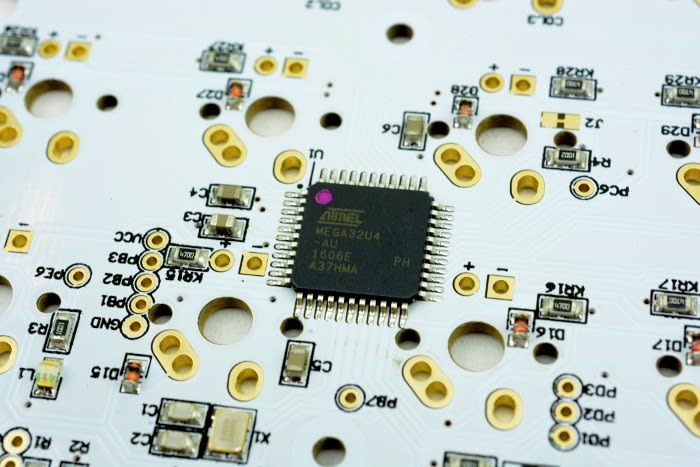
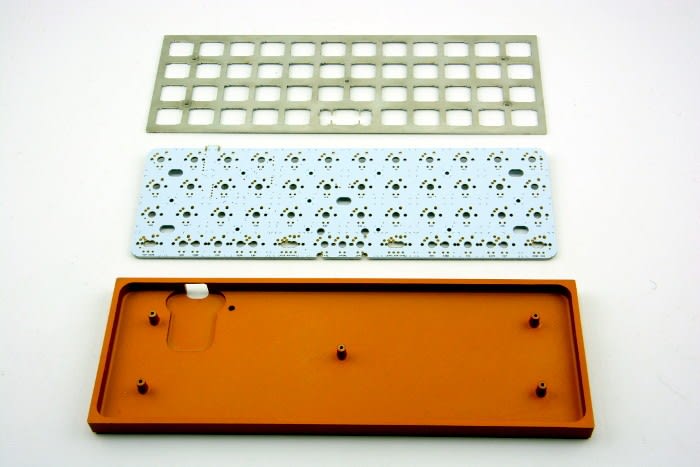
I opted for the “MIT layout” Planck with a 2U spacebar and a total of only 47 keys. The alternative full grid layout uses all 1U keycaps to give 48 keys in total. An anodised, milled aluminium base, PCB with SMT parts soldered and a steel top plate were sourced from olkb.com and can be seen above. Other base colour options included black, silver, blue, red and purple.
It should also be pointed out that the keyboard firmware is open source, highly customisable and has been made available on GitHub.

The PCB will support both Cherry MX and Matias/ALPS switch footprints. For me Cherry were the obvious choice given their tremendous reputation when it comes to keyboards and key switches (just look at the coverage on deskthority and other sites!) I went with the Cherry MX Black (664-569) variant which was introduced in the early 80s and requires a heavier actuation force.
One thing that’s important note is that key switches can either be PCB or plate mounted, which is to say mechanically supported by the PCB or a metal plate that they are inserted into. There are pros and cons to both, and broadly speaking PCB mounting can make maintenance easier, while plate mounting is more mechanically solid and the switch is less likely to move on being depressed.

Finally, the key caps used are the “Retroist K-Series” sourced from UK Keycaps, which were produced in a run limited of only120 key sets.
Assembly
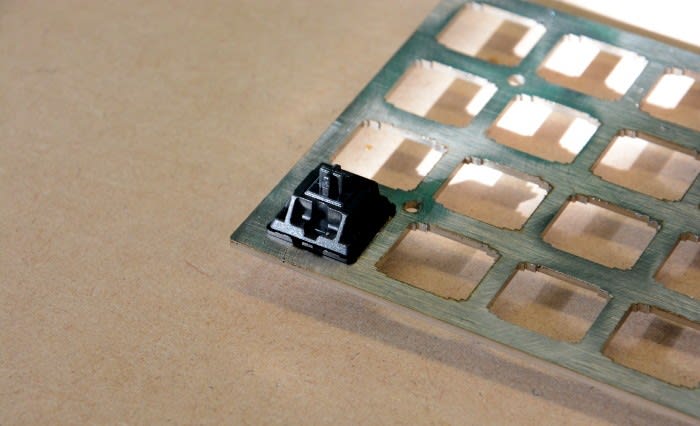
Assembling the keyboard was straightforward enough and first switches are inserted into the top plate, taking care to ensurethey’re correctly oriented, firmly pushed home and the pins are not bent.
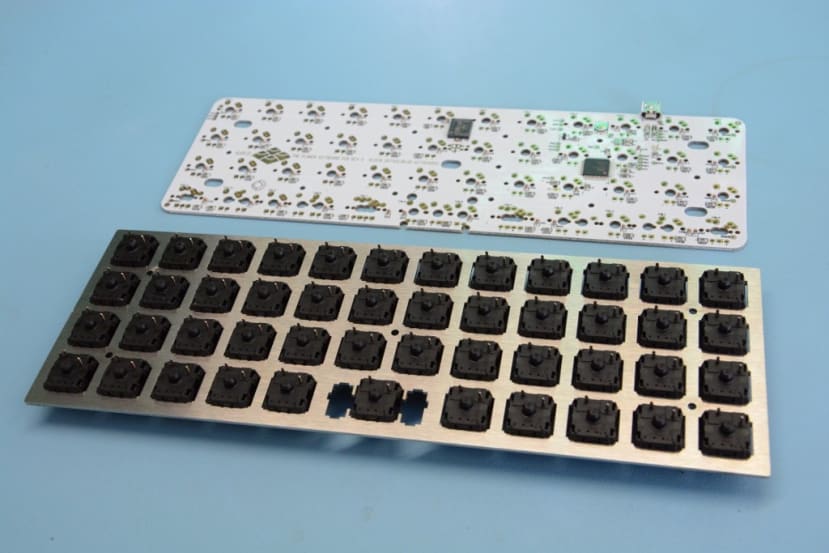
When all the switches have been fitted the plate can be turned over and the pins checked, following which the PCB is laid on top.
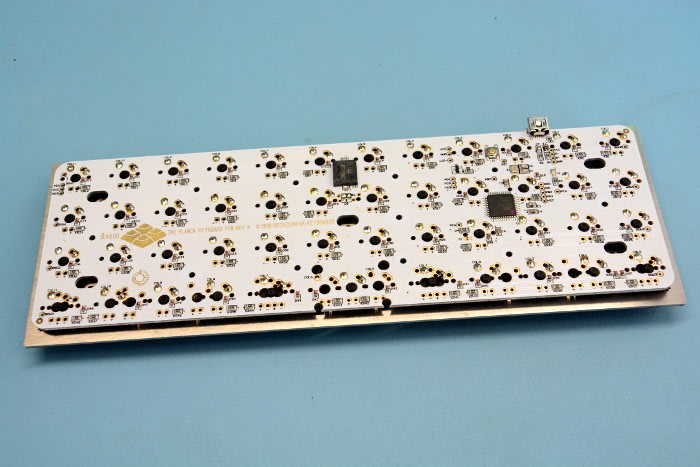
Next the switch pins were soldered.
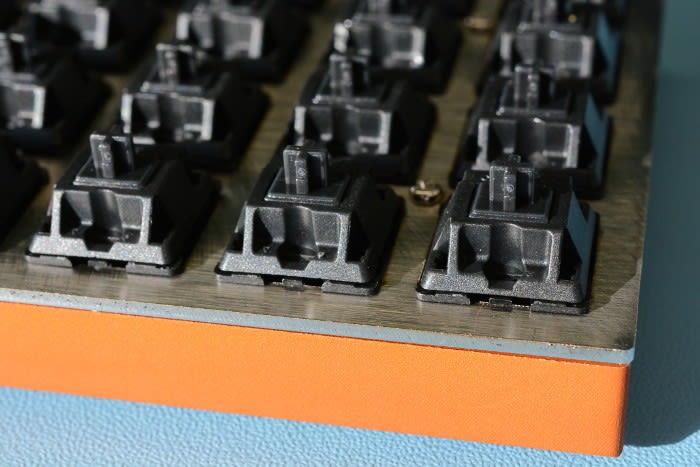
The PCB assembly and top plate could then be secured to the milled aluminium base.

Finally, the keycaps were added.
An easy to complete and rather fun project! Now just to see how I get on with the unorthodox otholinear layout, greatly reduced number of keys and use of key modifiers etc.