Trying out the Raspberry Pi HQ Camera with Different Lenses
Follow article
 Dave from DesignSpark
How do you feel about this article? Help us to provide better content for you.
Dave from DesignSpark
Thank you! Your feedback has been received.
Dave from DesignSpark
There was a problem submitting your feedback, please try again later.
Dave from DesignSpark
What do you think of this article?
Comparing four different C and CS mount lenses with the Pi HQ Camera.
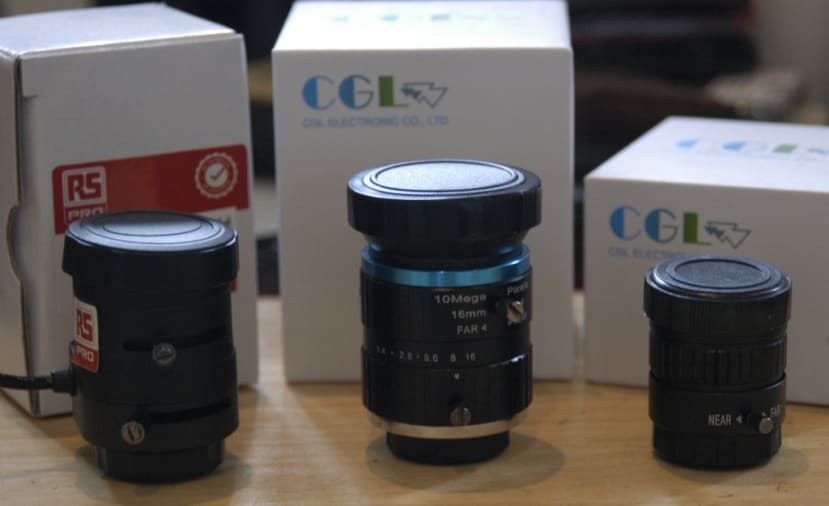
In a previous blog post, I detailed how I had set up a Pi HQ camera with a Pi 4 and tested it with a CCTV camera lens. As I wrote in that post, one of the great things about the HQ Camera is the fact that it comes without a lens, but with a standard mount for C lenses and an adapter for a CS lenses. I since got my hands on 4 different lenses, one intended for use with CCTV, two that are specifically marketed for use with the HQ Camera, and a microscope kit.
C vs. CS
The physical difference between a C and CS mount lenses is that the latter is designed to be mounted ~5mm closer to the image sensor than a C mount lens. C-mount lenses are designed to be mounted 17.526mm in front of the image sensor vs. 12.5mm for CS-mount. The HQ Camera is supplied with an adapter that needs to be used with a C mount lens to increase its distance from the sensor. Two of the lenses I have are CS, one is C, and the microscope can be used either way.
Software
The quickest way to get started with the Pi Camera is to use the command line interface from the terminal, but it can be a bit fiddly and I have a dreadful memory and keep forgetting all the commands and have to go and look them up again in the Pi Camera Guide, so I ended up using the RPi Cam Web Interface software, as I had done with my first try out of the HQ Camera.
6mm Lens

First I tried the 6mm lens (201-2855) , this is one of those recommended for use with the HQ Camera and is made by the Chinese company, CGL Electronics. I initially struggled a little to get the hang of this lens, particularly adjusting the focus. I found this was the best course of action:
- Adjust the aperture – loosen the thumbscrew nearest the front of the lens and then holding the front section of the lens steady, rotate the section with the thumbscrew until you are happy with the exposure. Then tighten the screw.
- Focus – loosen the other thumb screw and rotate the two front sections of the lens that should now be locked together, until your image is in focus. The first time I did this I had to use quite a bit of force to get it started and hold the back part of the lens so it did not unscrew from the mount.

The results were pretty good once I had got the hang of adjusting it, as can be seen in the above shot taken in our workshop.
16mm Lens

I decided to try some video recording with the 16mm Telephoto lens (201-2854) , which is another one from CGL Electronics. This is the one C mount lens in my collection and so I needed to use the adapter.
Luckily we had a spell of bright weather, so I set up the camera outside plugged it into a long extension lead, pointed it at my bird feeders and managed to capture some nice footage of a goldfinch feeding on sunflower hearts.
CCTV lens

The CCTV lens (776-9396) I have is an auto iris varifocal lens with a standard CCTV connector. The focus is manually adjusted. The auto-iris meant it needed a small voltage applied to the drive pins on its connector to open the aperture, as I detailed in my first blog about the HQ Camera I used the 3.3V from the Pi’s GPIO header.
The lens has a back focal length of 6.7mm; that’s the distance the back of the lens needs to be from the camera’s sensor to be in focus.
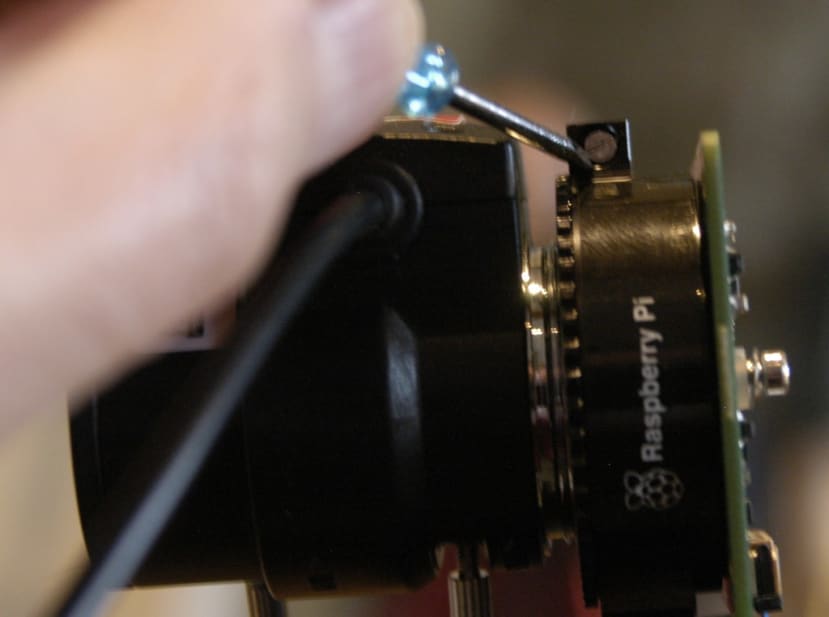
The camera’s back focal length is 7.35mm so I needed to use its back-focus adjustment ring to move the lens further from the sensor. This is done by loosening the locking screw with the small screwdriver provided and turning the adjustment ring until you get a nicely focused image, before re-tightening the screw to lock it in place.

Once that was done I found the lens was great for conditions with comparatively low light, as you can see in the ubiquitous cat picture above taken in a dimly light back bedroom. That’s Vince in his bed …

… and GB on my bed.
Microscope
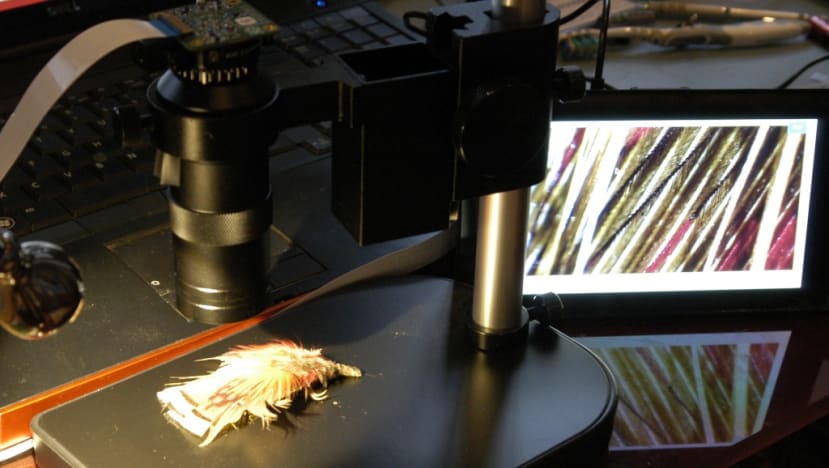
Now to try the microscope. It came supplied with a stand that features a screw mount that allows for rough adjustment, with a large knurled wheel giving fine adjustment through a rack-and-pinion. There is also a stop to limit the range of movement to protect your lens.
The lens itself has a knurled adjustment ring to move the main optics to zoom in and increase the magnification. You can then focus by changing the distance to the subject.

I tried it out first on some small type. I then tried it on the same feather I had used in my first blog post about the HQ Camera.
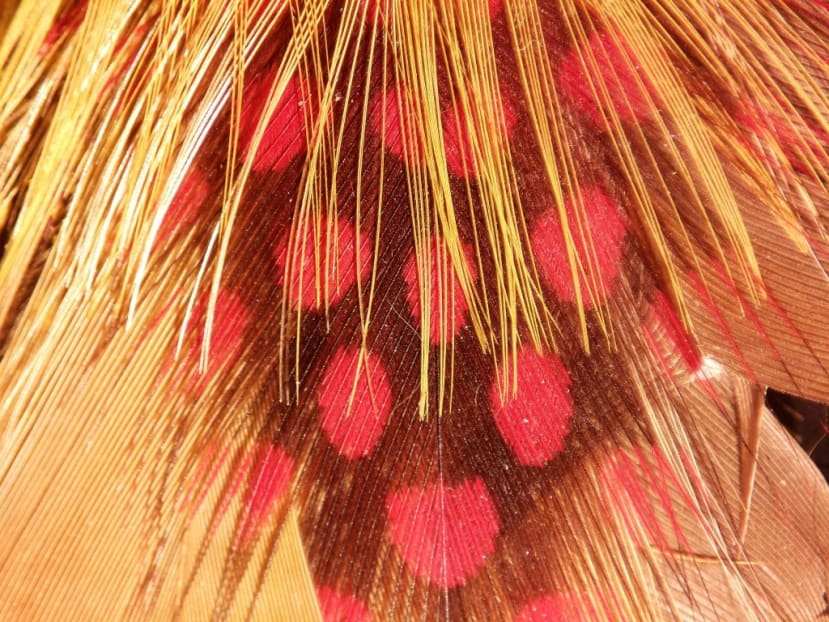
First I tried it at minimum magnification.
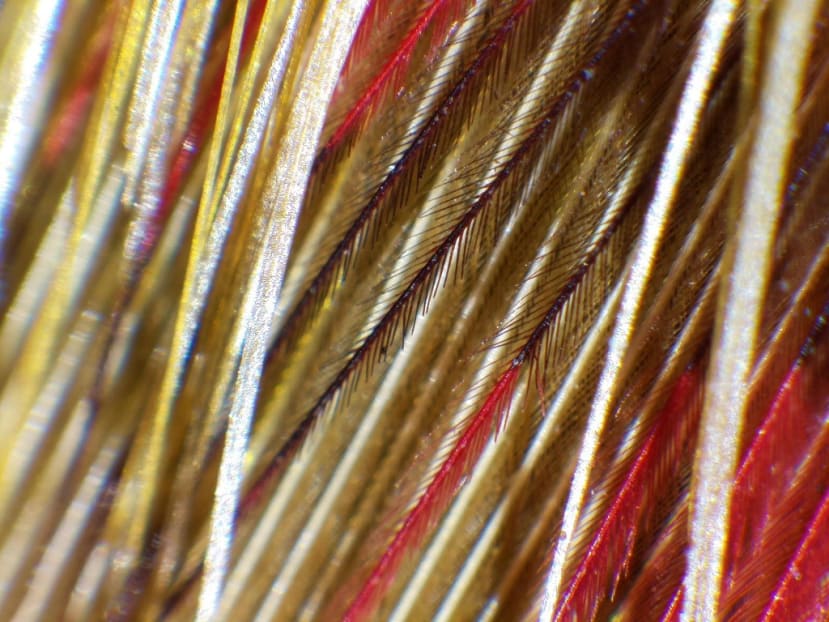
Then at maximum magnification.
As you can see this produced some very nice, detailed images.
Conclusion
I have had great fun trying out these different lenses and I think it demonstrates the versatility of the camera. I was particularly pleased with the video taken using the 16mm telephoto and the images from the microscope, which would be great for checking SMD soldering, for example.
I am now eager to explore the potential offered by more sophisticated Pi camera software and the possibilities of controlling lenses via the Pi GPIO.