Summer Sounds - Building a 12 Volt Sound System for Outdoor Use Part 2: Assembling the Cabinets
Follow article
 Dave from DesignSpark
How do you feel about this article? Help us to provide better content for you.
Dave from DesignSpark
Thank you! Your feedback has been received.
Dave from DesignSpark
There was a problem submitting your feedback, please try again later.
Dave from DesignSpark
What do you think of this article?
Gluing, painting and fitting components
In the first part of this series of blogs I set out my plans to create a stylish, great sounding 12 Volt portable sound system to accompany my DJ System in a red toolbox. Now it is time to glue the cabinets together, give them a coat of paint and plan and fit the connectors and switches.
Putting the cabinets together


Once this was done the next job was to glue the speaker cabinets together.

This was done applying a thin layer of glue to one of the surfaces to be joined and then clamping the panels together.

I took care not to over tighten the clamps as this bent the panels. Just enough pressure to hold the cabinets square and ensure all the joints were pressed firmly together while the glue set. Some weights (boxes of bolts) on the back of the cabinets helped keep things in shape.

Painting the cabinets red
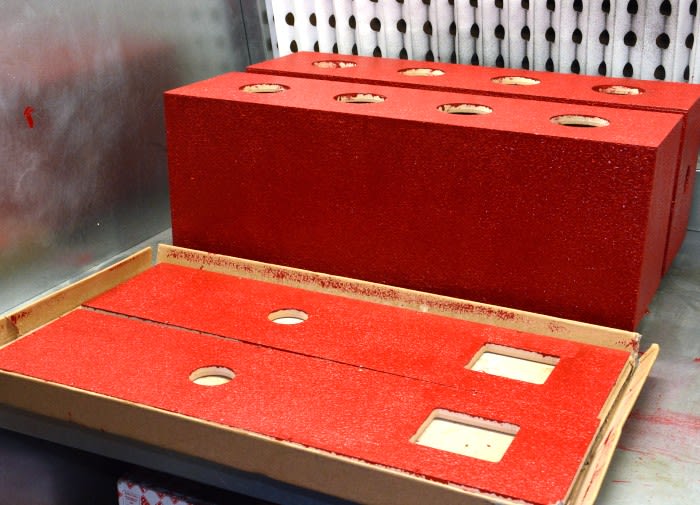
Once the cabinets were assembled it was time to paint them. I had sourced some paint specially designed for speaker cabinets and flight cases called “Tuff Cab”. It is remarkable stuff; thixatropic, water soluble, very low odour and cures to a really hard textured finish. The blog on the supplier’s web site provided some invaluable advice. As the paint is so thick it was not really like any paint I had used before. I had decided to apply it with a roller as recommended and tried a bit on some scrap MDF first to get a feel for it.
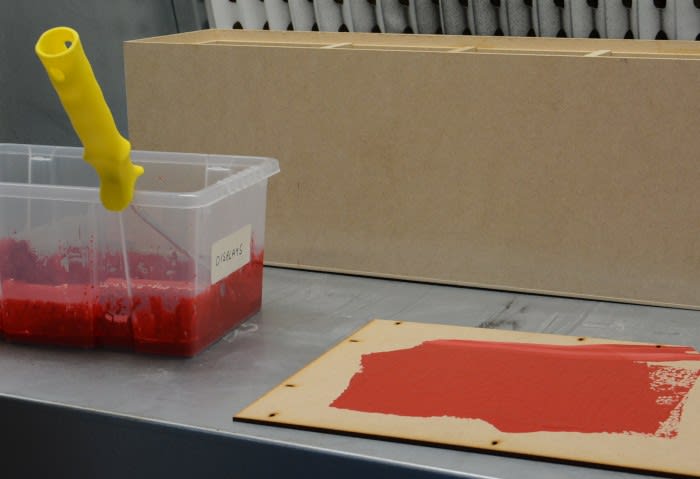
The suggested method of application - “roll steadily and smoothly and, once the paint is spread across a panel, gradually reduce the pressure on the roller, so that the last few rolls are very gently, almost like you are pulling the roller along with your fingertips” - worked well. I applied an initial coat that was watered down 50/50 to seal the MDF, and then a further 2 coats to give the cabinets a very satisfying, and very red, textured finish.
Fitting the hardware

Now to fit all the hardware. There is quite a lot of stuff to go on the relatively small cabinets.
I decided to fit the speaker drivers with bolts through the MDF and then “Nyloc” nuts to make sure they didn’t shake loose, rather than using the small wood screws supplied. I marked which connector was positive to make life easier when I cam to fitting the cables.

At this point I also started fitting the self adhesive sound damping pads.
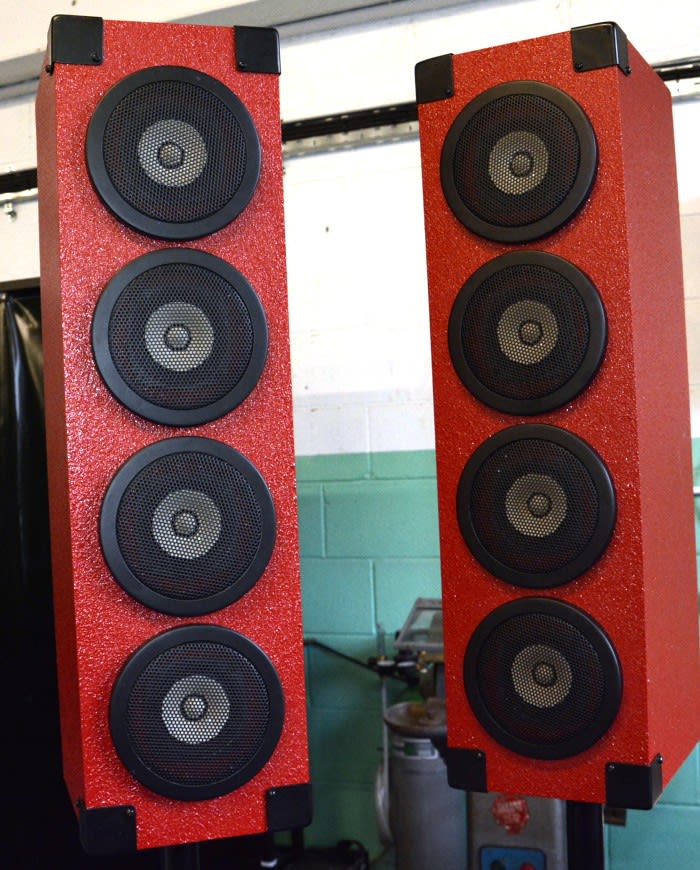
The corners guards and the speaker grills are held in place with wood screws. The ports at the back push into place in the pre-cut holes.

Once most of the hardware was in place the speakers started to look very impressive – the black hardware and the gloss red work really well together.
Switches, knobs and sockets
The only thing left to fit were the back panels where all the connections would be. With a total of 6 different sockets and switches to fit on a 70 x 80 mm panel, it was going to get pretty crowded.
- A power button (022-6047)
- 12 V input (734-5571)
- 12 V output (734-5650)
- Toggle Switch – for switching between balanced and unbalanced audio input (734-6968)
- Audio in – a combined XLR and 6.35mm jack (448-7243)
- Potentiometer – volume (504-2661)
I had two metal panels that came supplied with the cabinet kits that I could drill with the appropriate size holes to fit everything, but hole drilling is not something you can re-do if you decide you got things in the wrong place and it is not always easy to get them looking neat. So I decided to make some panels from laser-cut acrylic instead. These would not be as strong as the metal ones and possibly would not stand up to the rigours of life “on the road” (or in the field) but I could always revert to the metal ones if the acrylic proved unsatisfactory.

I did the initial design in Inkscape, playing about with different arrangements until I was happy that I had something that was practical and looked right.

The other advantage of the acrylic was that I could neatly label everything.
By line etching the lettering and then filling the etch with wax designed for the purpose, applied with some pressure before the excess is cleaned off, a very neat looking effect can be achieved.
The sockets and switches all fit on neatly arranged with power related stuff on one side and audio on the other. The audio input is turned on its side so the locking tab does not interfere with the volume knob above it.
Now it is all ready to fit the amplifiers and associated electronics. In the next post, I’ll detail how I wired the amplifiers with balancing transformers and volume control, fitted them into the cabinets and applied the finishing touches. I am getting even more excited to hear how it sounds.