Refreshing a well-used 3D printer
Follow article
 Dave from DesignSpark
How do you feel about this article? Help us to provide better content for you.
Dave from DesignSpark
Thank you! Your feedback has been received.
Dave from DesignSpark
There was a problem submitting your feedback, please try again later.
Dave from DesignSpark
What do you think of this article?
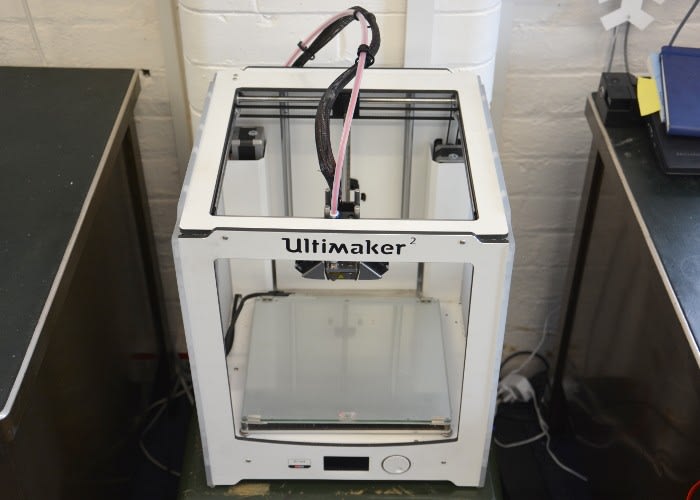
After 1200 hours of printing, this Ultimaker 2 is not ready to be retired yet.
3D printers have been around for some time, with desktop machines increasingly popular and affordable. Ultimaker is one of the leading brands, with a range of machines aimed at the home, hobbyist and educational market.
Imagine our delight then, when an Ultimaker 2 arrived at our workshop, sent over from our friends at RS. It transpired that it was a demonstration machine for use at trade shows and events, had been sat inactive for a little while and was in need of some TLC to get it back to working order.
In this post we will determine what needs replacing and give the machine a clean and service, before getting it printing once again!
The Ultimaker 2
The Ultimaker 2 uses Fused Filament Fabrication, (FFF) to create 3D models. Put very simply, a continuous filament (commonly plastic) is fed into a heated printer head that moves under computer control, with the melted material deposited as the head moves. More comprehensive information on this printing technique can be found on Wikipedia, amongst other sources.
Other methods of 3D printing are available, such as Stereolithography (SLA) and Selective Laser Sintering (SLS) – though these techniques are more common in industry, where tighter tolerances and more exotic materials may be required.
FFF, with comparitively quick printing times, convenience and low cost is the most popular printing technology for desktop and 'hobbyist' 3D printers, at least for the time being.
Now discontinued, the Ultimaker 2 has been superceded by the Ultimaker 2+, though the models are very similar, with interchangable parts and spares available. Fortunately, Ultimaker still have plenty of documentation and support for these machines, a thriving community of users, and easy to source spare parts.
Assessment

One of the great features of the Ultimaker 2 is the user interface, with a bright OLED display and simple scroll wheel giving access to a useful menu system. Navigating to the runtime statistics, we could see that the machine had been printing for over 1200 hours, and worked through over 500 metres of filament!
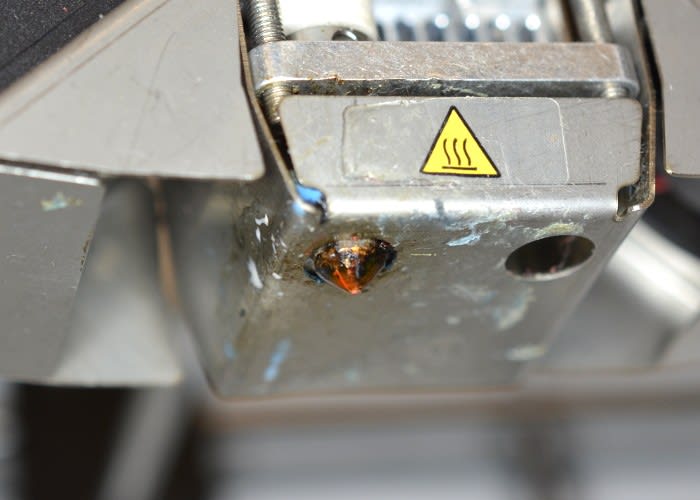
Visual inspection corroborated with the history of our printer, with a dirty, discoloured print head, cast-off pieces of filament and dust in the main body and a print bed covered in glue residue.
After so many hours of printing, and likely many more of transportation and periods of time sitting unused, it is unsurprising that some fettling was required to get the printer back to a happier state. First of all, the many moving parts may be in need some adjustment, cleaning and lubrication to ensure smooth motion with minimal error.

Secondly, the heated nozzle, subject to many heating and cooling cycles, as well as potentially different types of material (either intentionally with a change of filament, or as a result of foreign bodies such as dust or dirt) passing through it, may require some attention.
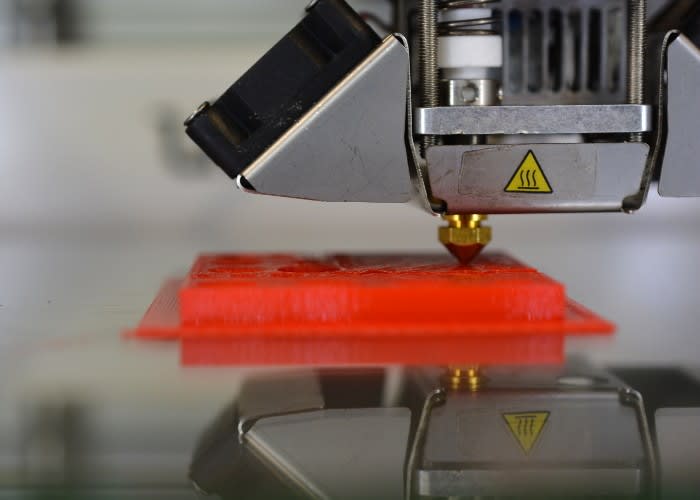
To quickly assess the state of the nozzle, we heated it up to maximum temperature of 260 degrees Centigrade and manually fed some filament into it. Instead of passing out of the nozzle in a straight line, or with a slight curl, the melted plastic curled rather severely, almost right back on to the head itself, indicating some level of blockage within the nozzle.
Following this assessment, the plan of action was as follows:
-
Attempt to clean print head, before replacing parts as necessary
-
Clean fans and possibly replace
-
General clean up
-
Lubricate axes
-
Calibrate + print some test parts
Head cleaner
We first tackled the print head, could it be unblocked? The Ultimaker website has some information on how to do this, both in the official documentation, as well as on the well-populated forum, with tips and tricks from fellow users. We first tried 'The Atomic Method' detailed in the link above.
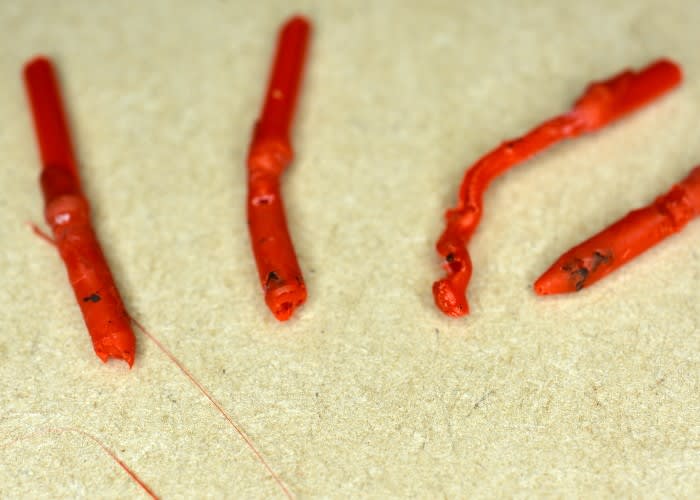
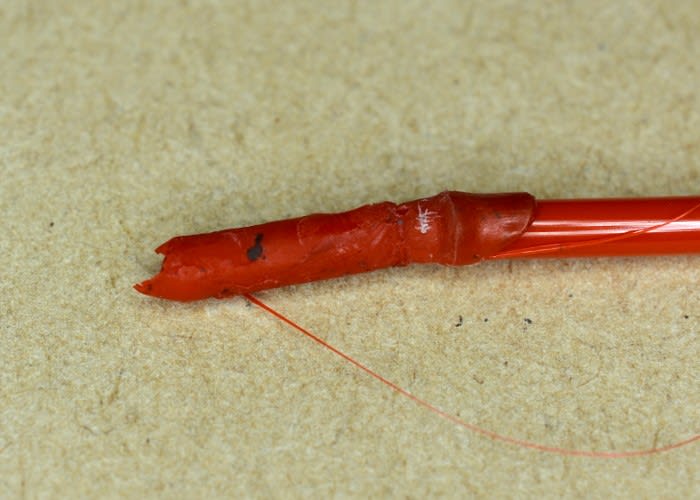
The amount of black pieces in the withdrawn filament shows that our nozzle was far from clean. After repeating the cleaning steps several times, the nozzle was still performing badly, with replacement settled upon as the best solution.
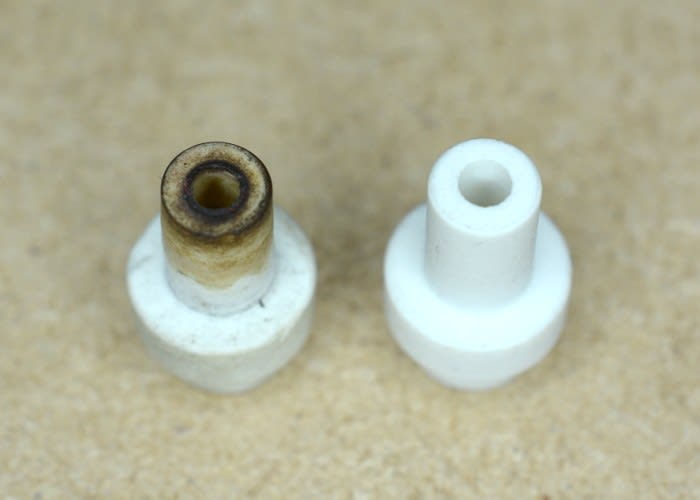
Referring again to Ultimaker's comprehensive documentation, we stripped down the head, discovering several other parts that had deteriorated over time. Most apparent was the discolouration of the glass-filled PTFE coupler part, that provides a smooth path for the filament into the heated nozzle, as well as thermal de-coupling between the nozzle and greater head assembly.
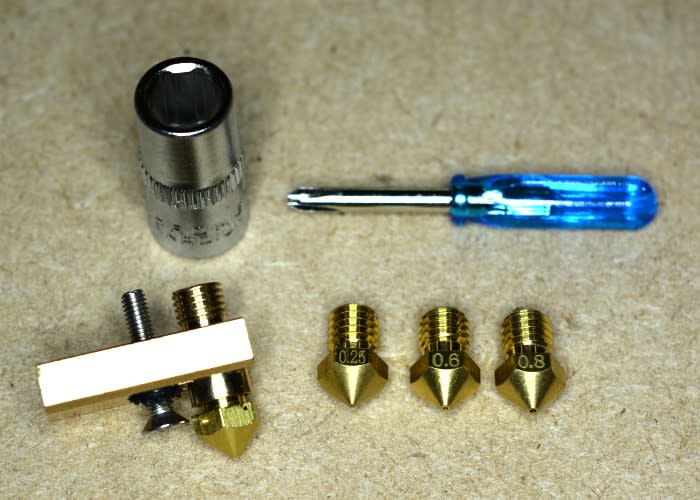
Whilst looking for a new nozzle we discovered that an upgrade is available, with four different sizes, that can be easily interchanged. Larger ones allow for faster, yet rougher printing, whilst smaller ones print more slowly, with finer detail.

The nozzle is part of a larger heater block, that accomodates a heating element and a sensor, together providing control and feedback of the head temperature. These had both become stuck in the original heater block and so were also replaced with new items.
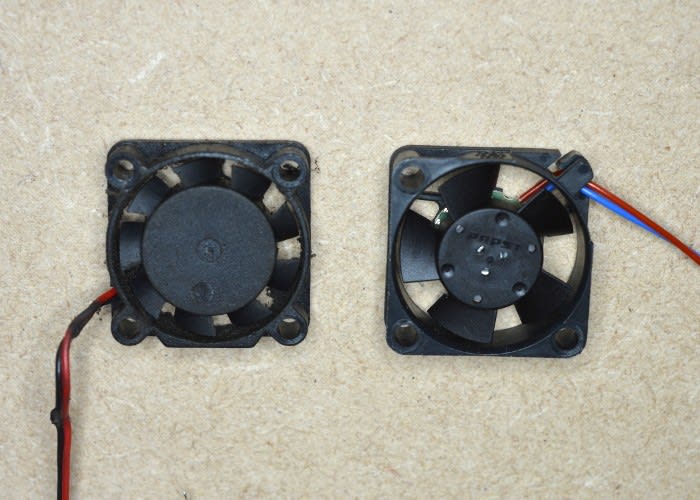
The Ultimaker 2 has three fans on the head. One helps keep the head assembly cool, whilst the other two cool the filament once it has been extruded. All three fans were dirty, a sign of prolonged use in dusty environments. The single head cooling fan was also very noisy, indicating that the bearings were damaged, and so a replacement, high quality ebm-papst fan was ordered.
Ordering replacement parts, even non-standard items like this new fan, was made easy thanks to Ultimaker's open policy – all mechanical parts for the Ultimaker 2 and their other printers are listed in their GitHub repositories – along with other useful reference information.
A fresh start

Once the new parts had arrived, we set about rebuilding the printer. This was a reasonably simple task, with the most fiddly part being replacement of the temperature sensor and heating element. This required access to the main control circuit board at the base of the printer, with removal of several panels necessary. Whilst not impossible to do, this added perhaps an hour or so to the task, with the silver lining that it did make cleaning the inside of the printer a little bit easier.

Replacing the nozzle was also a surprisingly involved task, with the bulk of the head needing to be dismantled. As well as solving the blockage problem, the upgrade is a great improvement as we can now swap out and replace the nozzle with minimum head dissassembly compared to the original design.
Changing the cooling fan was quick and easy to do whilst the rest of the head was in pieces. The two-pin power connector from the original fan was cut off and soldered to the new one to avoid modification of the original loom.
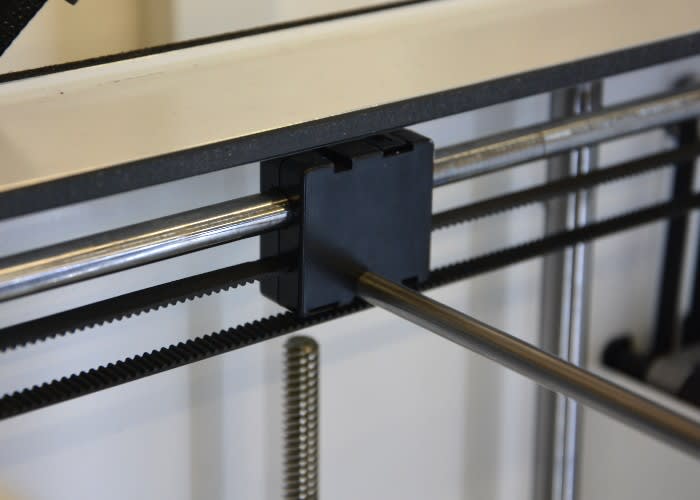
Once the head was back in place, each axis shaft was wiped clean, then a drop of light oil added for lubrication. Since our machine arrived without the oil and other accessories that would come with a new printer, we used 3-in-one oil, a low viscosity mineral oil, as recommended by some users in the Ultimaker community.
Finally, the glass printing bed was removed and thoroughly cleaned, with all residue removed, before being re-installed ready for our first test prints.
Printing again

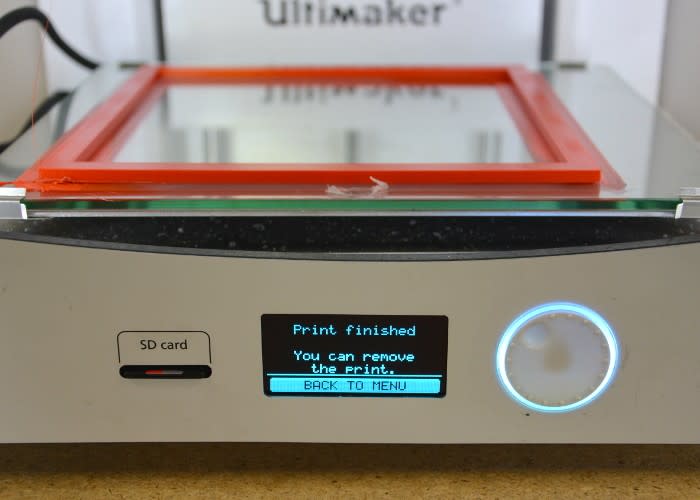
Powering up the printer, we first went through the calibration steps as though the printer was new. This provided further proof that plenty of thought has gone into the user interface of the Ultimaker 2, with clear, easy to follow instructions for levelling the bed and loading filament into the printer.
Following setup, the interface prompts the user to try out a first print from a file on the supplied SD card. Since we did not have this card, we downloaded the original file, an 'Ultimaker robot', copied it to a blank SD card, and inserted it into the printer.
Whilst this first print was underway, we set about preparing for a more useful test print of a 20mm cube, to check the accuracy and performance of the printer.
From screen to model

3D printers are CNC machines – they are controlled by a set of instructions, most commonly G-code, that contain parameters specific to the machine, as well as instructions based on the part to be produced. A basic workflow from design to printed part is as follows:
-
Modelling of 3D part in CAD – we will use DesignSpark Mechanical
-
Conversion of 3D CAD model into G-code 'instructions' – we will use Ultimaker's Cura software and save to SD card
-
Execution of G-code – the Ultimaker 2 machine reads the SD card
-
Printing of part
To begin, a 20mm cube was drawn in DesignSpark Mechanical, and exported as a .stl file.
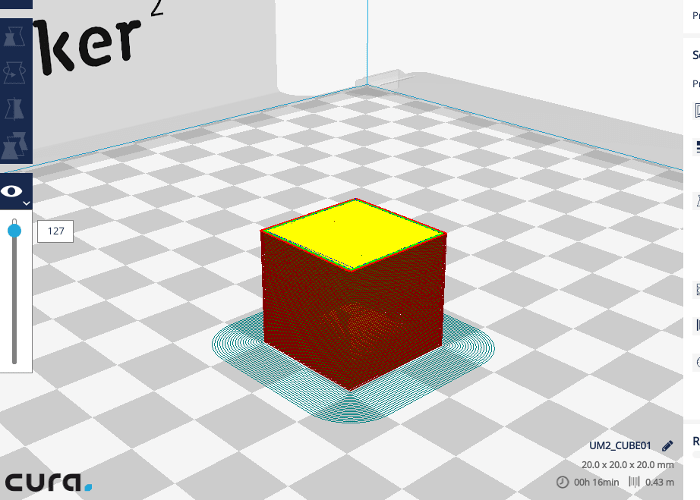
Moving to Ultimaker's Cura software, the .stl file was opened and the cube positioned on the simulated printer bed. Cura has a simple user interface, with either simple or advanced menu options available. In this first instance, we opted for the 'Low Quality' profile, giving the shortest print time possible.
Based on the profile chosen, Cura automatically 'slices' the model, effectively converting it into G-code appropriate for the Ultimaker 2. The advanced menu offers a wide range of options for fine-tuning, but these are beyond the scope of this article.
With the first robot model complete, and removed from the printer bed, the cube G-code was loaded onto the SD card and printed.
Results and next steps
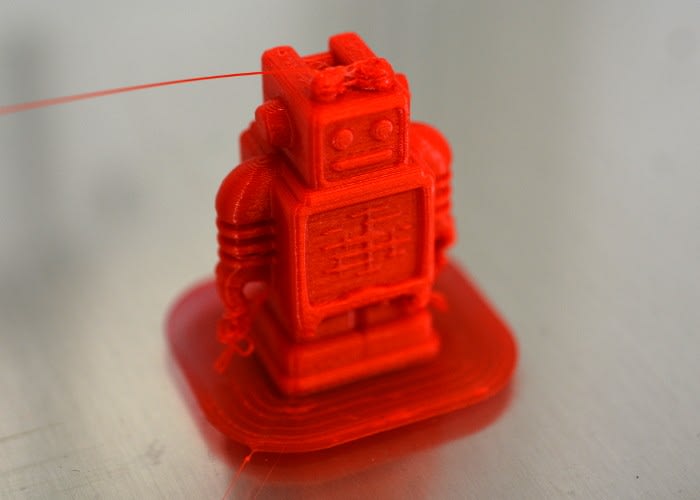
For a first print, the robot model isn't too bad. There is some sagging, or drooping of parts that are not supported, but overall it shows that the printer is extruding plastic well. Despite being simple to use, printing high quality models and getting the most from your printer can take a long time!

The cube printed slightly smaller than the model, when checked with calipers. It is also very slightly trapezoidal, indicating that the axes of the printer may not have been square. This was remedied by adjusting the pulleys and toothed belts on each axis.
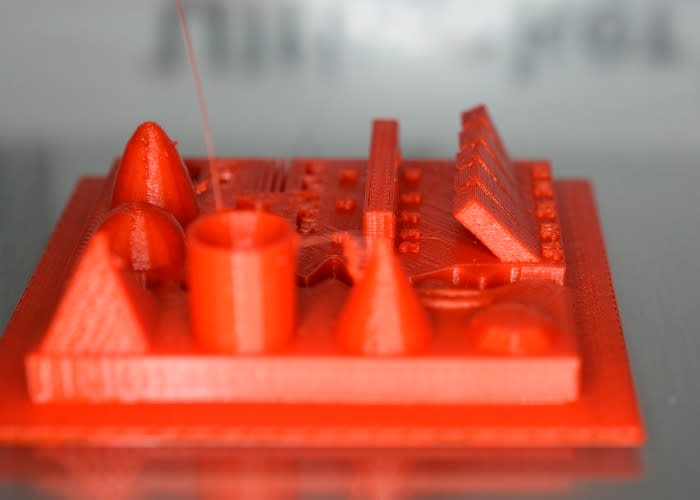
We then printed another test, this time a model shared by user ctrlV on Thingiverse, an online resource for sharing 3D designs. This file is intended to test the capability of 3D printers, specifically things that are hard to print, such as overhangs, fine detail and 'bridges'. The picture above shows the result, with great performance on the overhangs and bridge sections, and improvement needed on some of the finer detail.
We have succeeded in restoring a non-functional Ultimaker 2 into a printer that is already giving fantastic results. With plenty of resources available online (we found this great guide, for starters), and a vast community of people sharing their 3D printing experience, we're looking forward to improving the quality of our printed models.
Using DesignSpark Mechanical to create 3D models and export them to .stl files ready for Ultimaker's Cura software means we have a highly functional, cost free software toolchain too!