Knurling…So just how do you do that in DesignSpark Mechanical?
Follow article
 Dave from DesignSpark
How do you feel about this article? Help us to provide better content for you.
Dave from DesignSpark
Thank you! Your feedback has been received.
Dave from DesignSpark
There was a problem submitting your feedback, please try again later.
Dave from DesignSpark
What do you think of this article?
There are plenty of tutorials to be found in our DSM Learning area, for those times when you need a little reminder, or just don’t know! Here is a little tutorial that shows you how to create knurling on your designs with ease!
Get Knurling
The following is an example of creating a 'diamond knurl' (commonly used to improve grip on everyday objects). You may set dimensions of your preference while using the below steps as a guide to essential geometry operations:
1. Create a cylinder of length 30mm and diameter 20mm. In this case, the top & bottom edges have been rounded to 2mm each.

2. Place a sketch grid at the intersection of the round and cylindrical portion (above right-hand figure.
3. Draw two construction lines, centered at the cylinder's origin and with a 5-degree separation.

4. Sketch the following profile where each line is 0.617mm and perpendicular to each other.

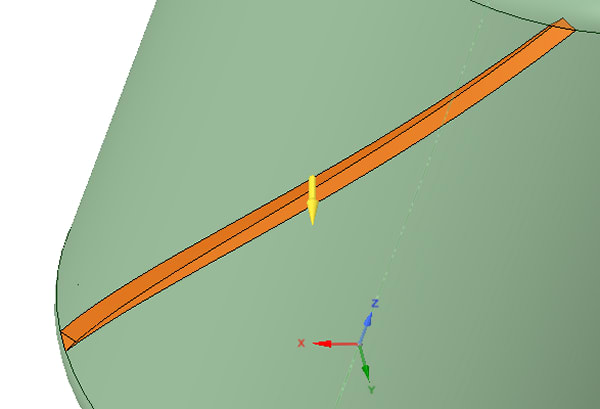
5. Switch to 3D mode. Select the surface you have just created and click Pull -> revolve. Choose the axis of the cylinder to revolve around and then enable 'Revolve Helix - right-handed' in the options tab on the left. Set a height of 26mm and Pitch of 120mm.

6. Select the four faces of the ridge and choose the move tool.
7. Drag the move handle to the cylinder's axis. Now choose 'create pattern' in the move tool.
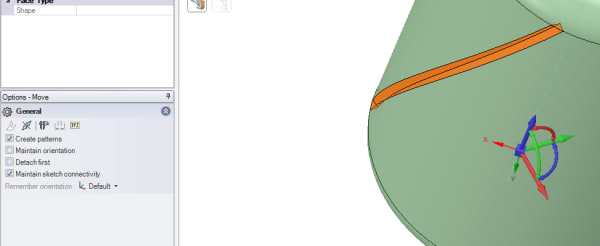
8. Rotate the move handle along the z-axis (blue curved arrow) to generate a pattern of 30 ridges (count = 30).

9. Select one of the profiles sketched earlier to create the ridge and then do PULL -> Revolve (along cylinder axis) -> create helix (left-handed). Pitch at 120mm and height of 26mm. Before completing the helix operation, click on ADD under PULL options.

10. Similarly to step 8, create a 30-count pattern of left-handed ridges which intersect the right-handed ones.

11. Select the combine tool; choose the cylinder as the target object (green coloured) and the 30 left-handed ridges as cutters (in yellow).

12. After the combine operation is complete, we need to perform a 2 stage removal of the artefacts. Firstly, the cutter objects (30 left handed ridges pattern) can be deleted.

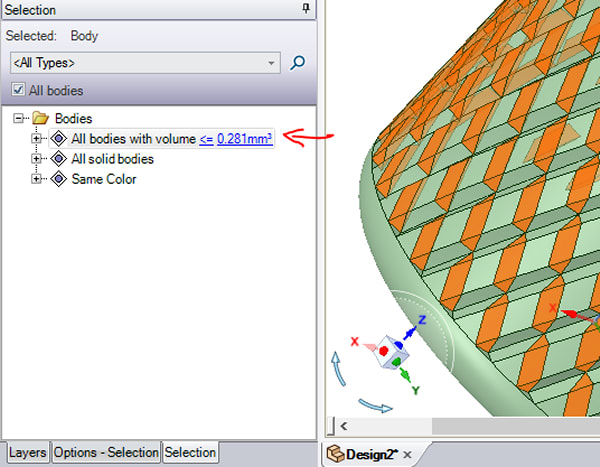
Next, the cut-out portions from the right-handed ridges need to be removed to get the diamond shapes. On the left-hand tab, you can find the advanced selection pane. Group select them and delete.
The result is:

Tip: You can increase the number of ridges (pattern count) to create a more detailed knurl.
DSM Learning area
If you haven’t downloaded and tried DesignSpark Mechanical yet what are you waiting for?Click on the image below!