Hello PROTO: the latest accessory from pi-top
Follow article
 Dave from DesignSpark
How do you feel about this article? Help us to provide better content for you.
Dave from DesignSpark
Thank you! Your feedback has been received.
Dave from DesignSpark
There was a problem submitting your feedback, please try again later.
Dave from DesignSpark
What do you think of this article?
Prototyping space and GPIO access for the popular Pi portable
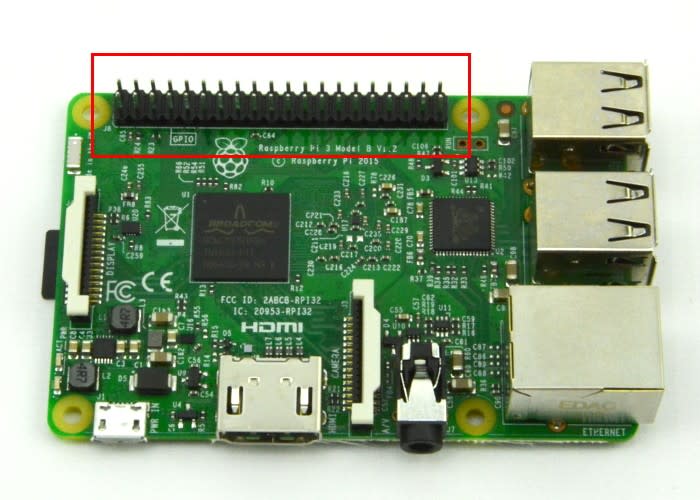
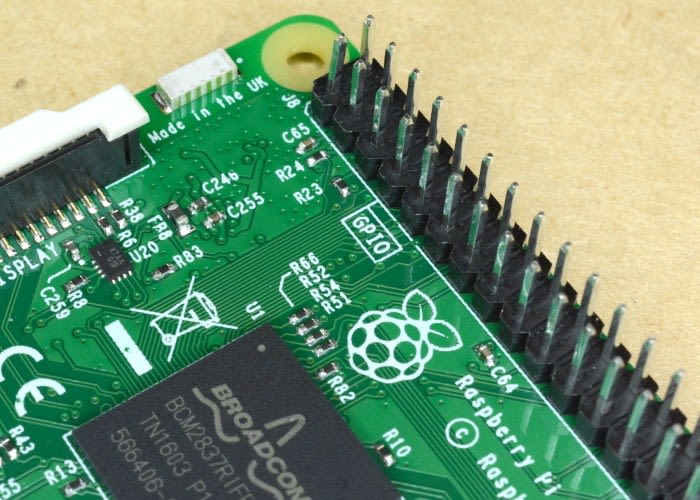
One of the best features of the Raspberry Pi is the exposed GPIO header pins, making it possible to connect all manner of things, from single components to other computers. Since the launch of the Raspberry Pi, numerous add-on boards known as 'HATs' have been developed, that fit on to the GPIO header and providing (almost) plug and play expansion.

When the pi-top – a build-it-yourself laptop based around the Pi – launched, we were excited by the prospect of a portable computer for prototyping and physical computing. Now there is a new accessory from the pi-top team, the pi-topPROTO.
Space to prototype
By default, the pi-top uses all of the Pi's GPIO header, with a cable to the 'hub' power distribution board. This takes care of the battery and screen brightness control, and breaks out the other GPIO connections to a separate header. These are still usable – see a recent post on how we broke out these connections – but the connector uses a smaller pitch than is common (2mm rather than 2.54mm), and is a touch awkward to work with.
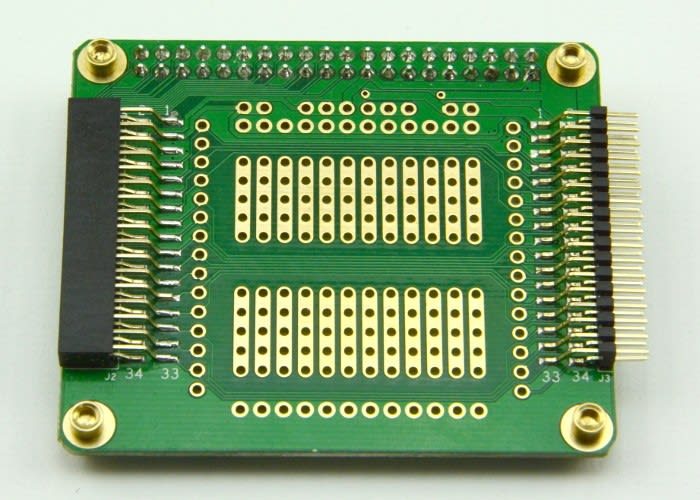
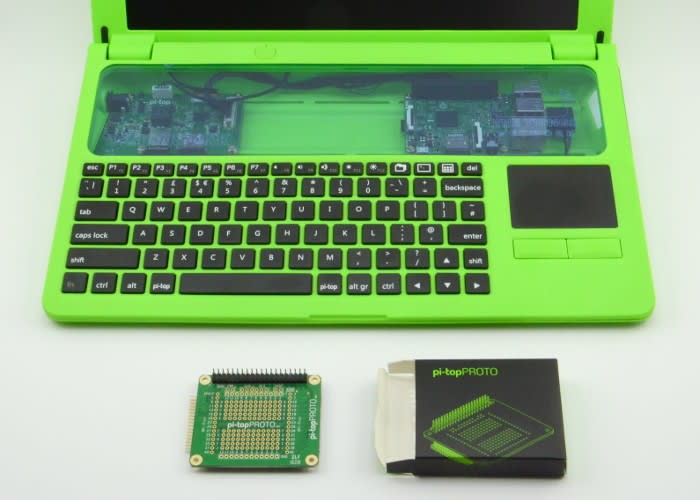
Enter the pi-topPROTO, a simple breakout board that is easy to mount, plugs into the hub's smaller pitch header and duplicates the Pi's GPIO header. There is also ample space to solder components, with each GPIO pin duplicated and clearly labelled, as well as convenient power rails of the usual 5V and 3.3V, as well as the 18V from the battery and power supply, for heftier power requirements.
Duplicating the entire GPIO header means you can once again use your favourite HAT boards with the Pi that is built-in to your pi-top. Before now, doing so meant having to remove the cable from the Pi to the hub board, forgoing control over screen brightness (not such a big deal), and battery monitoring and protection (a bigger deal).
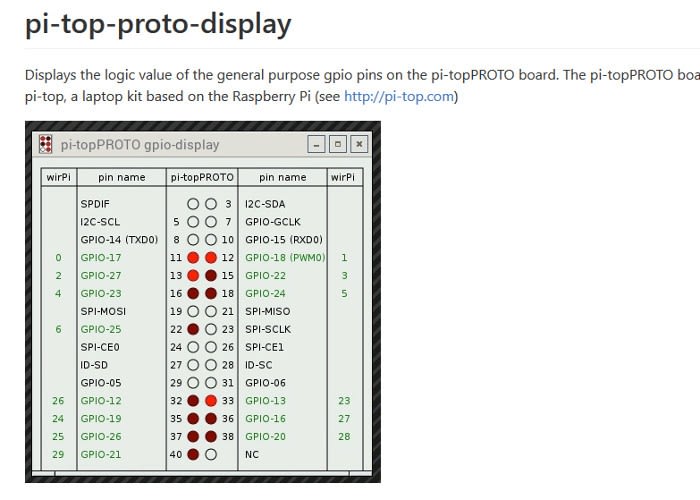
Should you wish to monitor the status of the GPIO pins, there are two handy utilities, pi-top-proto-display and pi-top-gpio-display. Once installed, these will display the logic value of the pi-topPROTO and GPIO pins respectively, which is helpful for debugging and so forth.
Keeping your HAT on
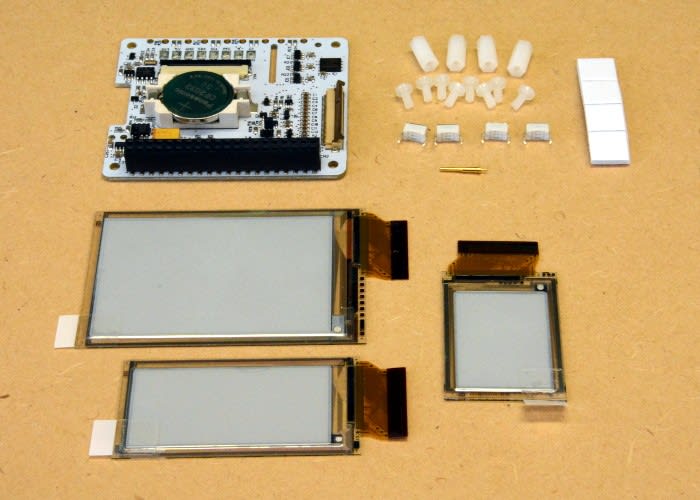
With the ability to add a HAT to our pi-top, we thought we'd try out one of our favourites, the PaPiRus. It comes bundled with three different sizes of ePaper screen, making for a flexible prototyping solution, and something we thought would be a cool addition to the pi-top.
For a closer look at the PaPiRus, and to see how we built it up from the components supplied, check out a previous post.
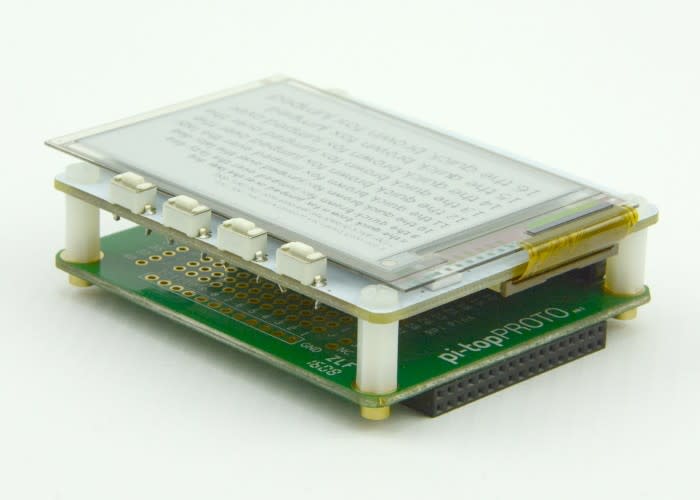
With an assembled PaPiRus, it made most sense to add it to the pi-topPROTO, screwing the small metal spacers into the plastic spacers provided with the PaPirus, before mounting both inside the pi-top.
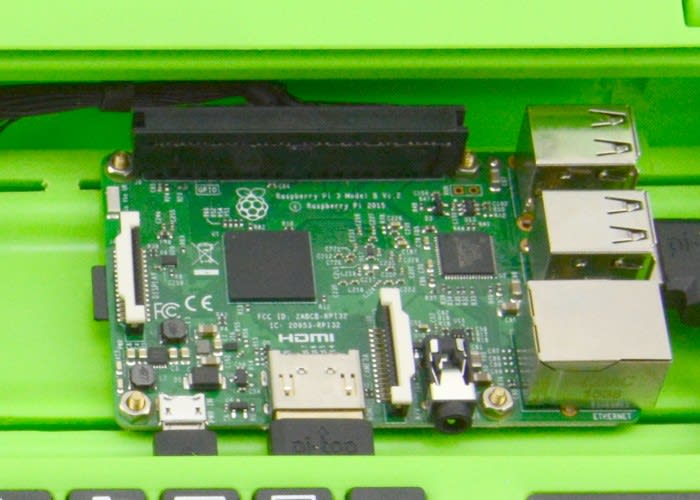
With the acrylic 'slice' cover, and bottom cover panels removed from the pi-top, the PROTO is easy to plug in to the hub, but take care to ensure that the pins line up with the socket before pushing into place.

The PROTO comes with mounting hardware required, which is handy given that M2.5 hardware isn't something many people have lying around (and if they did, it is easy to lose!)
Getting it working

The PaPirus is reasonably simple to set up, as we have done before in our first look at the ePaper display. We are running a stock Raspbian image, since it provides a more familiar environment than the image bundled with the pi-top by default. We configured this to play nicely with the pi-top in another previous post, should you wish to do the same.
Though ePaper is common in eBook readers, it is still relatively unusual to see it in different contexts. Having a display built in to a portable computer is cool for a number of reasons – firstly, it provides an opportunity for developing for ePaper without the need for a workbench or extra wires and components.
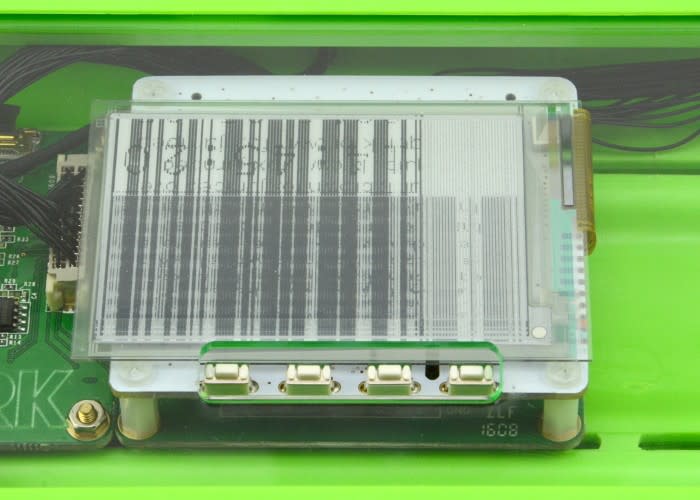
It also provides a nice piece of extra screen real-estate, that will continue to display things even when the power is turned off! I decided to try to clock demo to test the PaPiRus, but instead of showing the time and date, the display garbled as shown above, then the pi-top's screen went blank.
It turns out that the PaPiRus HAT requires use of the SPI bus – as does the pi-top's hub board. We had overlooked this when wanting to use the PaPiRus board, due to some excitement, and neglected to check for conflicts such as this!
Lesson learned: just because pins are broken out to a header, doesn't mean they aren't already in use.
SPI + I2C
This prompted us to look into the resources required by the pi-top hub, in case we could work around the problem. Since the Raspberry Pi has two chip-enable, AKA chip-select pins, it should be possible to use two SPI devices, by using one pin per device. With this theory, if both the hub and PaPiRus only require one chip-enable pin, and they are using the same one by default, we could perhaps modify the code for one device to use the second available chip-enable pin.
More comprehensive information about SPI on the Pi can be found on the officail Raspberry Pi website.
Though we could not find a schematic for the hub, it appeared that both chip-enable pins are used, meaning that we could not easily add another device that requires SPI, such as the PaPirus. We did find several forum posts discussing the possibility of getting more chip-enable pins working, but this is beyond the scope of this article.
Both the pi-top hub and the PaPiRus also require use of the i2c bus, though this presents less of a problem, as multiple devices may be used here, each with their own address. This address is often set in hardware, with a solder bridge or jumper setting, making it simple to chain devices together.
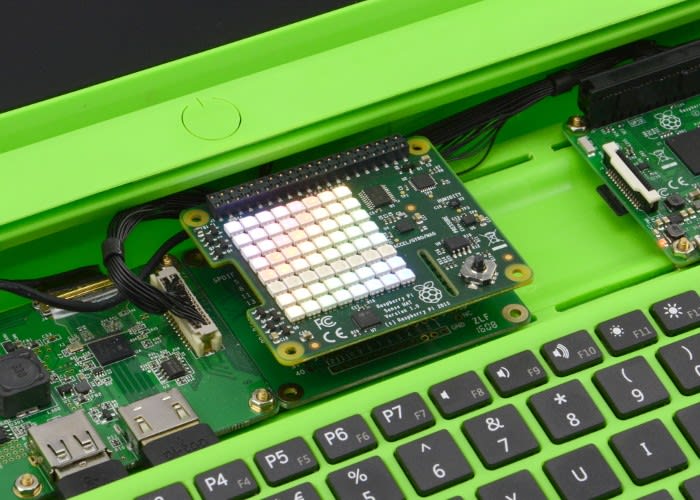
For example, the SENSE HAT is a different add-on board that includes an RGB matrix and many sensors that connect to the Pi over i2c. It does not require the use of SPI for operation. This HAT can be connected to the pi-topPROTO and used as if it was connected to the Pi's regular GPIO header.
A great resource for details of pins and resources used by different Raspberry Pi add-on boards can be found here.
Summary
The PROTO is a useful addition to the pi-top range, especially if you want to solder some components for semi-permanent prototyping rather than using a breadboard. It works just as well with the pi-topCEED, the desktop version of the pi-top. In addition, Raspberry Pi HATs that do not require use of SPI, such as the SENSE HAT, can now be used.
The pi-topPROTO also breaks out the 2mm pitch header in the same way as the hub controller, should you wish to add other accessories such as the pi-top speaker module. This modular design encourages further experimentation and is a great platform upon which to modify your pi-top. The challenge is seeing how much you can fit into the space provided!