Connecting a Raspberry Pi to Azure using Windows 10 IoT Core
Follow article
 Dave from DesignSpark
How do you feel about this article? Help us to provide better content for you.
Dave from DesignSpark
Thank you! Your feedback has been received.
Dave from DesignSpark
There was a problem submitting your feedback, please try again later.
Dave from DesignSpark
What do you think of this article?
In a previous article, we introduced the Windows 10 IoT Core operating system for Raspberry Pi with the intent of developing IoT functions using the Microsoft development environment. Windows 10 IoT Core is a flavour of Windows optimised for small devices and designed to streamline the workflow required for scalable IoT infrastructure projects. Having already installed Windows on our Raspberry Pi, this article will mainly focus on bridging the gap between edge and cloud by exploring the process of connecting our device to Microsoft Azure.
You will need
- Raspberry Pi 2 or 3
- 16GB class 10 micro-SD card
- Micro USB cable
- Windows 10 IoT Core Dashboard
- Visual Studio
Connecting to Azure
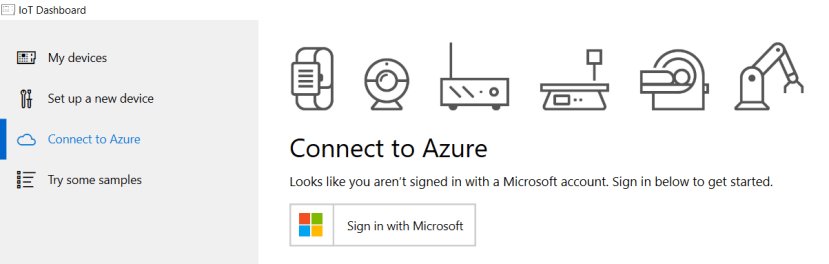
The first step in connecting our Raspberry Pi to the cloud is to establish a secure connection to the Azure service. We can login to Azure through the IoT Core Dashboard by clicking the “connect to Azure” tab and creating a free account. Once complete, we can then establish a secure connection to the cloud by creating the required Azure resources and provisioning our device in the dashboard.
The Azure cloud framework is designed around a hierarchy of interoperable resources that allow for the flexible collection, storage and application of data in different formats. The provisioning process requires a series of these resources to be created in order to establish the data flow for our application.
This project requires a hierarchy of two Azure resources to setup an initial connection. These can then be used in the IoT Core Dashboard to provision our Raspberry Pi to our Azure account. These are:
- An IoT Hub to handle any network events.
- A Device ID to authenticate the data source.
To create these resources, we first need to login to the Azure Portal. Once complete, use the search bar at the top of the page to navigate to the “IoT Hub” resource and use the “create” button near the top of the page to initialise a new instance for your project.

Using this menu, we can initialise a new IoT Hub as well as a Resource Group to hold our project dependencies. Name the new Resource Group using the “create new” link provided below the drop-down menu. Then select your ideal sever location and the desired name of your new IoT Hub and click “review + create” to initialise both resource types and link them together automatically.
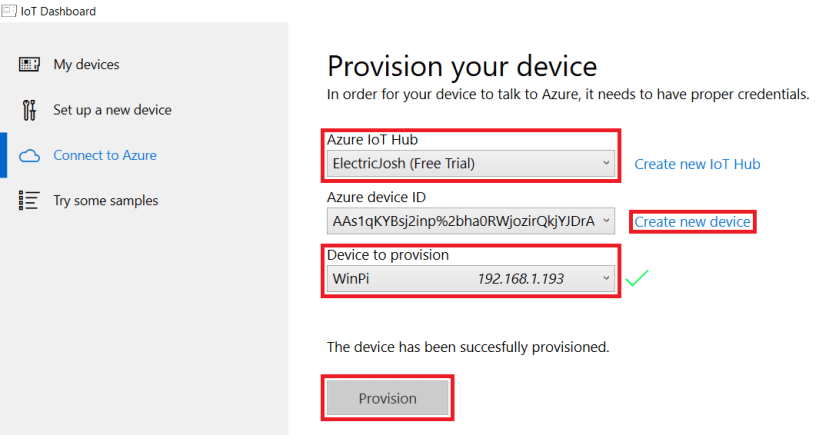
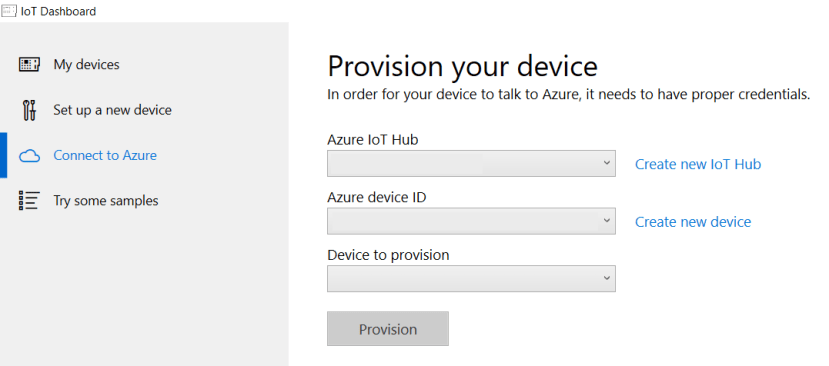
Once complete, we can switch back to the IoT Core Dashboard and provision our Raspberry Pi to talk directly to Azure by selecting our new IoT Hub instance in the first drop-down menu. We can then give our device an identifying name by clicking the “create new device” button and find our device on the local Wi-Fi network using the final drop-down menu. Click the provision button to finish the setup.
Sending messages to the cloud
Once our device has been successfully provisioned, the next step is to validate our efforts by sending an obligatory test message to the cloud. To do this, we will need to build our first IoT Core app by creating a new C# project in Visual Studio. For this example, we will be modifying the Hello Cloud C# sample project provided by the extensive Windows IoT Core Samples repository.
Alternatively, the code file for this project can be found on GitHub.
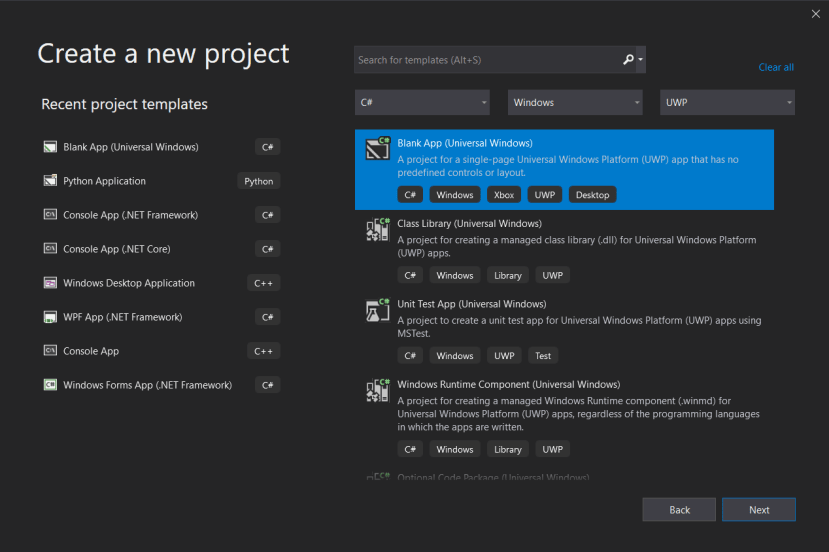
To start, open Visual Studio and create a new blank Universal Windows Platform (UWP) project from the start menu.
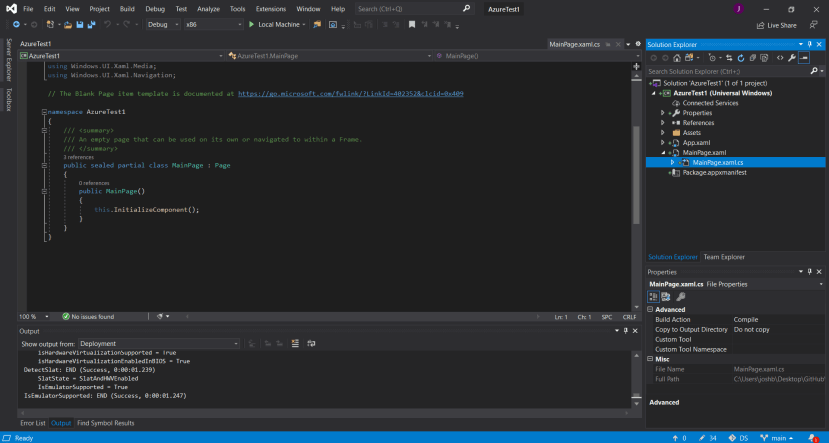
Use the project explorer on the right-hand side of the window to navigate to the default main project code file called “MainPage.xaml.cs”, here we will find the main function for our app to call on runtime.
public sealed partial class MainPage : Page
    {
        public MainPage()
        {
            this.InitializeComponent();
            SendDeviceToCloudMessagesAsync();
        }

        static async void SendDeviceToCloudMessagesAsync()
        {

            string IoTHubHostName = ""; // Azure IoT Hub Hostname
            string DevicePrimaryKey = ""; // Device Primary Key
            string DeviceID = ""; // Device ID or Name

            var deviceClient = DeviceClient.Create(IoTHubHostName,
                    AuthenticationMethodFactory.
                        CreateAuthenticationWithRegistrySymmetricKey(DeviceID, DevicePrimaryKey),
                    TransportType.Http1);

            var str = "Hello, Cloud!";
            var message = new Message(Encoding.UTF8.GetBytes(str));

            message.ContentEncoding = "utf-8";
            message.ContentType = "application/json";

            await deviceClient.SendEventAsync(message);
        }
    }
Modify the main page class to look like the snippet provided above. This code will call an asynchronous function on start-up and create a device client that sends a single JSON formatted "Hello, Cloud" message to Azure.
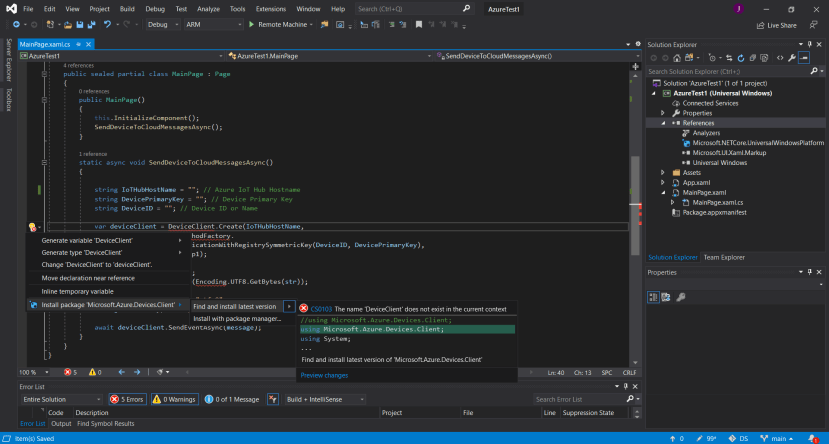
Fix any dependency issues you find using the lightbulb menu at the left-hand side of the window, then insert your device credentials using the string variables provided at the top of the function.

The IoT Hub Hostname can be found in the overview panel of your IoT Hub in the Azure Portal. The Primary Device Key and ID can then be found in the IoT Hub side menu under IoT devices.
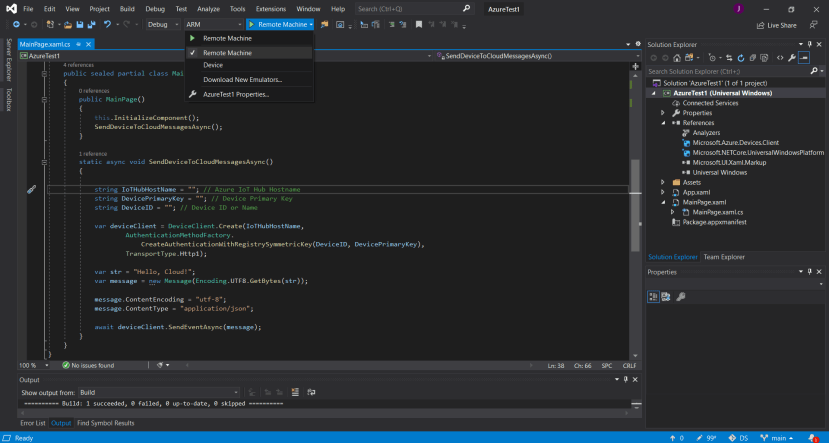
Build the project and then change the build target type at the top of the page to ARM and select Remote Machine to search for your Raspberry Pi on the local network. Run the code once complete to check for any errors.
Once the test app has been successfully run, we can head back to the Azure Portal to configure our routing for any incoming messages. As the IoT Hub is responsible for handling device events, we need to direct our incoming data to the desired endpoint using its message routing feature.

Navigate to the "Message Routing" tab on the IoT Hub side menu and click “Add” to start building a new route for our incoming data.
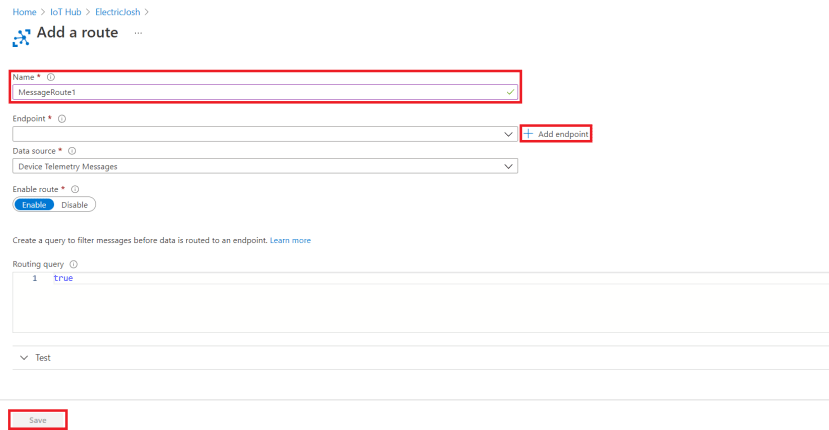
Enter the desired name for the new message route then click the “add endpoint” button. As we want to store these messages for future consumption, select “Storage” when prompted, to configure how the messages will be stored in the cloud. The save button will be greyed out until this is complete.

Enter the desired name for the new endpoint, making sure to select JSON encoding to store our data in a universally recognised format. Then click “pick a container” to setup a storage account resource for our formatted data. We can also modify our filesystem hierarchy from this page using the “file name format” box but for this project, we will keep the default settings.

Enter the desired name for the new storage account, pick a server location then click “OK”. When prompted, name the storage container that will hold our formatted message data and confirm to finish configuring our file system for incoming formatted messages.
Remember to save everything to finish establishing the message routing.

The final step is to test the message routing by running our app once more in Visual Studio. To find the message in the Azure Portal, navigate to the storage account resource menu using the search box at the top of the page. Click on your new storage account, then click the new container and navigate down the file system to find the most recently generated JSON file.
Please remember that the message can take a few minutes to appear in the file system.
Click the edit button to see the contents of your recently posted message, if successful we should see the “Hello, Cloud” message sent from our IoT device at the end of the file. Congratulations, you have successfully connected a Raspberry Pi running Windows 10 to Azure cloud services!