Remote Flying Fish Project Part 15: Bluetooth in Flutter
Follow article Dave from DesignSpark
How do you feel about this article? Help us to provide better content for you.
Dave from DesignSpark
Thank you! Your feedback has been received.
Dave from DesignSpark
There was a problem submitting your feedback, please try again later.
Dave from DesignSpark
What do you think of this article?
In this chapter, we will learn how to use a plugin - flutter_blue to connect our Bluetooth devices.
Firstly, install this plugin into Android Studio.
1. Include flutter_blue into your dependency(package) list (pubspec.yaml file):

2. Type "flutter pub get" in the terminal tab of Android Studio in order to update the package available for use in this project.
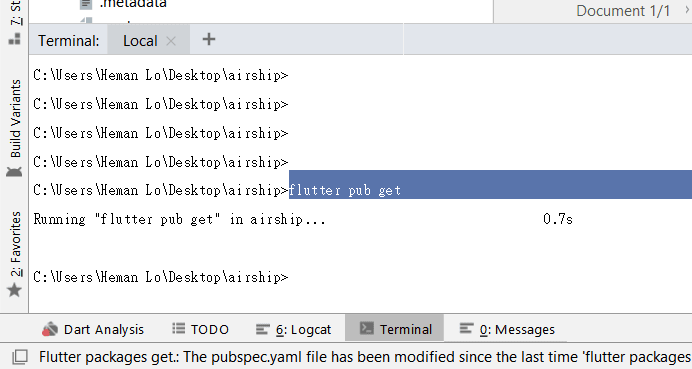
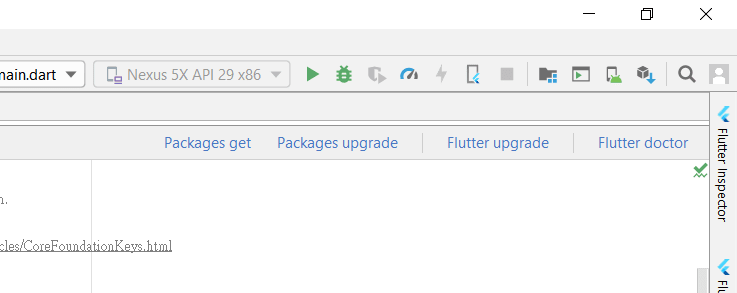
Or click "packages get" on the right upper area.
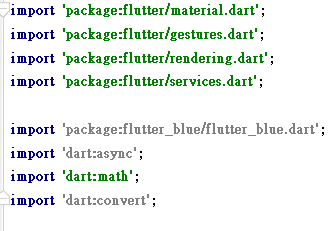
3. Import the following packages.
4. Change the minimum SDK version from "16" to "19" in "airship/android/app/build.gradle".

Now you are ready to start.
The flow of the code is the same as in App Inventor. Start with scanning the Bluetooth device, select our device, connect the device and send messages. For simplification, we will automatically select our device by the name. (HMSoft is our device's name.)
Firstly, create and initialize the flutter_Blue. Also with the service UUID, characteristic UUID , the name of the device and a string that for output. (Remark: UUID is in lower case letters)

Similar to the the default template in Flutter, here we create a new stateful widget MyApp() after main().
Hint: Hou can type stful for the shortcut

Then, override the initState() method. The uses of these two setup classes are to force the program to switch to landscape orientation and perform Bluetooth scanning at the very first place.

Next, we need to create startScan() method. It will keep scanning until it found a device that matches the out device name. Therefore, please be make sure you have the right name of your Bluetooth device. You can check it by using AT commands.
Once it is connected to the device, the program will stop scanning.

The following are the connectToDevice() and disconnectFromDevice() methods.

And the last step for setup is to locate the right characteristic. The idea is that there are several services in the Bluetooth device. However, only one of them is useful for us to send data. Also the same, there are several characteristics of the service but only one of them is useful for us.
Therefore, we can simply use "forEach()" to match the right service and characteristic by the UUIDs. Save the characteristic in "targetCharacteristic" for future use.

The last step is to send the data. create a global method of writeData() outside any class.

Insert the writeData(messages) inside the class HorizontalTouchControlPainter and the class VerticalTouchControlPainter.


Build the APK in the Build/Flutter/Build APK.

You can find the apk file in the directory "airship/android/build/app/outputs/apk/debug/".

Upload the apk and install it on your mobile device. You can use USB TTL or Arduino to test the results. (Remarks: now you can control both joysticks at the same time.)

Here you are, you are now ready to test it with the airship.
============================= iOS User Remark ======================================
You will need to comment out (by adding a #) the line of use_frameworks! in ios/Podfile in order to run/build successfully.
target 'Runner' do
  # use_frameworks!
Parts in this series
- Remote Flying Fish Project Part 1: Introduction
- Remote Flying Fish Project Part 2: DIY Series - Arduino Testing
- Remote Flying Fish Project Part 3: Motor Testing
- Remote Flying Fish Project Part 4: Bluetooth Testing
- Remote Flying Fish Project Part 5: Motor Testing with Remote XY
- Remote Flying Fish Project Part 6: PCB Design (preparatory)
- Remote Flying Fish Project Part 7: PCB Design (Schematic)
- Remote Flying Fish Project Part 8: PCB Design (PCB Layout)
- Remote Flying Fish Project Part 9: Soldering and Arduino Programming
- Remote Flying Fish Project Part 10: Flutter Introduction
- Remote Flying Fish Project Part 11: Flutter Installation on MacOS
- Remote Flying Fish Project Part 12: Flutter Installation on Windows
- Remote Flying Fish Project Part 13: Get yourself a Git
- Remote Flying Fish Project Part 14: Flutter UI Design
- Remote Flying Fish Project Part 15: Bluetooth in Flutter
- Remote Flying Fish Project Part 16: 3D printing for propeller protector
- Remote Flying Fish Project Part 17: Flight Test and Fine-tuning