3D printing with DesignSpark Mechanical
Follow article
 Dave from DesignSpark
How do you feel about this article? Help us to provide better content for you.
Dave from DesignSpark
Thank you! Your feedback has been received.
Dave from DesignSpark
There was a problem submitting your feedback, please try again later.
Dave from DesignSpark
What do you think of this article?
Rapid prototyping a holder for the Raspberry Pi Camera
3D printing is now more accessible than ever, with desktop models being used in schools, hackerspaces, workplaces and homes across the globe. Of course, having access to a printer is only the first step towards printing objects, you also need to be able to design parts in 3D, too.
In this post we will use DesignSpark Mechanical, a feature-rich, free software package from RS, to design a holder for the Raspberry Pi Camera module, before printing it on a recently refurbished Ultimaker 2.
Getting started
A guide to installing DesignSpark Mechanical (DSM) can be found here. Once installed, it is recommended that you spend some time learning about the software. There are video tutorials available on the RS website, as well as online help reference and even an Instructable to help get you started.
3D modelling can appear daunting to begin with, but with some practice and understanding of the tools and techniques, you may be surprised at how quickly you can get professional results!
It can be useful to start by modelling a known object, rather than starting from scratch. Since I had a Raspberry Pi Camera on my desk, I decided to measure it and make a basic model in DSM. This is good practice for several reasons: it can be used to 'carve out' parts without the need of drawing every detail, it can be used for alignment and to determine what other pieces need to be modelled.
Completing the first design
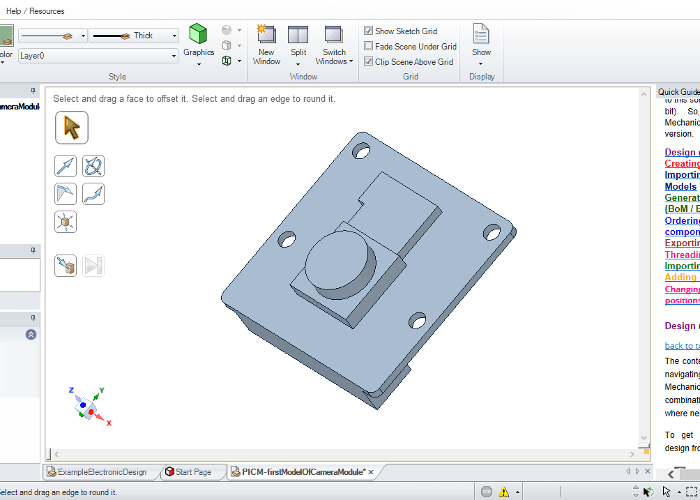
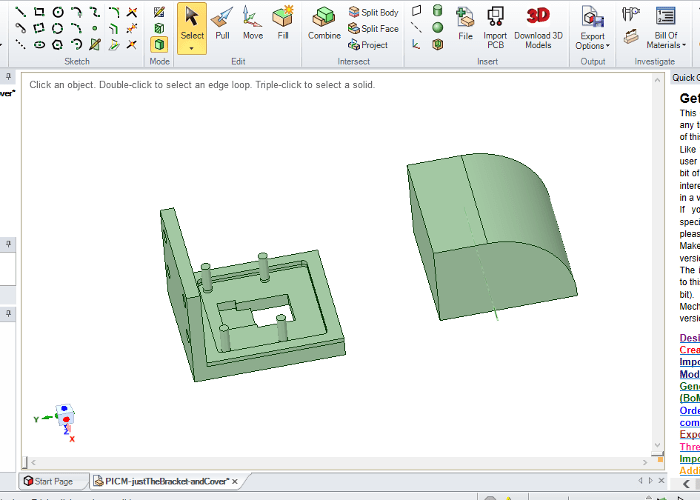
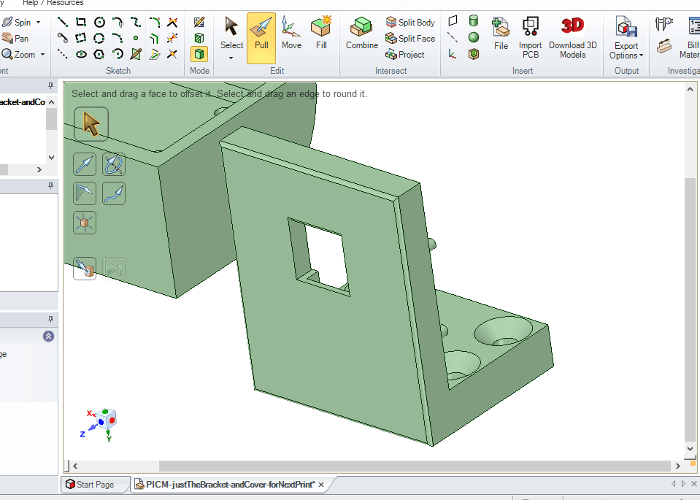
With the camera model in the drawing area, I started to design a basic right-angle mounting bracket, first sketching a rectangle with dimensions just larger than the Pi camera module, then using the 'Pull' tool to create a solid box.
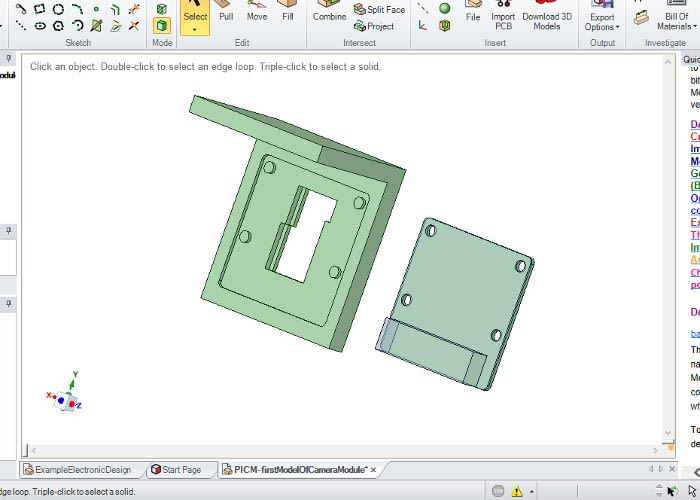
Using the camera model, I cut out a section of this solid box with the 'Combine' tool. Once this operation had completed, the block had several features, like the mounting holes, that could easily be modified.
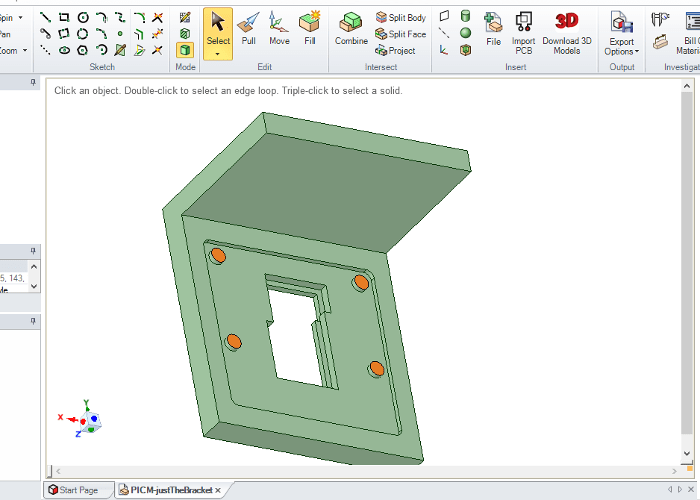
For example, the cut operation left some cylinders that I intended to use as mounting 'pegs' to hold the board in place. These could be extended using the 'Pull' tool. Once happy with the part of the mounting plate that will hold the camera module, I added another solid block, perpendicular to the first, and used the 'Combine' tool again, this time adding rather than cutting, to join the two pieces together.
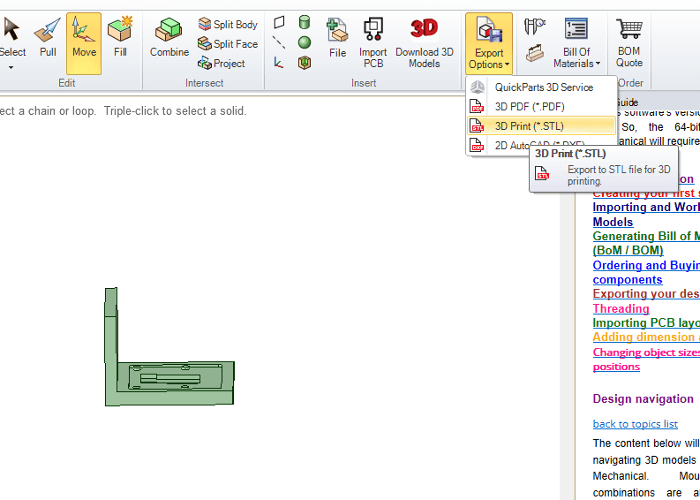
Exporting the model to a format suitable for 3D printing is easy – simply using the 'Export Options' button on the toolbar and selecting '3D Print (*.stl)' option. This file could be sent to a third party 3D printing company, but for DIY printing we need to open it with another piece of software, in this case Cura, from Ultimaker.
From screen to machine
Cura takes 3D models and converts them into instructions, or G-code, for 3D printers. It is not limited to the Ultimaker range of printers, you can also use it with some RepRap and Prusa models, amongst others. A more comprehensive list of compatible printers can be found here.
Cura has a simple mode that allows for quick and easy printing, and for the beginner or basic user this is great. However, I would recommend choosing the advanced toolbar, to see the different parameters taken into account when converting the design file into G-code, and make changes if necessary.
There is lots of information on getting the most out of your 3D printer, some generally applicable and some dependant upon your particular type or model of machine. As well as in-depth tutorials and guides, Ultimaker have a well-developed forum with many active users sharing their advice and experiences, all of which are invaluable when you are new to 3D printing.
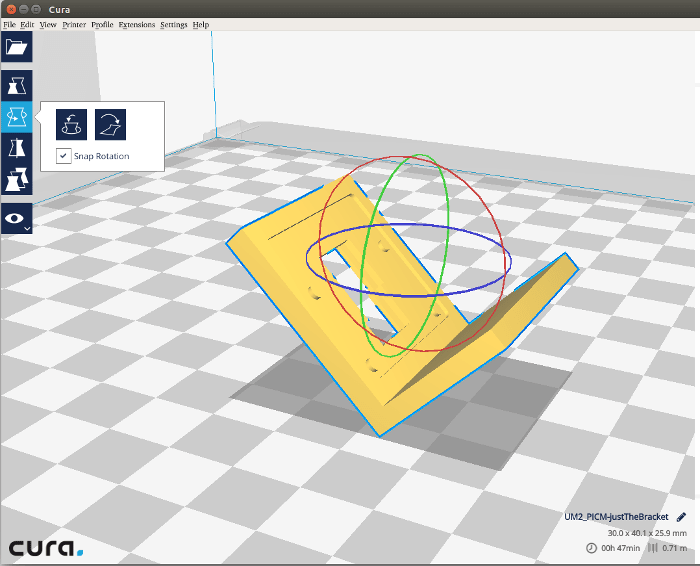
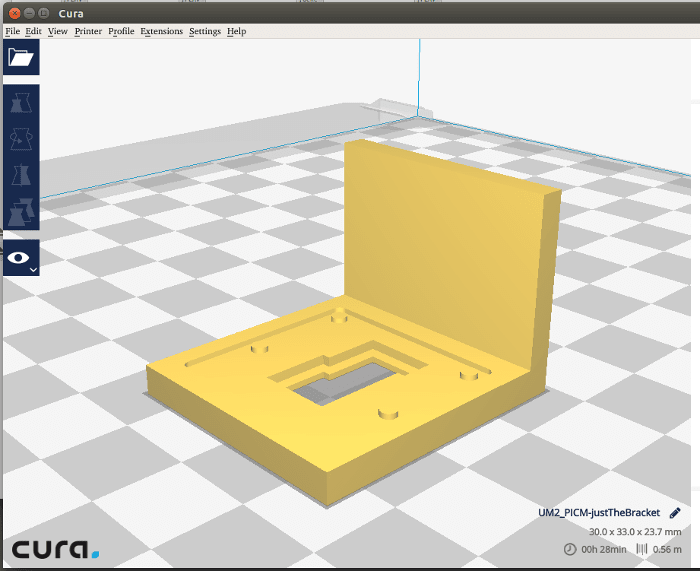
One factor to consider is orientation of your model. When loaded into Cura, it is displayed in a virtual 'print area'. Before exporting the G-code, take a moment to think about how the part will print, and if there is a 'best' orientation. For example, I chose to position my model as shown above, to minimise the amount of overhanging parts, as these can be difficult to print well.
Since this was my first print of this design, I opted for the 'Low Quality' profile, to give a reasonably quick printed result. With an SD card inserted into my computer, exporting the design was simple, with a click of the 'Save to removable drive' button.
Printing the part
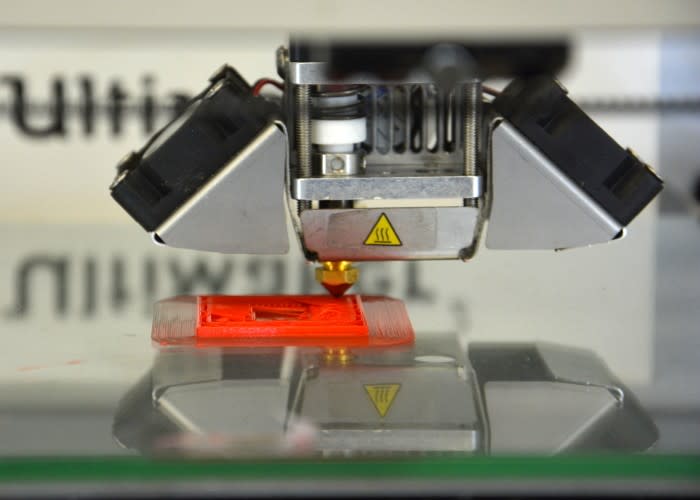
Printing objects with the Ultimaker 2 is quick and easy, using the scroll wheel to navigate the machine control menu, selecting the file to print and starting the job. Again, there is a whole host of discussion and information online about the finer points of 3D printing that are beyond the scope of this article.
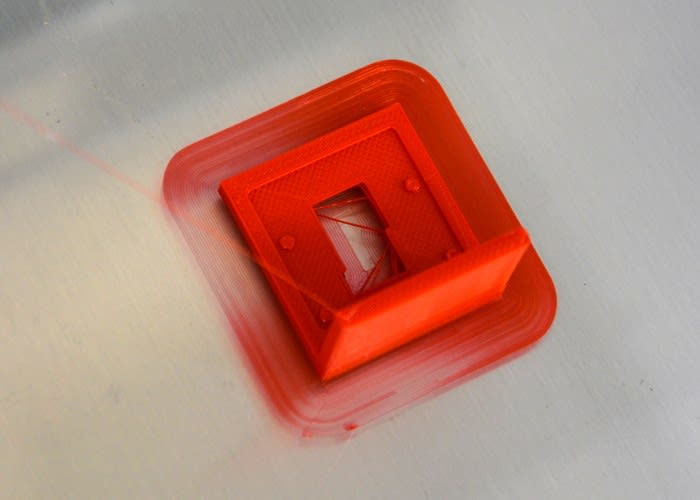
Once completed, I removed the model from the print bed, tidied up the excess 'brim' and filament and checked how well the part fit with the camera module. It was slightly disappointing – the cutout for the board was too small, and the mounting pegs were too short and too thick to fit through the mounting holes. Lessons learned included:
-
PLA filament shrinks a little when it cools, meaning that printed parts can vary in size somewhat from the design file
-
Printing quickly with simple settings will not give a true representation of the part as modelled on screen
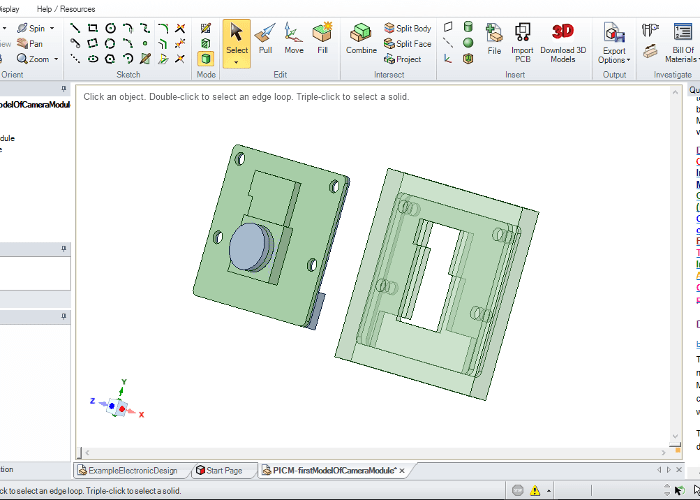
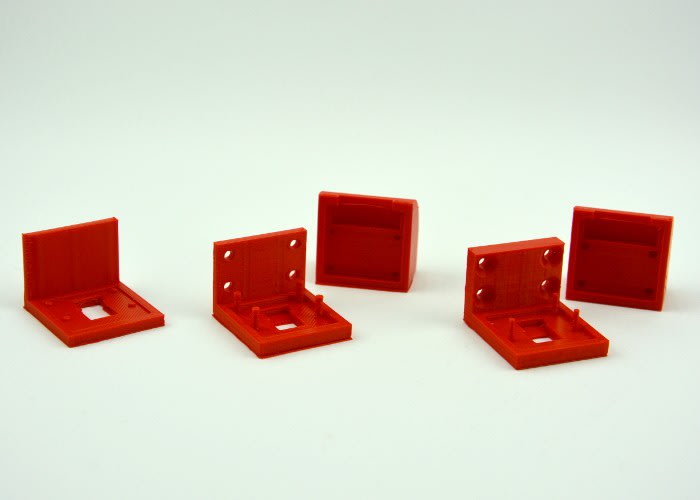
Taking the above into account, I made some changes to the design, including lengthening the mounting pegs, making them thinner, and enlarging the recess for the camera board. I also added some mounting holes to the bracket, and designed a second part to cover and protect the camera module.
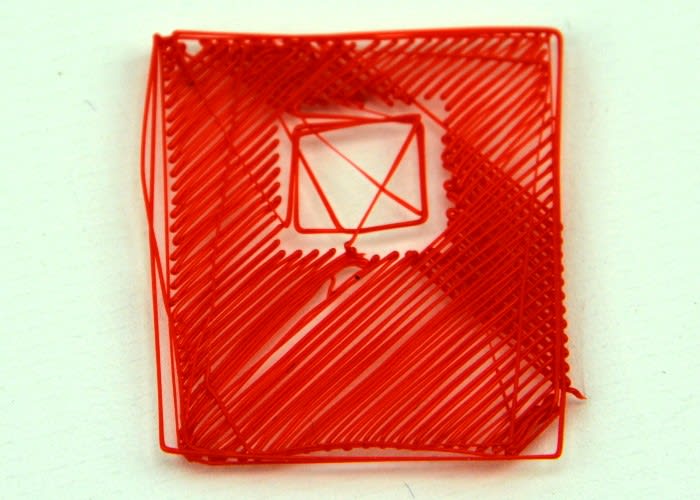
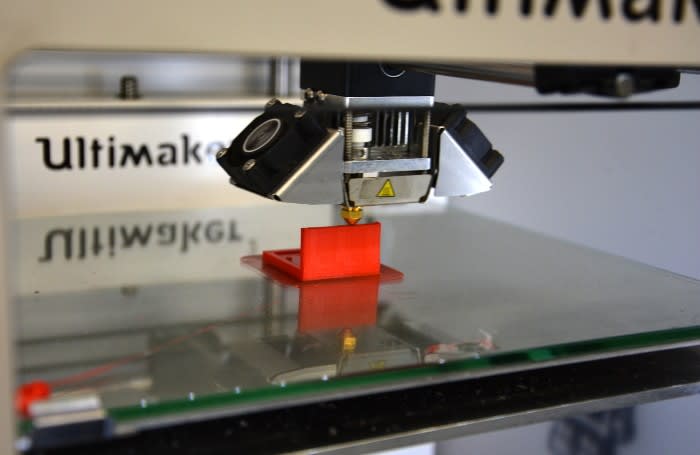
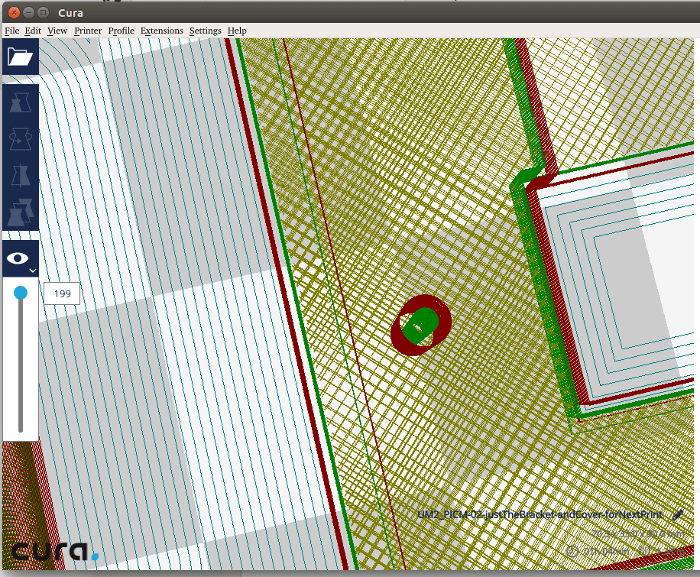
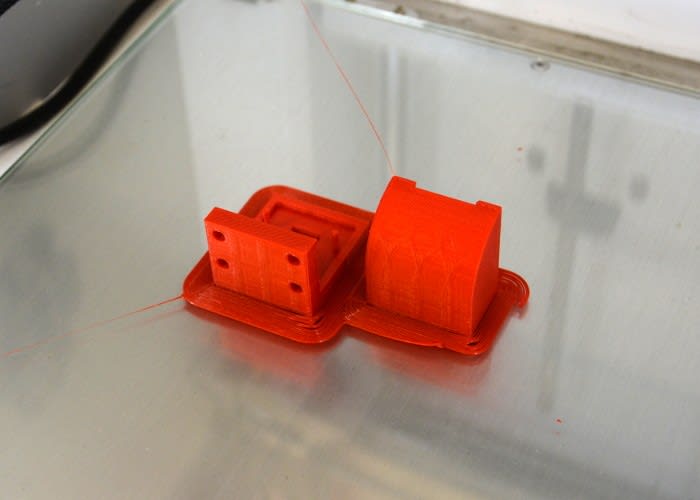
When printing multiple objects at a time, care should be taken to align the desired 'bases', to ensure that each part is printed from the bed upwards. If this is not done, and a part is 'hovering' above the print bed, the filament will not bind to the bed, giving poor results, wasted filament and time. See the photo above for what the first layer of a print looks like when it starts several mm from the print bed!
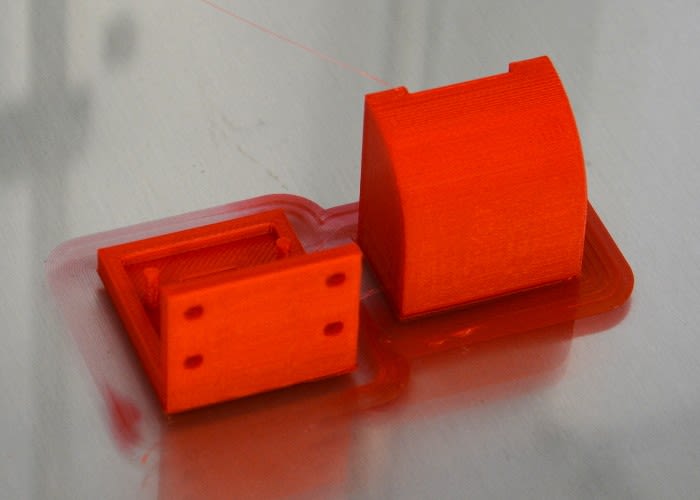
Once this issue was fixed, the second print was an improvement over the first, but still suffered from some problems. It still did not fit the camera module as expected, with the biggest issue being deformed holes and pegs, where the filament did not stay in the place it was deposited.
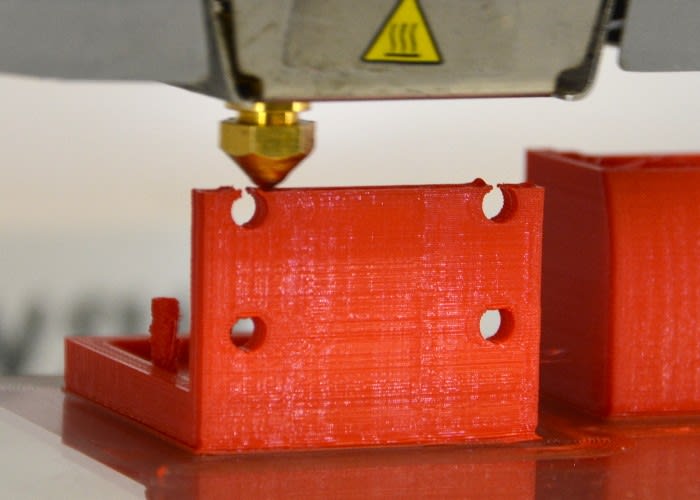
To overcome this problem, I could have tried to print the part in a different orientation, but I felt that this would result in problems with other elements of the design. Instead, I made adjustments to the size of parts, making the holes bigger than they needed to be, and the pegs smaller. I also reduced the printing speed in an effort to improve print quality.
With these changes made, I ran a third print job. This rapid prototyping process is one of the advantages of having access to a machine. I could design a part, run a test print job, make changes and print again within minutes and hours, rather than having to send the design to a third party for printing, and wait days or weeks before seeing the results.
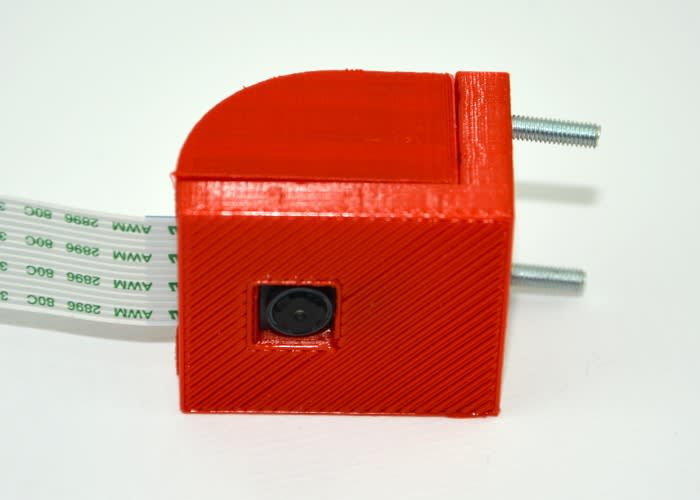
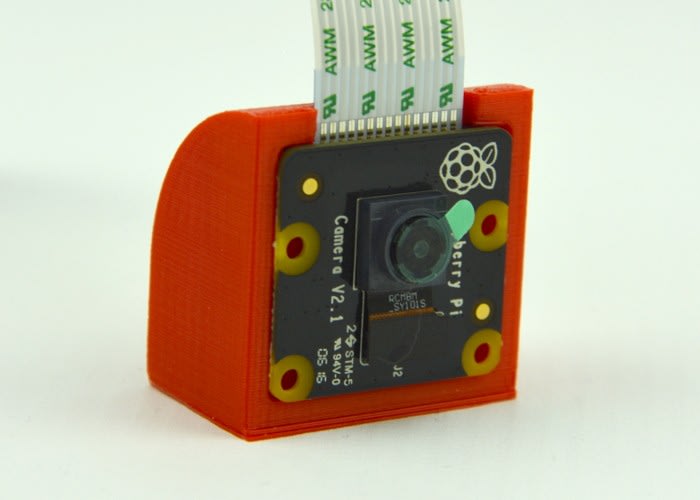
This time, the camera module fit onto the pegs and the cover could be added on top. Though some parts of the design were delicate, overall it functioned as expected, and allowed for perpendicular mounting of the camera.
In summary
Designing parts for 3D printing is not without it's complications, but it is certainly a process with plenty of scope for experimentation and learning. By printing out models that you have designed yourself, you can gain an understanding of what works and what doesn't through trial and error.
DesignSpark Mechanical is incredibly powerful CAD software, with over 40,000 3D models of existing RS products, that you can browse within DesignSpark Mechanical, and use in your own designs.
Getting started with 3D printing is relatively simple, with plenty of resources to help you along the way, and a community of people with lots of experience, should you encounter problems. With free to use software and widely available 3D printers, the opportunity for rapid prototyping new designs is greater than ever before!