Program the IOT2000 with Arduino IDE!
Follow article Dave from DesignSpark
How do you feel about this article? Help us to provide better content for you.
Dave from DesignSpark
Thank you! Your feedback has been received.
Dave from DesignSpark
There was a problem submitting your feedback, please try again later.
Dave from DesignSpark
What do you think of this article?
Step 1: Setting Up Your IOT2000!
You will need the next parts.
- 9-36V DC power supply.
- Micro SD card (Min 8GB)
- 5V LED
- Micro USB cable
- Arduino IDE software
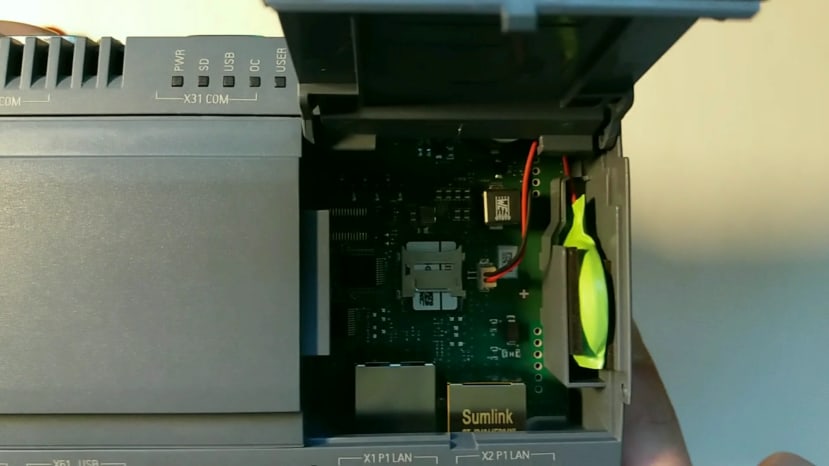
Your IOT2000 needs an SD card with the Siemens image on it.
It will boot from it.
Step 2: Create a Bootable SD Card
The next steps will explain you how to create it.
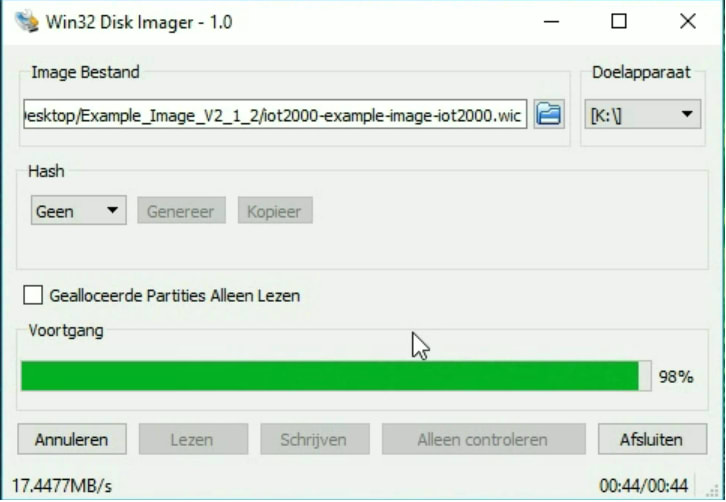
1. Place the SD card in your PC.
2. Download WIN32DiskImager.
3. Download the Siemens Image.
4. Open the WIN32DiskImager and write the file on your SD card.
5. Place it in the IOT2000. (The IOT2000 must be voltage free!)
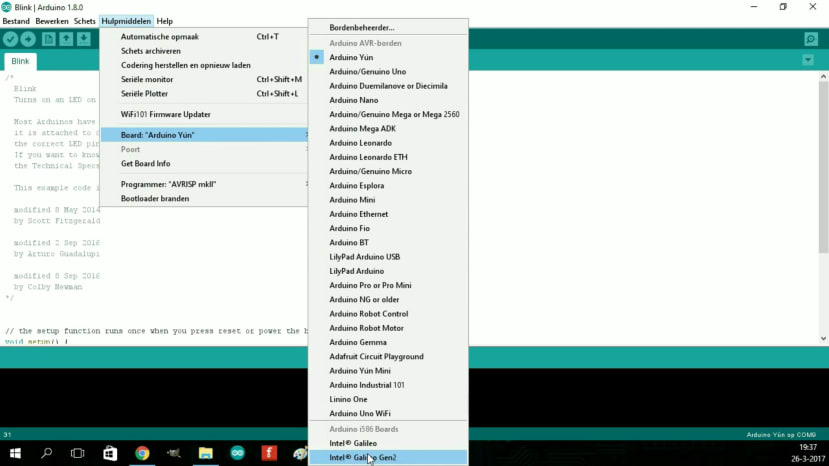
Step 3: Download the Intel Galileo Package in Arduino IDE
We must import the Intel Galileo package in the Arduino IDE software.
1. Open Arduino IDE
2. Go to Tools > Boards > Board Manager.
3. Search for "I5"
4. Download & install the latest version.
5. Check at "Boards" for the Intel Galileo gen2 and select it
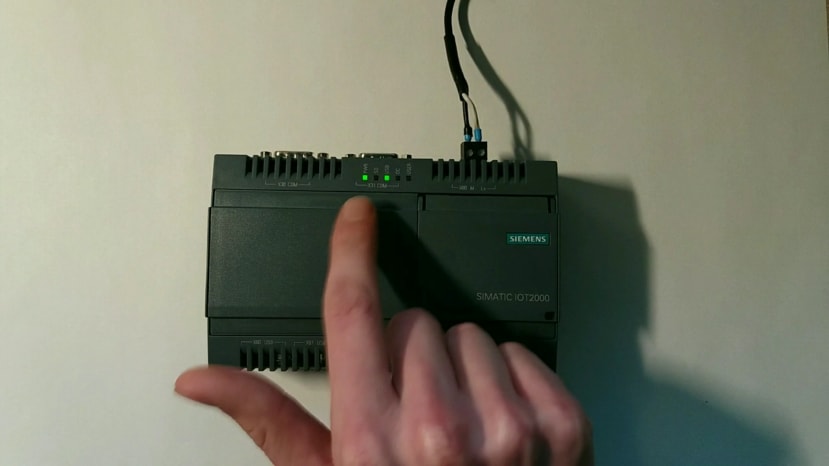
Step 4: Power & Drivers

So we are almost there.... :)
1. Set the power on your IOT2000
2. If everything goes alright, the PWR led should be on.
3. It takes about 30 seconds before your IOT2000 has fully started.
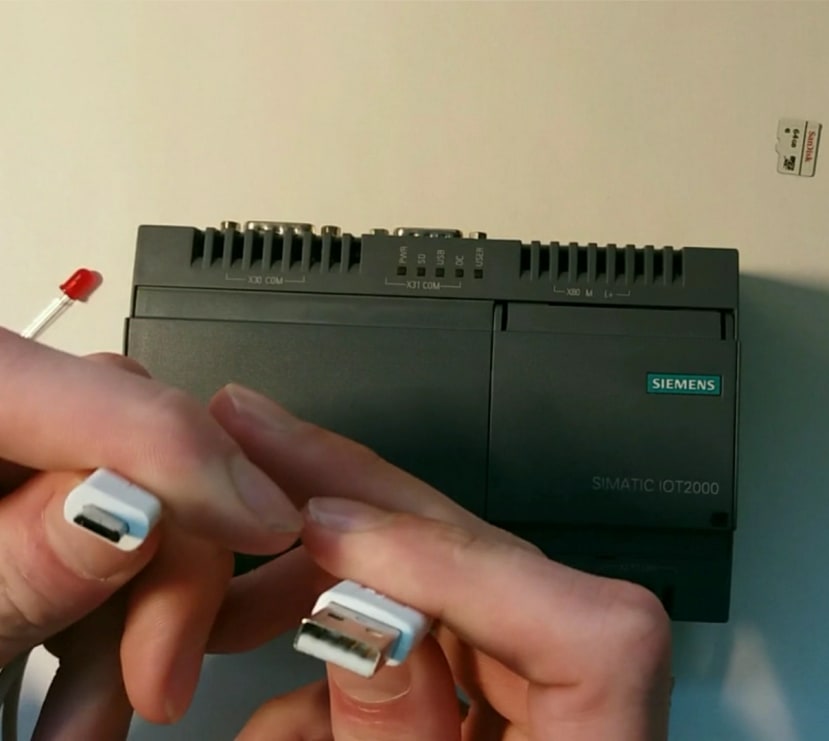
4. Attach the Micro USB to your IOT2000.
5. If your PC don't reconizes your IOT2000, update the drivers manually.
6. You can download them here.
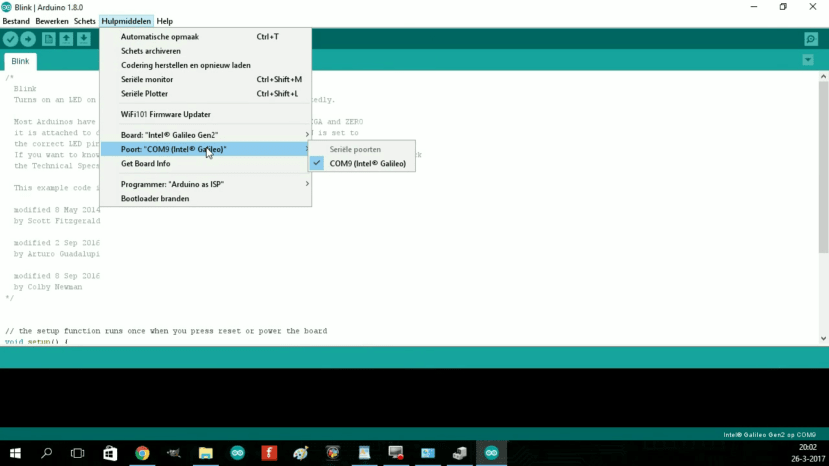
Step 5: Upload the Arduino Sketch to the IOT2000
So finally we are going to upload the Blink Sketch.
1. Open your Arduino IDE software.
2. If it's right, you should have a new COM-port named "Intel Galileo"
3. Select it.
4. Upload the Blink sketch to your IOT2000!
5. The pinlayout in the IOT2000 is the same as the Arduino UNO. (Pay attention! The Vin is the same voltage as your power supply!)
6. Attach the Led to pin 13 & GND.
7. It should be blinking! :D