Off-the-shelf light in a wooden wine box !!!
Follow project
 Dave from DesignSpark
How do you feel about this article? Help us to provide better content for you.
Dave from DesignSpark
Thank you! Your feedback has been received.
Dave from DesignSpark
There was a problem submitting your feedback, please try again later.
Dave from DesignSpark
What do you think of this article?
 This project will guide you through the fabrication of an interactive "lightbox" that permit you to paint or put transparent coloured things onto it and enjoy playing games with your kids.
Parts list
| Qty | Product | Part number | |
|---|---|---|---|
| 1 | Arduino, Nano Development Board | 696-1667 | |
| 1 | Mean Well 25W Isolated DC-DC Converter Chassis Mount, Voltage in 9.2 → 18 V dc, Voltage out 5V dc | 183-837 | |
| 1 | Switch, Circular Rocker, Black, Illuminated, Red neon, 230v, DPST | 533-2992 | |
| 1 | RS PRO Single Pole Single Throw (SPST) Latching Push Button Switch, 4.95 (Dia.)mm, Panel Mount, 32/50/125V ac | 734-6750 | |
| 1 | White Acrylic Sheet, 500mm x 300mm x 5mm | 680-892 | |
| 1 | Mirror Plastic Sheet, 600mm x 600mm x 3mm | 748-1302 | |
| 1 | RS PRO Electric Soldering Iron, 230V, 40W | 772-4756 | |
| 1 | ITT Cannon Hand Crimping Tool for Crimp Contact | 791-7407 | |
I love my two years old boy face when he is manipulating a new gadget. He is very anxious and loves manipulating objects. Sometimes I buy these gadgets but what I really like is to build them myself. I had been looking for a new item for him for several weeks, a lightbox. A “lightbox” as the words say consists of light inside a box or table that permits to paint or put transparent coloured things onto it. This gadget facilitates the concentration of the kids enabling multiple and funny games. I had been searching for a good light table but they were quite expensive so I finally decided to build it myself using spare parts that I had been gathering in my house.
However, I wanted to add an extra for my kid and I decided to move forward from the usual “white light table” to a “coloured light table” using an addressable led strip and an additional push-button in order to change the colour of the light.
The things you will need for this project are:
- Wooden wine box
- Arduino nano
- Coloured cables (crimp tool or soldering iron)
- Switch
- Push-button
- Soldering Iron/Crimp tool
- Power Source 230V/5V
- White Methacrylate
- Led strip (addressable LEDs in my case WS2812B)
- Computer with Arduino IDE and adafruit neopixel library
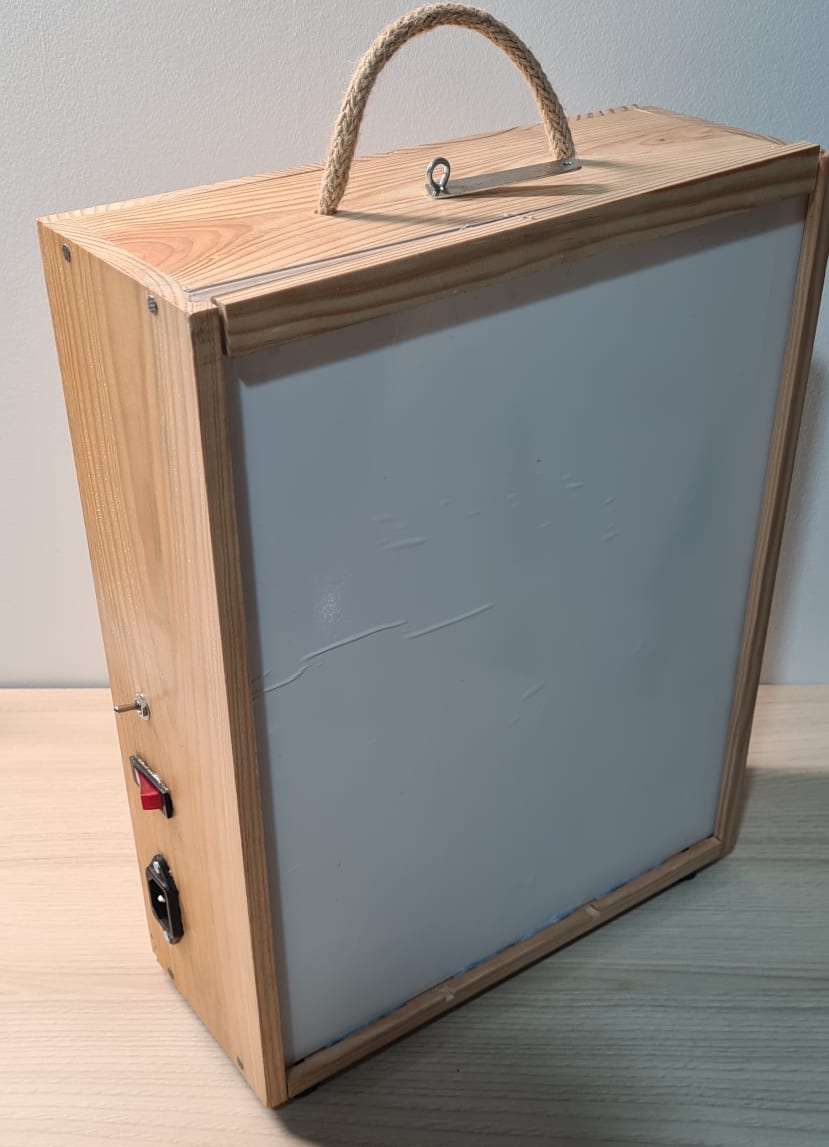
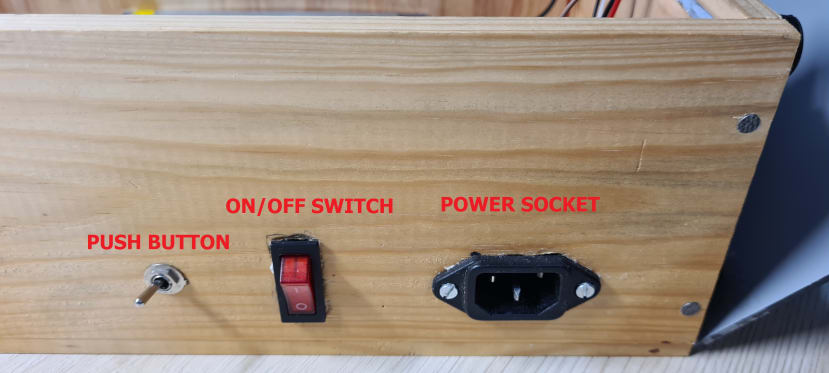
The first and most important thing for this project is a box. In my case, I used a wooden wine box (37x28cm approx.), that I had stored for don’t know what reason, but you can use any other thing or build it with the size you need. Then, I drilled one side of the box in order to allocate the power socket, the ON/OFF switch and the selection push button as is shown in the image.
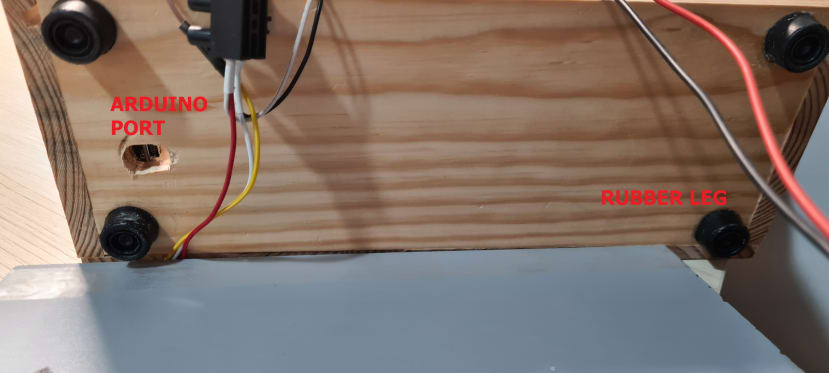
I also drilled an additional hole at the bottom of the box to get access to the Arduino programming port and four additional holes for the rubber legs in order to assure the box is in a vertical position as it is shown in the image.
After that, I just needed to put the power transformer into the box and fix it properly in order to prevent any undesired movements when my kid is playing. I used here several screws but it can vary depending on the power source that you use. In my case, I used an adjustable power source from an old 3D printer project that provided me with a 5V/5A output.
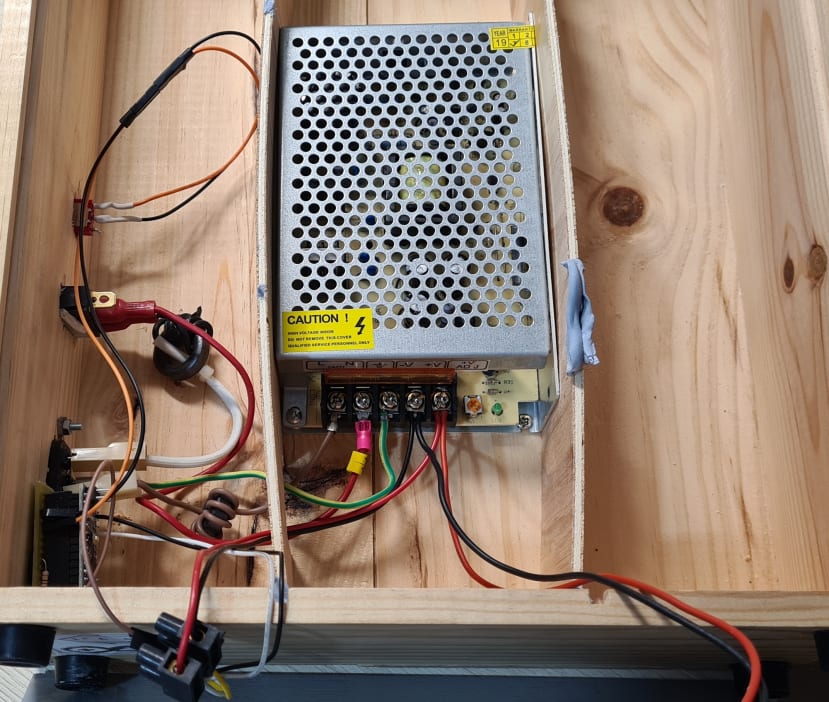
Then I wired everything out. From the 230V power socket to the power transformer passing one wire through the main switch. From the 5V power transformer output to the Arduino nano and from the Arduino nano to the selection push button. Here it is important to add a pull-up resistor (5-10KW) to force 5V in the Arduino digital input (pin 2) when the push button is not pressed (see the image below).
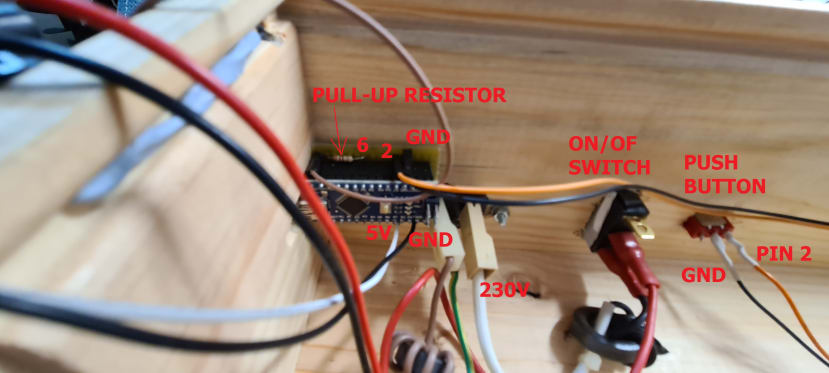
After the wiring, it is time to install the led strips onto the panel. In my case, I used a mirrored methacrylate panel in order to reflect the light that enters the box back again to the room. I used 5 led strips with a total of 85 addressable LEDs. It is important to note the number of LEDs used because you will need to use this number for the Arduino program. Take care when connecting several led strips and check carefully that all the GND, +5V and Data pins are properly connected to each other. After glueing the led strips I wired them to the power source (5V-GND) and the Arduino control pin (pin 6 in my case). It is recommend connecting power on both sides of the entire led strip (at the beginning and at the end of the 85 led strip) In order to assure that all the LEDs receive +5V without voltage drops.
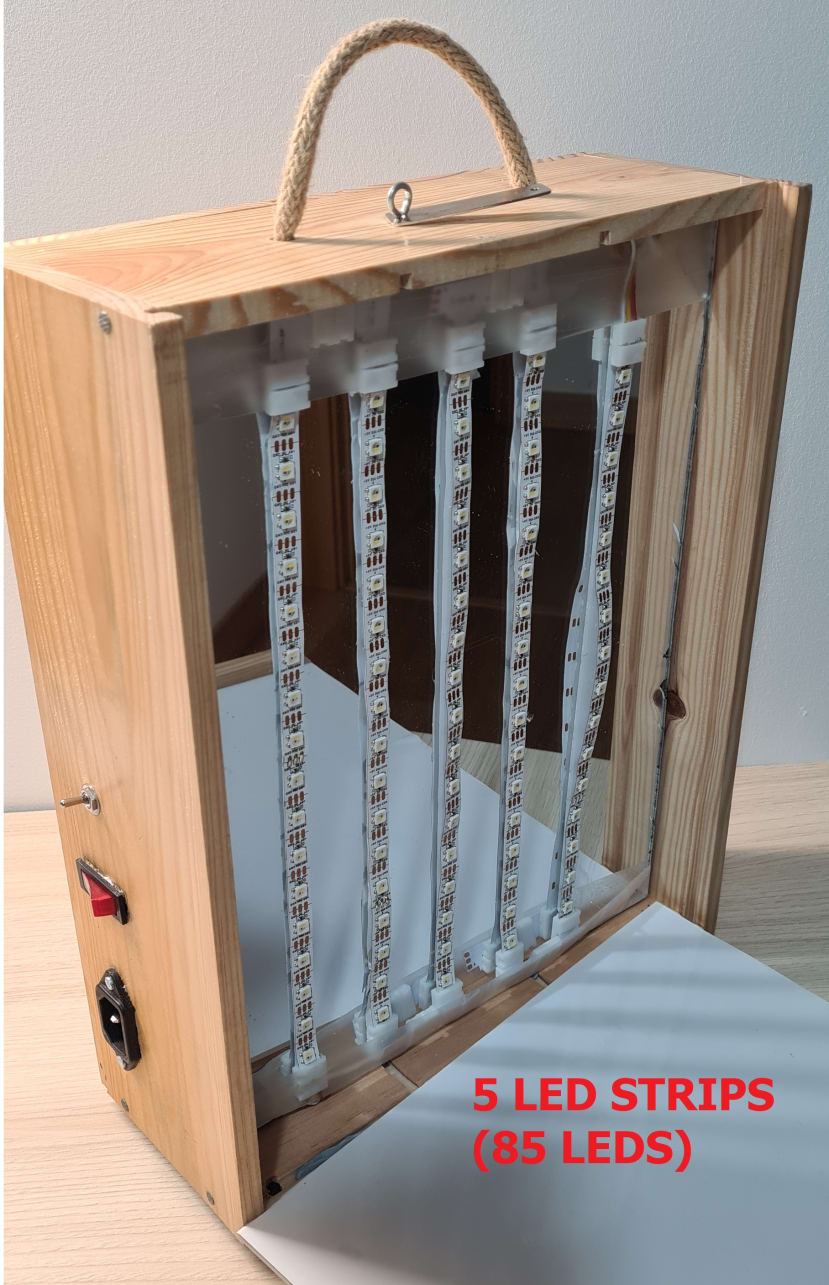
After installing the led strips the only remaining thing was covering the box with a transparent white methacrylate and fix it to the box in order to prevent my kid from accessing the inside of the box or get injured.

The last but not least important part consists of the Arduino programming. I recommended you program the Arduino code before you close the box in order to assure that all the connections are ok. Otherwise, you could be in the situation of opening and closing the box several times until that you fix all the connections.
In order to program the Arduino nano, you will need to install the Arduino IDE on your computer together with the adafruit neopixel library. You can download and use/modify the code attached to this project if necessary.
Finally, you can enjoy a simple demonstration of the “coloured lightbox” in the following video.