How to spot the biscuit thief with Raspberry Pi and C++
Follow project
 Dave from DesignSpark
How do you feel about this article? Help us to provide better content for you.
Dave from DesignSpark
Thank you! Your feedback has been received.
Dave from DesignSpark
There was a problem submitting your feedback, please try again later.
Dave from DesignSpark
What do you think of this article?
 In this article, we will look at how you can use Raspberry Pi 4 and C++ for motion detection and tracking.
Parts list
| Qty | Product | Part number | |
|---|---|---|---|
| 1 | Raspberry Pi 4 Model B Starter Kit | 192-5286 | |
| 1 | Raspberry Pi Camera Module V2 | 913-2664 | |
Have you ever wondered who has been stealing the biscuits from the biscuit tin? Why do dark chocolate digestives last only a couple of days? Now you will not have to guess! Just connect Pi Camera to Raspberry Pi 4 and with a few lines of C++ code, you will be able to spot the biscuit thief in no time.
Of course, the possible use of Raspberry Pi 4 is not limited to a simple application like described above. In fact, we have a wide range of articles on DesignSpark that you can refer to for inspiration. The main focus of this article is to explore how Raspberry Pi 4 can be used for computer vision and is ideal for those who are new to Open CV libraries and to programming with C++ in general.
Setting up Raspberry Pi 4
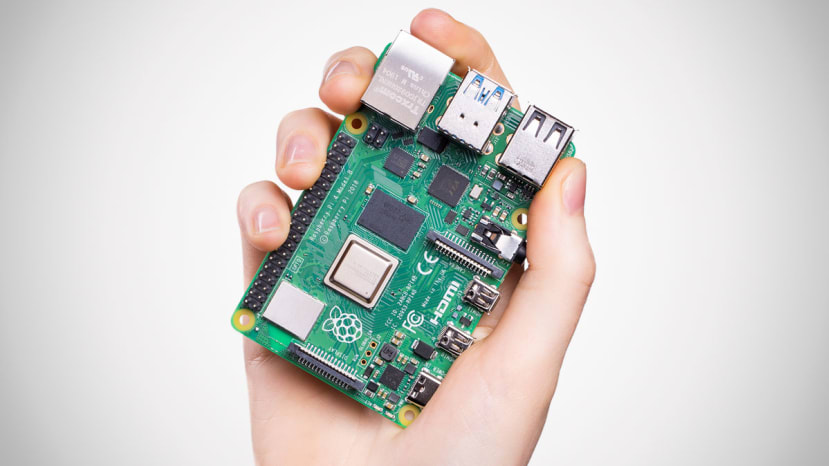
The star of this article is no doubt the Raspberry Pi 4 Starter Kit (192-5286) from OKdo. It comes with everything you need to get started, including power supply, 2 Micro HDMI to HDMI cables, SD card with preloaded operating system, heatsinks, Raspberry Pi case integrated with fan and the board itself. For instructions on setting up the Starter Kit, you can follow an official guide from OKdo.
My first encounter with the Raspberry Pi board was back in 2016 as a part of my undergraduate term project. I must admit, my experience with setting up the board was not as smooth as this time. I remember it took me about two weeks just to install the operating system and all the necessary libraries for my project. Luckily for me, the kit already includes a 32GB Micro SD card with a pre-installed Rasbian operating system (NOOBS v3.1.1).

Most of the operations with the board are carried out through the terminal on the top left corner of the screen. Before starting any installations, it is a good practice to perform these following commands to make sure all the packages are up-to-date:
$ sudo apt-get update
$ sudo apt-get upgrade
If there has been any update, a reboot is necessary.
sudo rebootThe board should connect to Wifi automatically, but I had some issues with that. I followed these instructions from raspberrypi.org to resolve them.
Installing OpenCV libraries and CodeBlock
OpenCV (Open Source Computer Vision) contains several hundreds of image processing algorithms and can be used for applications, such as, but not limited to, face, gesture and text recognition, object detection, machine learning. OpenCV libraries can be used for programming in C++, Python and even in Matlab.
There are already tons of articles online on how to install OpenCV on Raspberry Pi. The only thing to consider is the version of OpenCV as well as the operating system you are installing on your Raspberry Pi 4. We will be installing OpenCV 4.1.2 and the board from the Starter kit is pre-installed with NOOBS 3.1.1. I can personally recommend this article from Q-Engineering since I followed pretty much the same steps except I did not install the virtual environment. I had a few crashes on the way and it took me about 3-4 attempts to complete the installation.
After installing OpenCV on your Raspberry Pi 4, you need to install the IDE tool for programming and debugging your code in C++. My choice was a free IDE called Code::Blocks. You can install it by running:
sudo apt-get install codeblocksCapturing Video from Pi Camera
We are finally ready to run our first C++ code with OpenCV libraries on Raspberry Pi 4. Let us start with simple example of streaming the video from camera. The code below is from official OpenCV documentation, and it explains how VideoCapture class can be used for video capturing. I will go through the code line by line because we are going to use it later.
#include <stdio.h>
#include <iostream>
#include <opencv2/core.hpp>
#include <opencv2/highgui.hpp>
#include <opencv2/videoio/videoio_c.h>

using namespace cv;
using namespace std;

int main(int argv, char** argc)
{
    Mat frame;
    VideoCapture cap(0);

    if (!cap.isOpened()){
        cerr << "ERROR! Unable to open camera\n";
        return -1;
    }
    cout << "Start grabbing" << endl
        << "Press any key to terminate" << endl;

    for (;;)
    {
        cap.read(frame);
        if (frame.empty()){
            cerr << "ERROR! Blank frame grabbed \n";
            break;
            }
        imshow("Live", frame);
        if (waitKey (5) >= 0)
            break;
    }
    return 0;
}
As usual, we first need to "include" all the necassary directories in our code. Apart from standard <stdio.h> library, we need to add three more OpenCV related libraries, namely,<opencv2/core.hpp>, <opencv2/highgui.hpp> and <opencv2/videoio/videoio_c.h>, which cover OpenCV's core, user interface and video capturing capabilities.
OpenCV contains numerous functions and classes that are all accessed through cv namespace.
using namespace cv;We start our main function by initializing incoming frames as a class called Mat, which treats images as a matrix. As mentioned before, we are going to use VideoCapture class to stream video from the camera. The following syntax is used to create VideoCapture object:
VideoCapture cap(0);Here, cap is an object name and 0 is the camera ID. In OpenCV, cameras are addressed by integers starting from zero for the first device. I am using Pi Camera
(913-2664)
for this article, which is also available on OKdo. If you are not comfortable with creating classes and objects, I would recommend referring to this resource.
To check if the program successfully opened the camera, we can use bool statement isOpened. It is going to output an error message if initialization did not happen.
if (!cap.isOpened()){
        cerr << "ERROR! Unable to open camera\n";
        return -1;
    }
    cout << "Start grabbing" << endl
        << "Press any key to terminate" << endl;
To access individual frames, we use VideoCapture's .read function. However, because we are not interested just in one frame, but rather frame sequence, a.k.a. video, we need to use loops. For/while/do-while loops are all just fine. The function .empty ensures that captured frames are not empty. And lastly, video frames can be displayed using imshow function within the loop.
for (;;)
    {
        cap.read(frame);
        if (frame.empty()){
            cerr << "ERROR! Blank frame grabbed \n";
            break;
            }
        imshow("Live", frame);
        if (waitKey (5) >= 0)
            break;
    }
Background Subtraction & Motion Detection
I hope you managed to grab video frames from your camera at this point. Now, let's move on to more exciting things! So, the easiest way to do to spot your biscuit stealer will be to ask (or order) your Raspberry Pi to detect if there is any motion happening next to the biscuit tin and record it. And that is why we are going to practice a very basic motion detection and tracking algorithm in this section.
The code below does exactly what we have discussed. Let me walk you through the exact process:
- We start with capturing the video frames from the camera
- Then, we perform background subtraction to identify moving object (s) in the scene
- Next step would be finding contours of the moving object
- Compare the area of contour to the preset value to make sure that the program is not taking into account small changes in the scene (e.g. change in the light)
- Lastly, we draw a border around the moving object
#include <iostream>
#include <sstream>
#include <opencv2/imgproc.hpp>
#include <opencv2/videoio.hpp>
#include <opencv2/highgui.hpp>
#include <opencv2/video.hpp>
using namespace cv;
using namespace std;

vector<vector<Point> > contours;
vector<Vec4i> hierarchy;

int main(int argc, char* argv[])
{

    //create Background Subtractor objects
    Ptr<BackgroundSubtractor> pBackSub;
    pBackSub = createBackgroundSubtractorMOG2();

    VideoCapture capture(0);
    if (!capture.isOpened()){
        //error in opening the video input
        cerr << "Unable to open: " << endl;
        return 0;
    }
    Mat frame, fgMask;
    while (true) {
        capture >> frame;
        if (frame.empty())
            break;
        //update the background model
        pBackSub->apply(frame, fgMask);

        imshow("FG Mask", fgMask);

        RNG rng(12345);
        findContours(fMask, contours, hierarchy, RETR_EXTERNAL, CHAIN_APPROX_SIMPLE,Point(0, 0));

        vector<Rect>boundRect (contours.size());
        vector<vector<Point> > contours_poly( contours.size() );

        for (int i = 0; i < contours.size();i++) {
            if( contourArea(contours[i])< 500)
            {
             continue;
            }
            putText(frame, "Motion Detected", Point(10,20), FONT_HERSHEY_SIMPLEX, 0.75, Scalar(0,0,255),2);
            approxPolyDP( contours[i], contours_poly[i], 3, true );
            boundRect[i] = boundingRect( contours_poly[i] );
            Scalar color = Scalar( rng.uniform(0, 256), rng.uniform(0,256), rng.uniform(0,256) );
            rectangle( frame, boundRect[i].tl(), boundRect[i].br(), color, 2 );
            }

        imshow("Frame", frame);
        int keyboard = waitKey(30);
        if (keyboard == 'q' || keyboard == 27)
            break;
    }
    return 0;
}
Background subtraction is a very common technique, which allows you to differentiate moving objects from the static background. The term foreground mask is used to define a binary image that contains pixels of those moving objects.

Background subtraction (docs.opencv.org)
BackgroundSubtractor class in OpenCV class contains a number of algorithms to perform background subtraction. We are going to use an approach called MOG2 and corresponding BackgroundSubtractorMOG2 class. Please refer to OpenCV's documentation for more information on this topic. Default parameters were used for the simulations.
    Ptr<BackgroundSubtractor> pBackSub;
    pBackSub = createBackgroundSubtractorMOG2();
The foreground mask is going to be shown in FG Mask window. When we see the foreground mask, we can automatically tell where the contours of the object are. However, computers or in our case Raspberry Pi 4 need specific instructions to be able to identify that. findContours class takes 8-bit binary image and outputs its contours. The expressions below mean that only external contours will be selected and a simple chain approximation method will be used.
findContours(fMask, contours, hierarchy, RETR_EXTERNAL, CHAIN_APPROX_SIMPLE,Point(0, 0));In the next section of the code, we are asking to find areas of each of the detected contours. If the area is smaller than a certain value (500 in our case), ignore that contour. We need to focus on large enclosed contours since that is more likely to represent moving objects. Smaller detected contours could just mean that there were some changes in lighting conditions.
for (int i = 0; i < contours.size();i++) {
            if( contourArea(contours[i])< 500)
            {
             continue;
            }
            putText(frame, "Motion Detected", Point(10,20), FONT_HERSHEY_SIMPLEX, 0.75, Scalar(0,0,255),2);
            approxPolyDP( contours[i], contours_poly[i], 3, true );
            boundRect[i] = boundingRect( contours_poly[i] );
            Scalar color = Scalar( rng.uniform(0, 256), rng.uniform(0,256), rng.uniform(0,256) );
            rectangle(frame, boundRect[i].tl(), boundRect[i].br(), color, 2 );
            }
To track our detected object, we can put a rectangle around it. This can be done by first approximating the contour by some polygonal curve with certain precision, which is why approxPolyDP class is used. After that, boundingRect calculates the rectangle with minimal area that can surround the polygonal curve. Lastly, a rectangle can be drawn from previous calculations.
Here is the short demo video of object detection and tracking with C++/OpenCV on Raspberry Pi 4. Ignore the noise in the background, which was caused by the fan attached to the RP's case plus my Bluetooth speakers. As you can see, every time my hand appears in the camera vicinity, the message, which says "Motion detected", pops up on the right window. The window on the left with binary image is the foreground mask that was created by background subtraction.
Summary
Coming from someone, who jumped from first to fourth generation of Raspberry Pi boards, I can promise you that you will not be disappointed by the Raspberry Pi Starter kit. In fact, I am writing this article from my board, which I found very useful when toggling between the code and DesignSpark website. OpenCV libraries consume lots of computational resources, but I found the running time for my codes to be 4 seconds as a maximum. Granted, I was not doing anything crazy. Well, that might be because I am relatively new to C++ (surprise!) and more comfortable with Matlab. I am mentioning this because I would like to ask for your input. Could you please leave recommendations in the comments below on where to learn C++/OpenCV for newbies like me? If you are a beginner, what topics in computer vision you would like us to cover next?