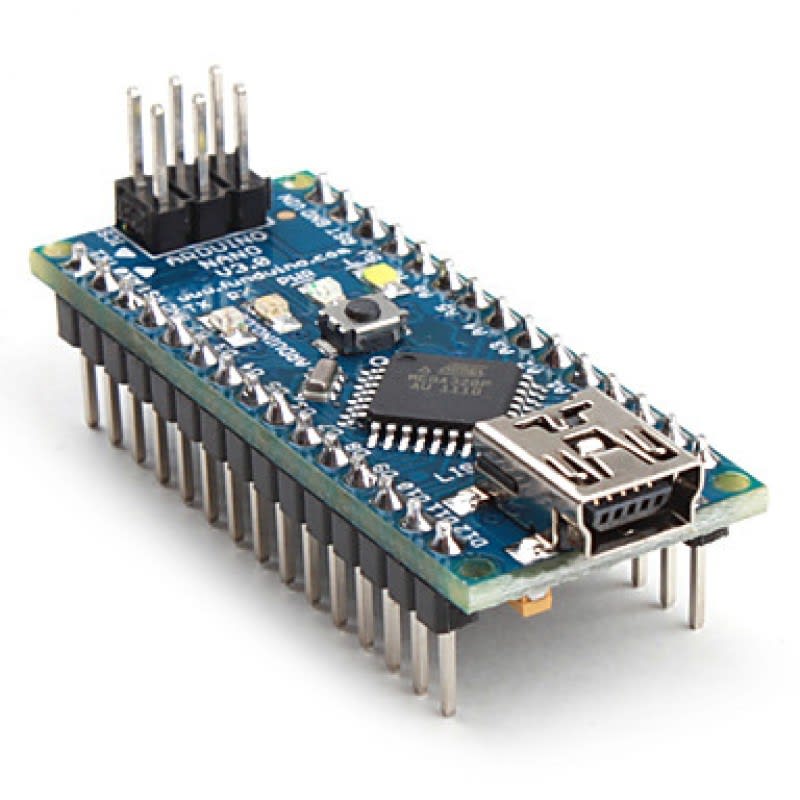
Basics of Arduino Nano
Follow articleHow do you feel about this article? Help us to provide better content for you.
Thank you! Your feedback has been received.
There was a problem submitting your feedback, please try again later.
What do you think of this article?
Hello friends, I hope you all are having fun in your lives. Today, I am going to share a new tutorial in which I am gonna discuss the basic details of the Arduino Nano Microcontroller board. It's quite similar to Arduino UNO when it comes to features and pinouts but it has replaced UNO because of its small size. As you all know size matters a lot in Embedded as well. Embedded devices are preferred to be smaller in size.
Basics of Arduino Nano
Arduino Nano is a microcontroller board designed by Arduino.cc. The microcontroller used in the Arduino Nano is Atmega328, the same one as used in Arduino UNO. It has a wide range of applications and is a major microcontroller board because of its small size and flexibility. So, now let's have a look at its basic features:
Basic Features of Arduino Nano
Here are few of its basic features which you must know if you are thinking to work on this great microcontroller board:
- It has 22 input/output pins in total.
- 14 of these pins are digital pins.
- Arduino Nano has 8 analogue pins.
- It has 6 PWM pins among the digital pins.
- It has a crystal oscillator of 16MHz.
- It's operating voltage varies from 5V to 12V.
- It also supports different ways of communication, which are:
- Serial Protocol.
- I2C Protocol.
- SPI Protocol.
- It also has a mini USB Pin which is used to upload code.
- It also has a Reset button on it.
Memory in Arduino Nano
It has below memories embedded in it which are used for different purposes and are as follows:
- Flash memory of Arduino Nano is 32Kb.
- It has preinstalled bootloader on it, which takes a flash memory of 2kb.
- SRAM memory of this Microcontroller board is 8kb.
- It has an EEPROM memory of 1kb.
Applications of Arduino Nano
Here are few of its application but it has an extensive range which we can't discuss here. So here's the tip of the iceberg:
- Automation.
- Robotics.
- Control Systems.
- Embedded Computer.
- Instrumentation.
So, that was all for today's tutorial. I hope you have enjoyed it and are gonna share your comments. Will meet you guys in next tutorial. Till then take care and have fun !!! :)


