How do I create a rotational pattern?
Tutorial folgen
 Dave von DesignSpark
Wie denkst du über dieses Tutorial? Helfen Sie uns, bessere Inhalte für Sie bereitzustellen.
Dave von DesignSpark
Vielen Dank! Ihr Feedback ist eingegangen.
Dave von DesignSpark
There was a problem submitting your feedback, please try again later.
Dave von DesignSpark
Wie finden Sie dieses Tutorial?
Für dieses Tutorial braucht man::
DesignSpark Mechanical V6.0Create a rotational pattern from an existing or new object through these steps:
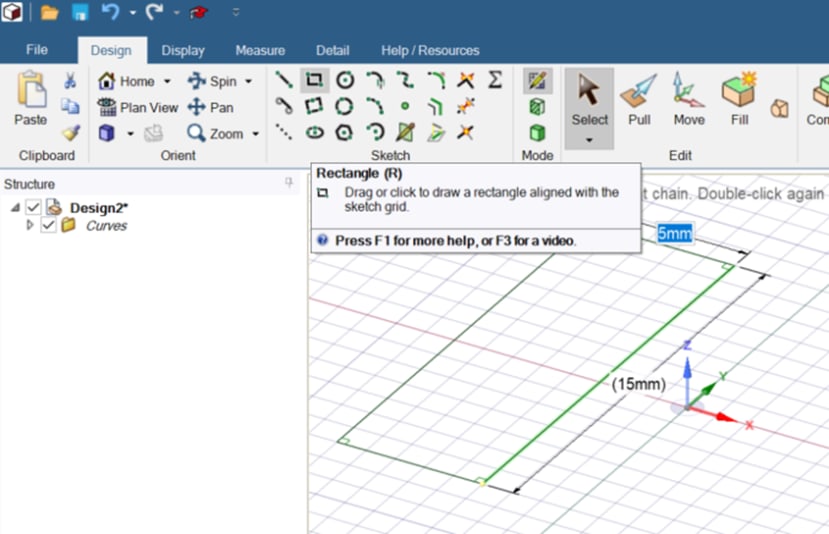
1. Click on the File button and then New design. Select the rectangle tool and draw it to a preferred size (say, 15mmx5mm)
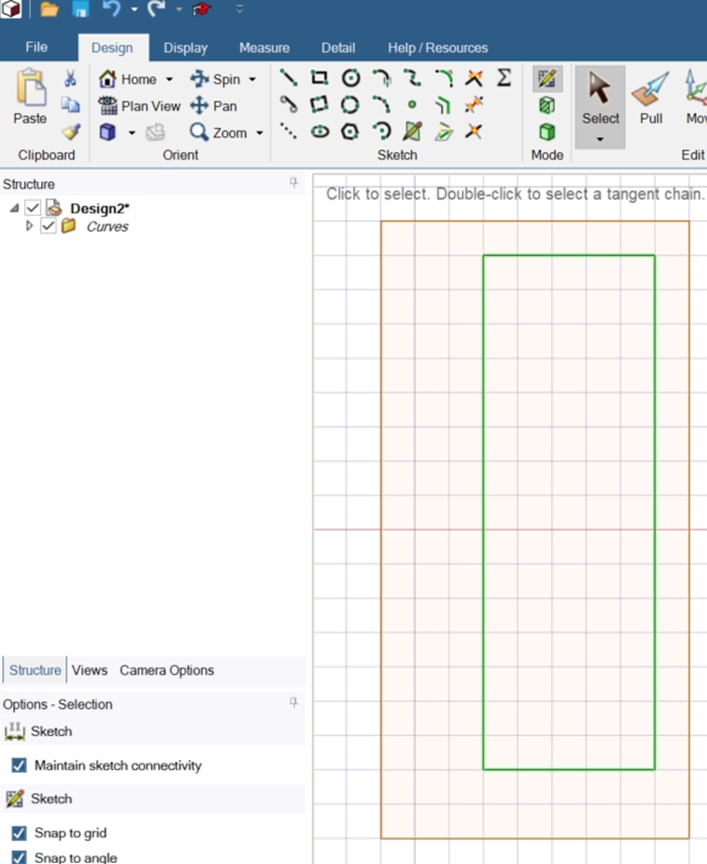
2. Click the Select button and left-click & drag to select the whole rectangle (you will be in Sketch Mode).
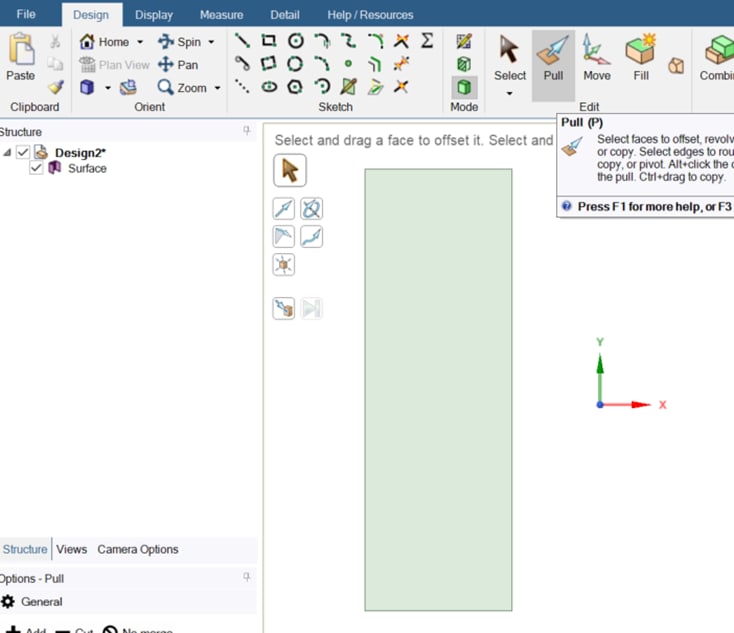
3. Click the Pull tool - this will make the rectangle 1 piece (a surface) and will put you back in 3D mode.
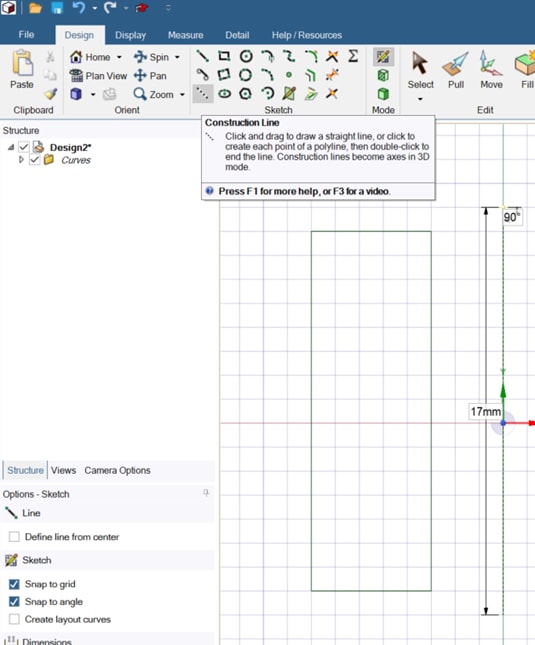
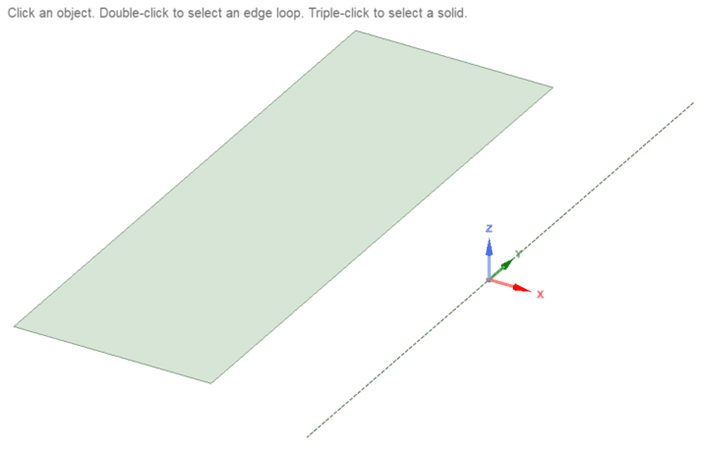
4. Click the Construction line in Sketch menu (it will revert to Sketch Mode) and place the construction line where you want. Draw the line to any size as we will simply use it as the axis for rotation here it is 17mm).
5. Click the Select button and click the 3D Mode button. You should just see the rectangle and construction line by itself.
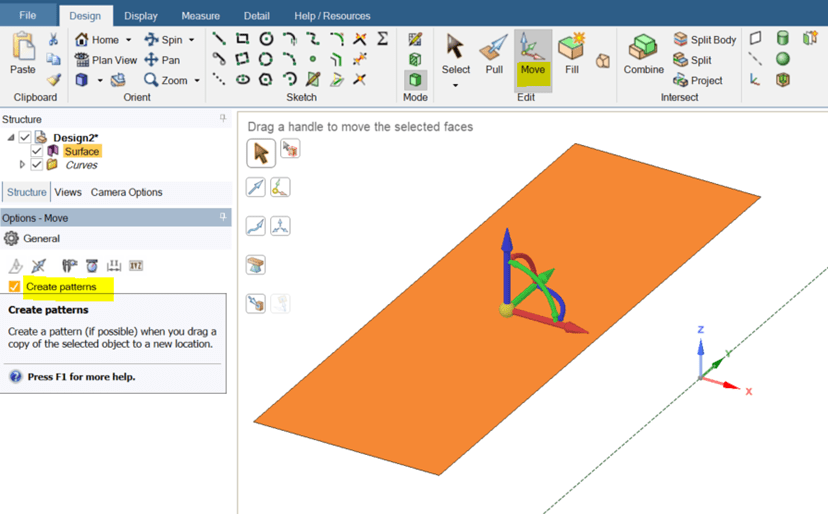
6. Select and highlight the rectangle.
7. Select the Move tool and then select and enable the Create Patterns button.
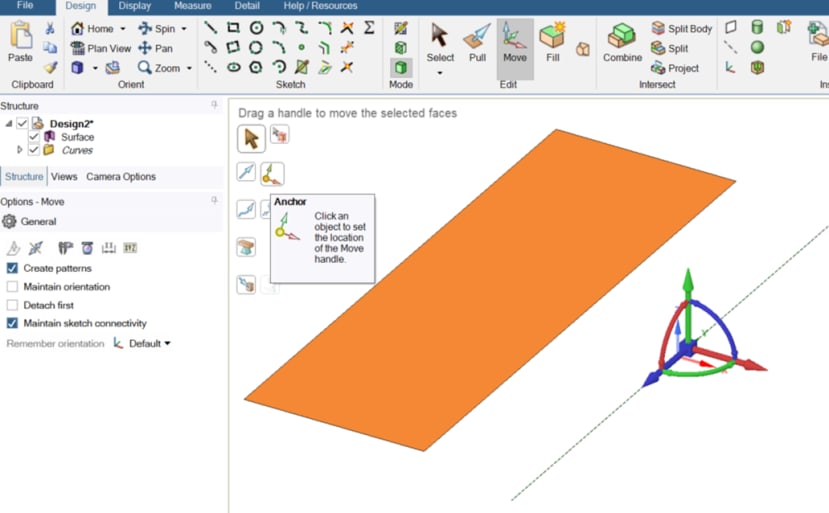
8. Click the Anchor button and click on the construction line.
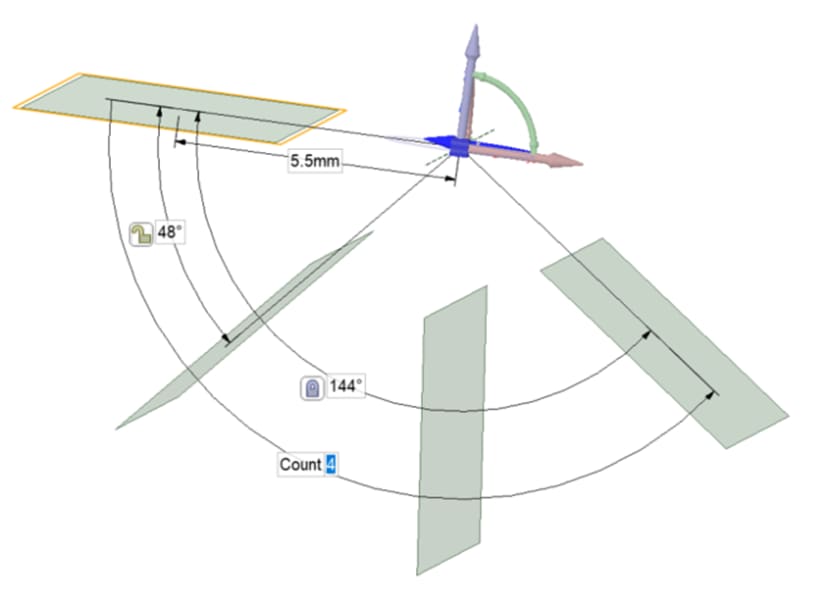
9. Click on the angle rotation arrow (it will show the grey ghosted ring and the way it will rotate towards too). Select the angle of rotation, i.e., which way do you want it to rotate... above or below the first rectangle.

10. Drag the arrow clockwise or anticlockwise so it displays the pattern settings box. Enter ‘144’ degrees between the first and last rectangles, and then in the Count box ‘4’. Press Enter to complete the pattern.
11. Any changes you make to one pattern member will apply to all, until they are ungrouped. For example, apply thickness of 0.1mm.
