On a Conductive Note
Follow article
 Dave from DesignSpark
How do you feel about this article? Help us to provide better content for you.
Dave from DesignSpark
Thank you! Your feedback has been received.
Dave from DesignSpark
There was a problem submitting your feedback, please try again later.
Dave from DesignSpark
What do you think of this article?
Using the Bare Conductive Electric Paint and Touch Board to create a paper thin keyboard instrument.
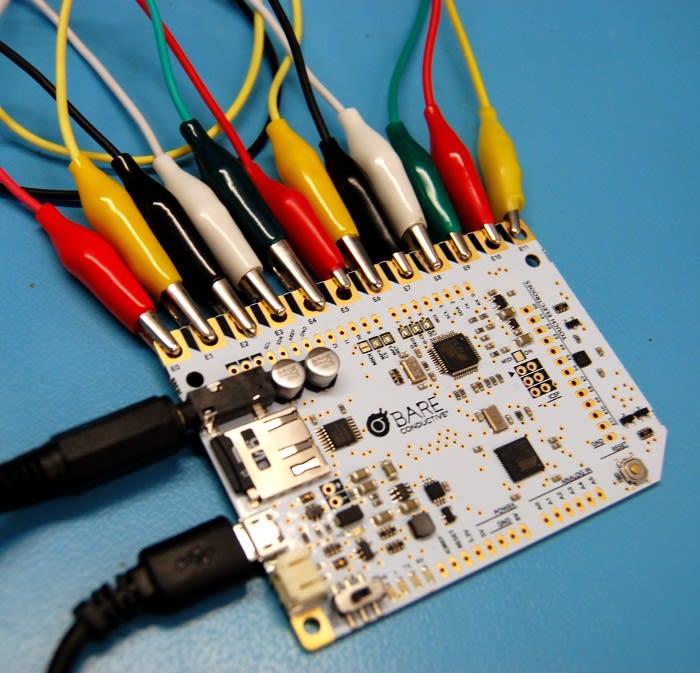
The Touch Board allows you to turn almost anything into a touch sensor. It uses the Arduino IDE, has the same pin mapping as the Arduino Leonardo and it includes and SD card for storage. Due to the versatility of the Touch Board it should appeal to a wide audience, ranging from beginners to more advanced users.
Getting started
The supplied instructions say to power up the board and plug headphones into the jack socket, so that you can listen to the instructions by touching the sensor electrodes. The audio instructions give examples of what could be done with the Touch Board using pretty much anything conductive.
-
It has 12 electrodes labelled E0 to E11 which act as individual sensors that can trigger sounds when touched.
-
Either a micro USB or rechargeable LiPo battery can be plugged in to power the Touch Board.
-
Audio files can be stored on the micro SD card and by following a simple naming system they are assigned to an individual electrode.
-
Electric paint is great for graphical interfaces with the Touch Board and can be painted directly onto the electrodes.
-
The default Touch Board code (Arduino sketch) can be rewritten or modified to create your own functions and new applications.
Uploading to the SD card
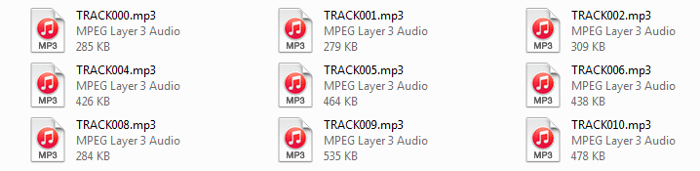
For a first project I wanted to make a simple musical keyboard using both the Touch Board and Electric Paint. This was fairly straightforward and the first thing I had to do was download 12 tracks of individual keyboard notes in mp3 format, and save them to the micro SD card. Files can have a descriptive name, but this must followed by three digits for the electrode number, e.g. TRACK011.mp3.
Using Electric paint
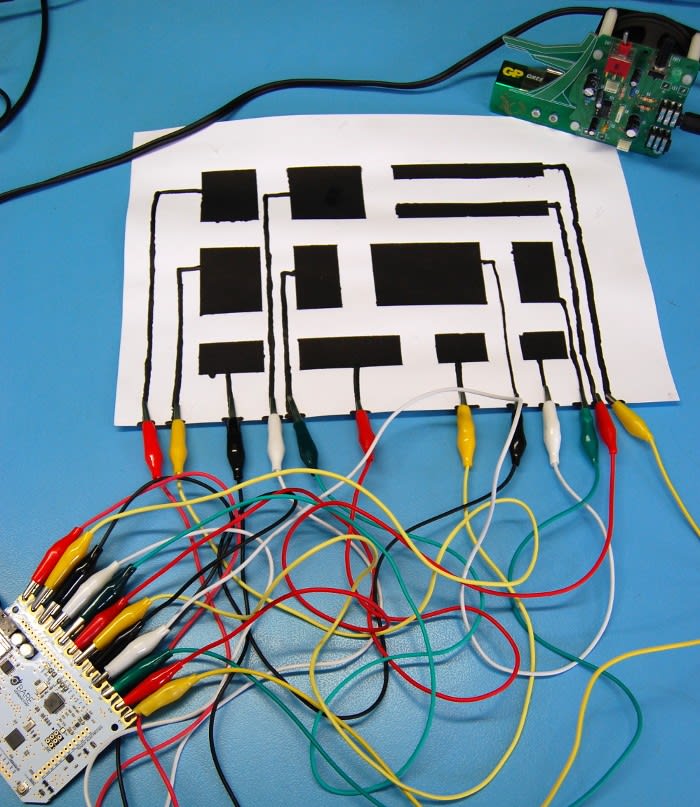
I next painted 12 pads on a sheet of A4 card, which would each be connected to an electrode on the Touch Board, and decided on a selection of different sized rectangles. I then added connections between the pads and the edge of the paper so that it could be connected to the Touch Board using crocodile clips.

Connecting the Touch Board
I attached the Touch Board to a speaker and then connected each electrode to a connection on the edge of the paper. When powered up I pressed the reset button to calibrate the Touch Board (to take into account the capacitance of the wires and pads) and then began to press each pad. This worked so that every time a different pad was pressed a musical note would play.

I chose to use piano notes but you could upload any sounds to the SD card and this could be a voice recording or any other mp3.
The touch pads could be easily changed too and could be pained as any shape that comes to mind. One thing to be careful of is when painting, not to create a “cold solder” bridge between the tracks (as it can be quite messy), which will essentially short the circuit.
This initial project with the Touch Board was really simple and only involved changing the content on the SD card. However, there is the potential for more advanced projects that use custom code and use the arduino headers to attach other inputs and outputs, in addition to using the touch sensor electrodes and audio output. This could enable you to make some really creative projects when also used with conductive paint!
More Resources -
- Touch Board Workshop Manual contains everything Bare Conductive have learned from the last year of working with the Touch Board. This is a great resource for individuals, groups or educators
- Touch Board Installer, makes it so much easier to program the Touch Board by installing all of Bare Conductives libraries and examples in just a few clicks.
- Touch Board vs. MaKey MaKey vs. Pi guide, is a response to a frequent question and comparison between Bare Conductive and these other great products.