Design for Laser Cutting First Experiences
Follow article
 Dave from DesignSpark
How do you feel about this article? Help us to provide better content for you.
Dave from DesignSpark
Thank you! Your feedback has been received.
Dave from DesignSpark
There was a problem submitting your feedback, please try again later.
Dave from DesignSpark
What do you think of this article?
Back in high school I gained some very basic experience with laser cutting. More recently I had a lot of help with designing an acrylic top plate for the Arduino Robot, and following this I wanted to learn how to do design for laser cutting myself.
There are three main stages to the process:
-
Producing a sketch that includes all measurements.
-
Entering a drawing into a CAD or illustration package (Inkscape was used here).
-
Loading the design into CAM software and sending it to the machine to be cut.
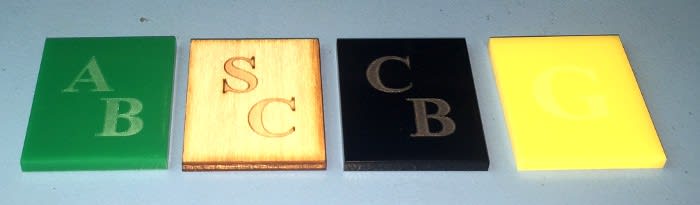
A simple first project
As I hadn't designed anything from scratch before I wanted to start with something simple and decided to make some custom name tags for coat hooks.
CAD
Because this was a very simple design I didn't bother with a hand drawn sketch and went straight to drawing the design in Inkscape. I started with the name tag outline and set the dimensions to those required, then added text and ensured there was no fill.
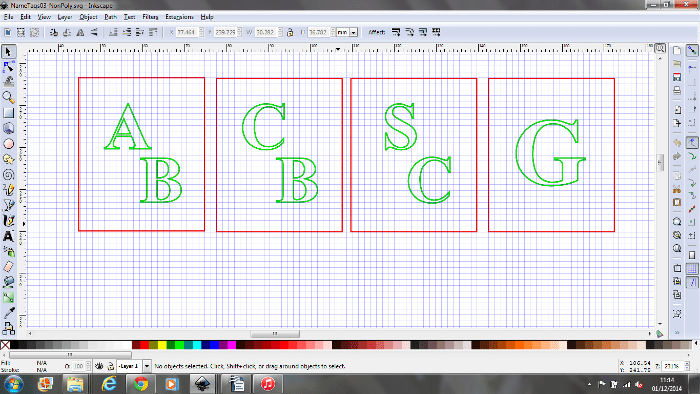
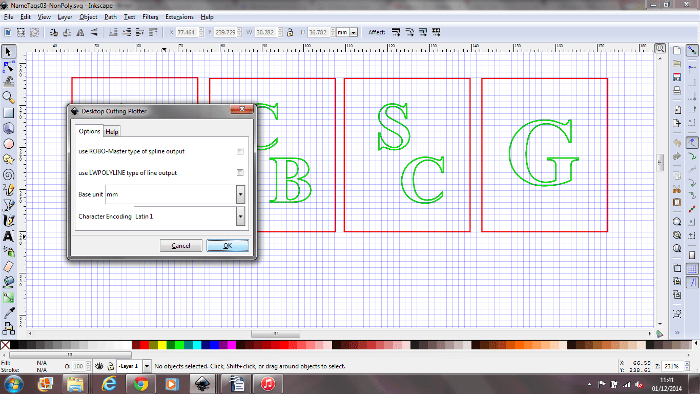
In order to be laser cut all objects need to be converted to paths by selecting them and ctrl+shift+c. Then the file was saved as a DFX (I had to make sure 'use ROBO-Master type of spline output' and 'use LWPOLYLINE type of line output' were not selected!)
Finally I copied it to the PC connected to the laser cutter.
CAM
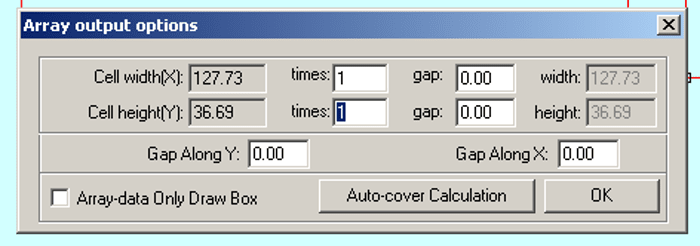
After importing the design into the laser cutting software I need to check the dimensions were correct by right-clicking and confirming the values displayed in 'set array output'.
If the design includes text it's important to 'unite lines'.

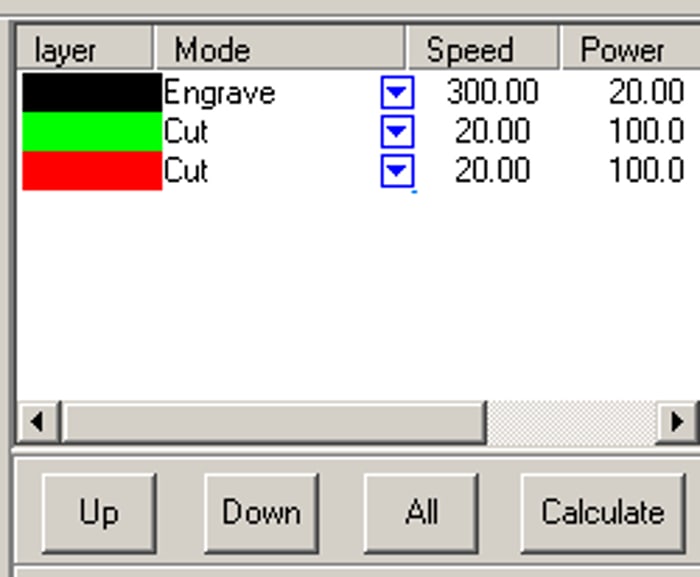
What is to be cut first and what is to be cut last is ordered by the colours of the lines in the drawing, and ensuring that all different cut types are set to the correct speed and power for the type of cut required.
*etching should always be ordered first and the shape outline should always be cut last.
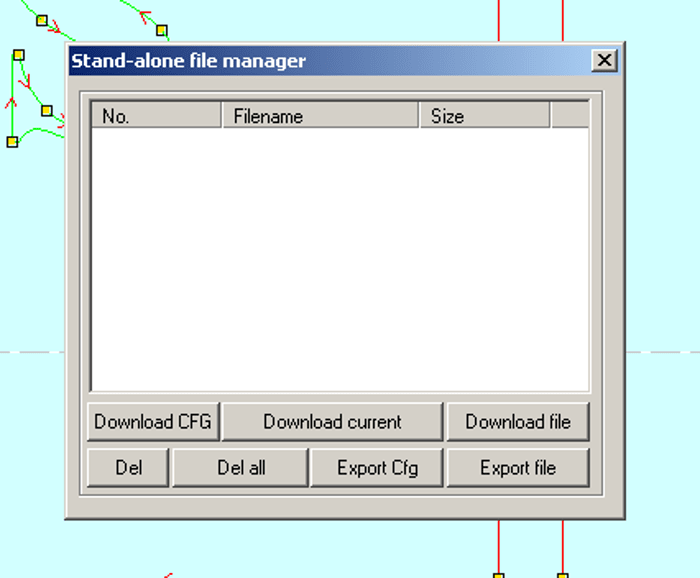
The file was then downloaded to the laser cutter by selecting download> del all> download current.
Operating the laser cutter
In order to get the best results, before pressing start I needed to:
-
Use a focusing aid to make sure the bed height is set correctly
-
Move the laser to the far corner position by selecting esc> datum.
-
Run a test before the laser cutter is started, by inserting the material to be cut on and pressing esc> test. This moved the laser and showed the biggest area which will be cut. The position of the acrylic could then be adjusted and the process repeated until the beam fits comfortably within the space available.
Cutting
It is best to cut a prototype on a cheaper material to be sure there are no final changes which need to be made before cutting in final material. However, since this project was very simple I didn't bother prototyping with MDF and instead went straight to acrylic.
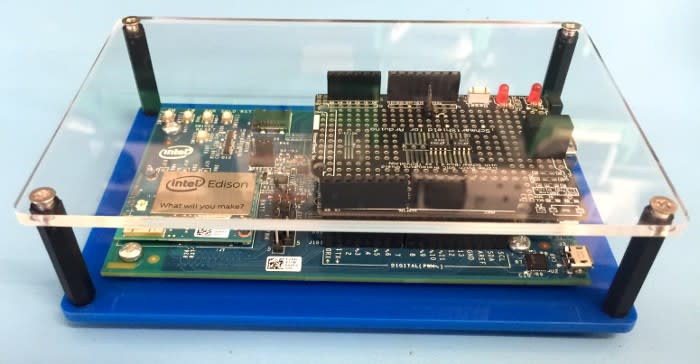
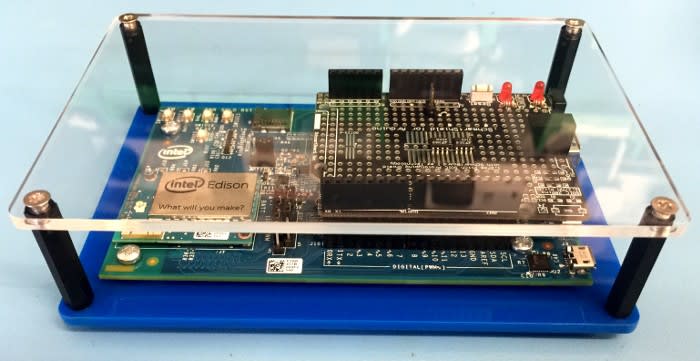
A case for the Intel Edison for Arduino kit
Next I decided to design a very simple acrylic housing for the Intel Edison for Arduino kit, with room for a prototyping shield.
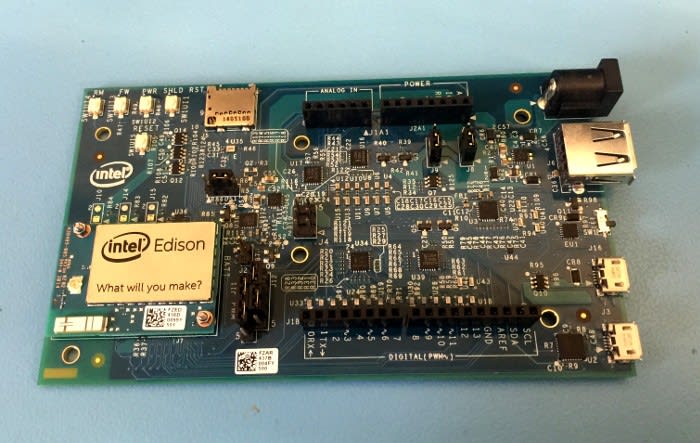
This was going to be an acrylic top and base panels separated by nylon spacers, similar to the one seen here used with the HackRF Jawbreaker.

The CAD stage was completed as described above for the name tags.

I then followed the steps for importing the file into the CAM software and sending it to be first cut in MDF as a prototype.

Once I'd assembled the case and PCBs and confirmed that everything was as it should be, I finally sent this to acrylic.
NOTE:These steps worked for me based on the CAD/CAM software I used and also the make and model of the laser cutter, so they may not work for others.
If you have a laser cutter and you're interested in making the case for the Intel Edison for Arduino, the files are available on GitHub.