Add GPS Time and Location to a Raspberry Pi Project
Follow article
 Dave from DesignSpark
How do you feel about this article? Help us to provide better content for you.
Dave from DesignSpark
Thank you! Your feedback has been received.
Dave from DesignSpark
There was a problem submitting your feedback, please try again later.
Dave from DesignSpark
What do you think of this article?
The addition of a GPS receiver to a Raspberry Pi gives it both positioning and high accuracy time capabilities. Perfect for when you need to ascertain the location of equipment which is on the move and with systems that require accurate time synchronisation.
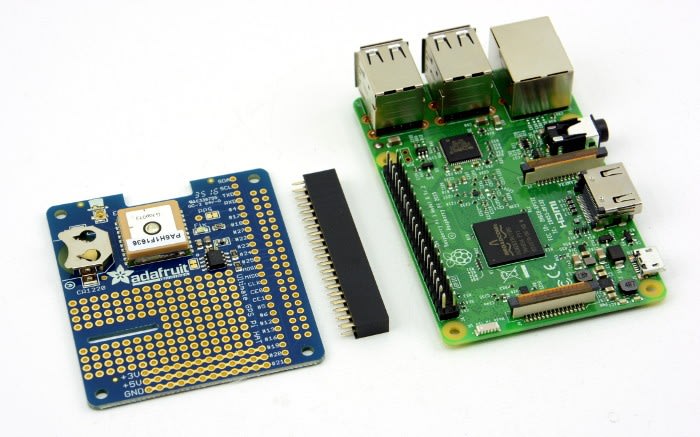
The Adafruit Ultimate GPS HAT makes it trivial to add GPS capabilities to the Raspberry Pi, with the bonus of also integrating a real-time clock with battery backup, plus prototyping area.
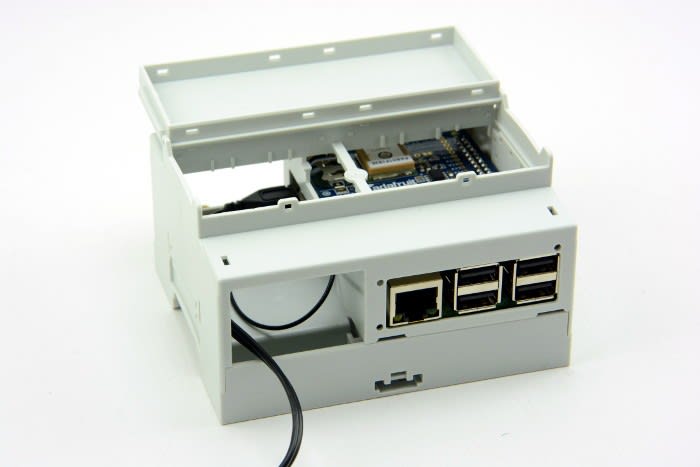
In this example, we’re housing a Raspberry Pi 3 Model B (896-8660) plus Adafruit Ultimate GPS HAT (124-5481) in a DIN rail enclosure from Phoenix Contact (122-4298) , although they could easily be housed in any one of a number of other enclosures with sufficient space to accommodate the Pi + HAT.
Assembly
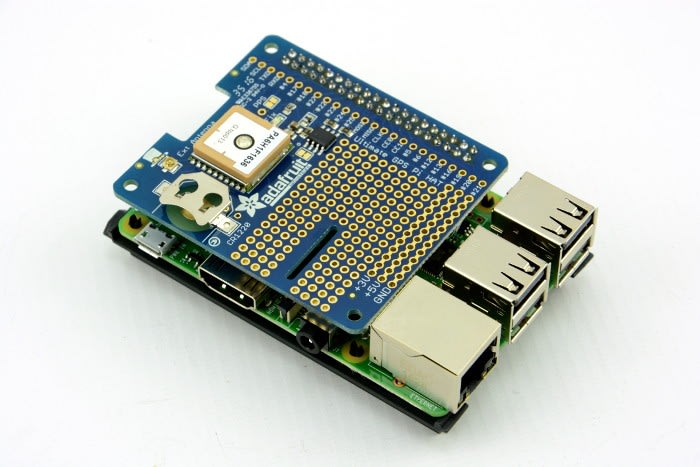
The only assembly to be done with the GPS Hat itself is to solder the through-hole header. Following which the HAT is connected to the Pi’s P1 header.
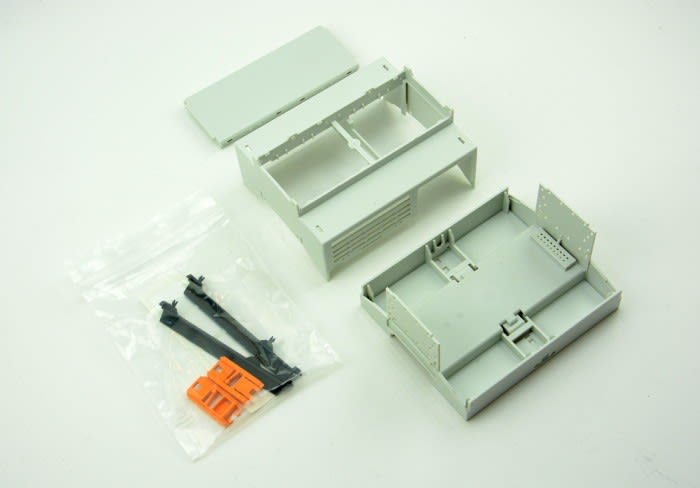
The enclosure components can be seen above.
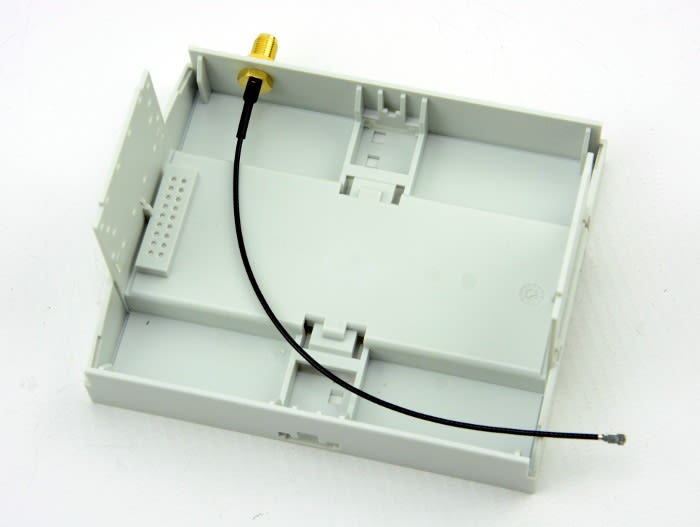
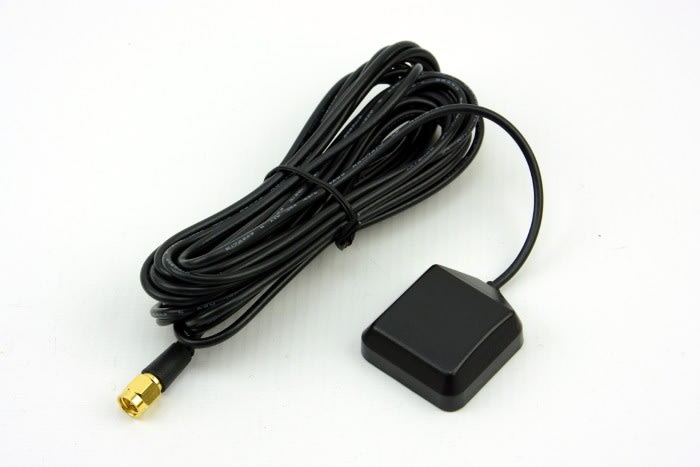
The bottom half was drilled in the top-left corner to enable fitting a panel mount female SMA to male U.FL cable (794-2897) . The GPS module does have an integrated antenna, but where there is not good sight of the sky or the receiver will be housed in a metal enclosure, an external antenna is essential.
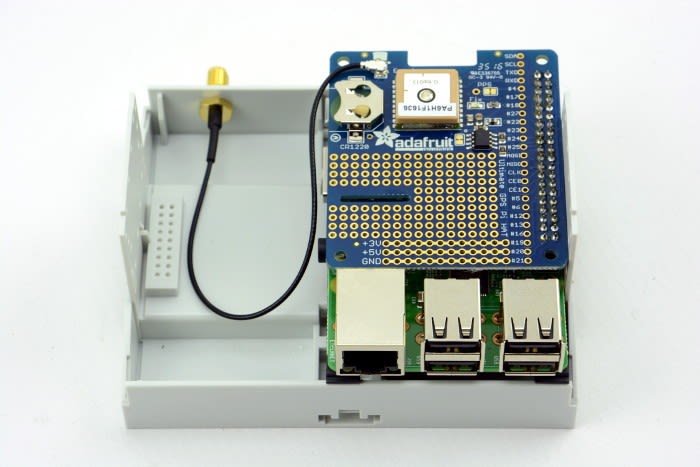
The U.FL was connected to the HAT and the case assembled.
In testing, a GPS antenna from RF Solutions (704-3464) was placed in the window.
O/S configuration

We don’t need a full desktop distribution Linux and the “lite” variant of Raspbian Jessie will more than suffice. This was written out to a Micro SD card (121-3897) with:
$ sudo dd if=2017-01-11-raspbian-jessie-lite.img of=/dev/mmcblk0 bs=4M
Note that the input filename (if) parameter will be different as newer versions of the Raspbian Lite image are made available. Similarly, the output file (of) parameter may be different depending on the Linux distribution and SD card hardware being used. Of course, Windows users can use the usual utilities to write out an O/S image to the Micro SD card.
In cases where a screen is not absolutely necessary, I much prefer to work on Raspberry Pi projects via SSH. Since this is now disabled by default, it can be re-enabled by creating an empty file named ‘ssh’ on the boot partition of the card. This can either be completed with the card inserted into another machine — such as the one used to write it out — or with it inserted into the Pi you are using. Boot normally, with a keyboard and monitor attached, then type the following at the command prompt:
sudo touch /boot/ssh
Following a reboot, it should now be possible to log in via SSH, as when the Pi boots it will search for the ssh file. If this file is found, ssh will be enabled.
With Raspberry Pi 3, the default is for the hardware UART (serial port) to be used by Bluetooth and a lower performance software serial port, or “mini-UART”, made available for general use. Since we don’t require Bluetooth, we’ll swap these round. But first, we run raspi-config and disable serial.
$ sudo raspi-config
P5 Interfacing Options → P6 Serial (disable).
This is to stop boot messages being sent to the serial port and a login service enabled on this.
Next, we enable the UART and force the mini-UART to be used by Bluetooth, by editing /boot/config.txt and adding the lines:
enable_uart=1
dtoverlay=pi3-miniuart-bt
Following a reboot, we can check that /dev/serial0 points to the hardware UART (AMA0) and serial1 to the software UART (S0) with:
pi@ntpi:~ $ ls -l /dev/ser*
Initial test
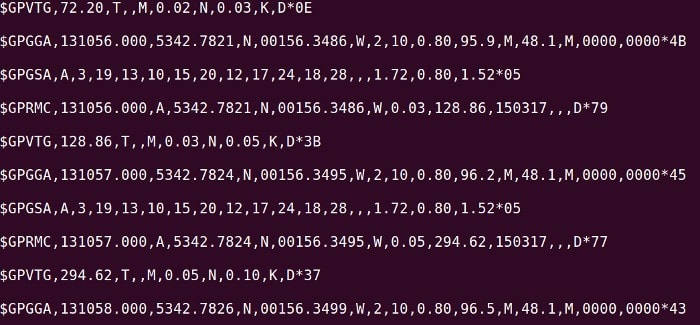
In testing, we followed the Adafruit guide but noticed that we could get debug output from the serial port without first running stty to configure it, whereas if we ran this to set the options specified we did not. So in short, to test we are getting data from the GPS module simply use:
$ cat /dev/ttyAMA0
And if all goes well there should be output similar to as shown in the above screenshot. Whereas the presence of lots of commas with empty fields between would suggest the lack of a GPS fix.
Note also that at the time of writing the Adafruit guide states the Ultimate GPS Hat as being incompatible with Raspberry Pi 3, but this is remedied with the UART config detailed above.
At this point, an application could make direct use of the data being output by the GPS receiver, which is nothing more than text which is formatted as standard “NMEA sentences”. There are even libraries available to make the job of interpreting this easier, such as pynmea for Python.
gpsd
gpsd is described as: “a service daemon that monitors one or more GPSes or AIS receivers attached to a host computer through serial or USB ports, making all data on the location/course/velocity of the sensors available to be queried on TCP port 2947 of the host computer.
With gpsd, multiple location-aware client applications can share access to supported sensors without contention or loss of data. Also, gpsd responds to queries with a format that is substantially easier to parse than the NMEA 0183 emitted by most GPSes.”
gpsd can be used to make GPS data available to applications across the network and provides a simple abstraction of the underlying hardware. Support for it is provided by a variety of applications, including GPS navigation and wireless network detection/mapping software.
We can install >gpsd via:
$ sudo apt-get update
$ sudo apt-get install gpsd gpsd-clients python-gps
To configure we edit /etc/default/gpsd and amend the USBAUTO, DEVICES and GPSD_OPTIONS lines as follows:
USBAUTO="false"
DEVICES="/dev/ttyAMA0"
GPSD_OPTIONS="-n"
To enable it to be started upon boot a small fix with Raspbian Jessie is required:
$ sudo ln -s /lib/systemd/system/gpsd.service /etc/systemd/system/multi-user.target.wants/
We can then start it with:
$ sudo service gpsd start
And test with:
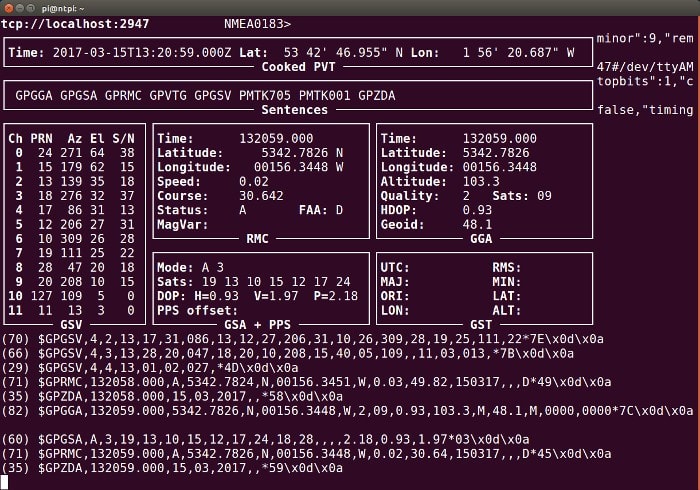
$ gpsmon
Which should result in a terminal based application starting up and an output similar to as shown in the image above being displayed.
At this point we could use the GPS receiver with an existing application that has gpsd support, else we could develop a new one which makes use of its simple interface.
pps
One of the really great things about this HAT is that it not only provides NMEA data, but also a pulse-per-second (PPS) signal from the GPS. Why would this be useful when you can extract the time from the NMEA sentences output? Well, ASCII text is far from being the most efficient way of conveying information, in this case, it is also be sent over a relatively slow serial port and the operating system will introduce some latency too.
Handily, the PPS signal generated by the GPS module can be sampled via the Raspberry Pi GPIO and the Linux kernel even provides support for access via the /dev/pps0 device. This means that applications can use the NMEA data in conjunction with the PPS signal to get remarkably high accuracy time considering the cost of the equipment being used.
To get access to the PPS we need to install the pps-tools software with:
$ sudo apt-get install pps-tools
Add another line to /boot/config.txt to configure the Linux kernel appropriately:
dtoverlay=pps-gpio,gpiopin=4
Following a reboot we can then test:
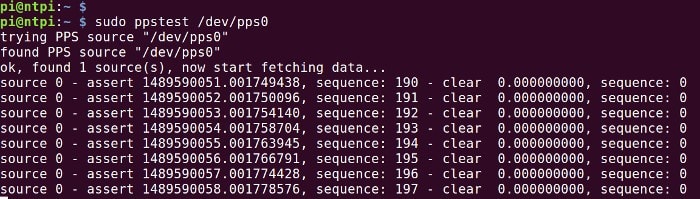
$ sudo ppstest /dev/pps0
Which should give an output similar to as shown in the image above.
NTP server
NTP is developed by the Network Time Foundation
Finally, one really handy use for a GPS enabled Raspberry Pi is to create a server which distributes time to LAN clients using the Network Time Protocol (NTP). The ntpd software used for this is incredibly flexible and it can gather time from “peer” NTP servers on the Internet if a connection is available, but it can also get time from GPS via NMEA and/or PPS, amongst other sources, using clever, tunable algorithms to select the best time source of those presently available.
NTP is a whole other topic in itself and how it must be configured depends on the particular use case. However, there is a lot of really great information available on David Taylor's website.
A few things to bear in mind if you go down this route:
- The Raspbian supplied NTP software will need to be replaced with a build from source (which is simple enough)
- The ntpd can get time information direct from the GPS module (via /dev/ttyAMA0) or be configured to get data via gpsd
- Some time spent fine tuning the NTP configuration may be required in order to get optimal performance
Wrapping up
The Ultimate GPS Hat is a quick and easy way of adding the ability to derive location and high accuracy time to Raspberry Pi-based projects, with no shortage of ways that this information can be exposed to applications and indeed other networked devices.